
Projects
On DECTRIS CLOUD, projects can be created by users as a place to store and organize data in the cloud. Functionally, projects are similar to experiments in that they follow the same folder structure. However, unlike experiments, projects are not tied to a specific instrument and can be created by any user. Projects also provide an organizational layer, allowing you to link together related experiments under a common research theme or initiative.
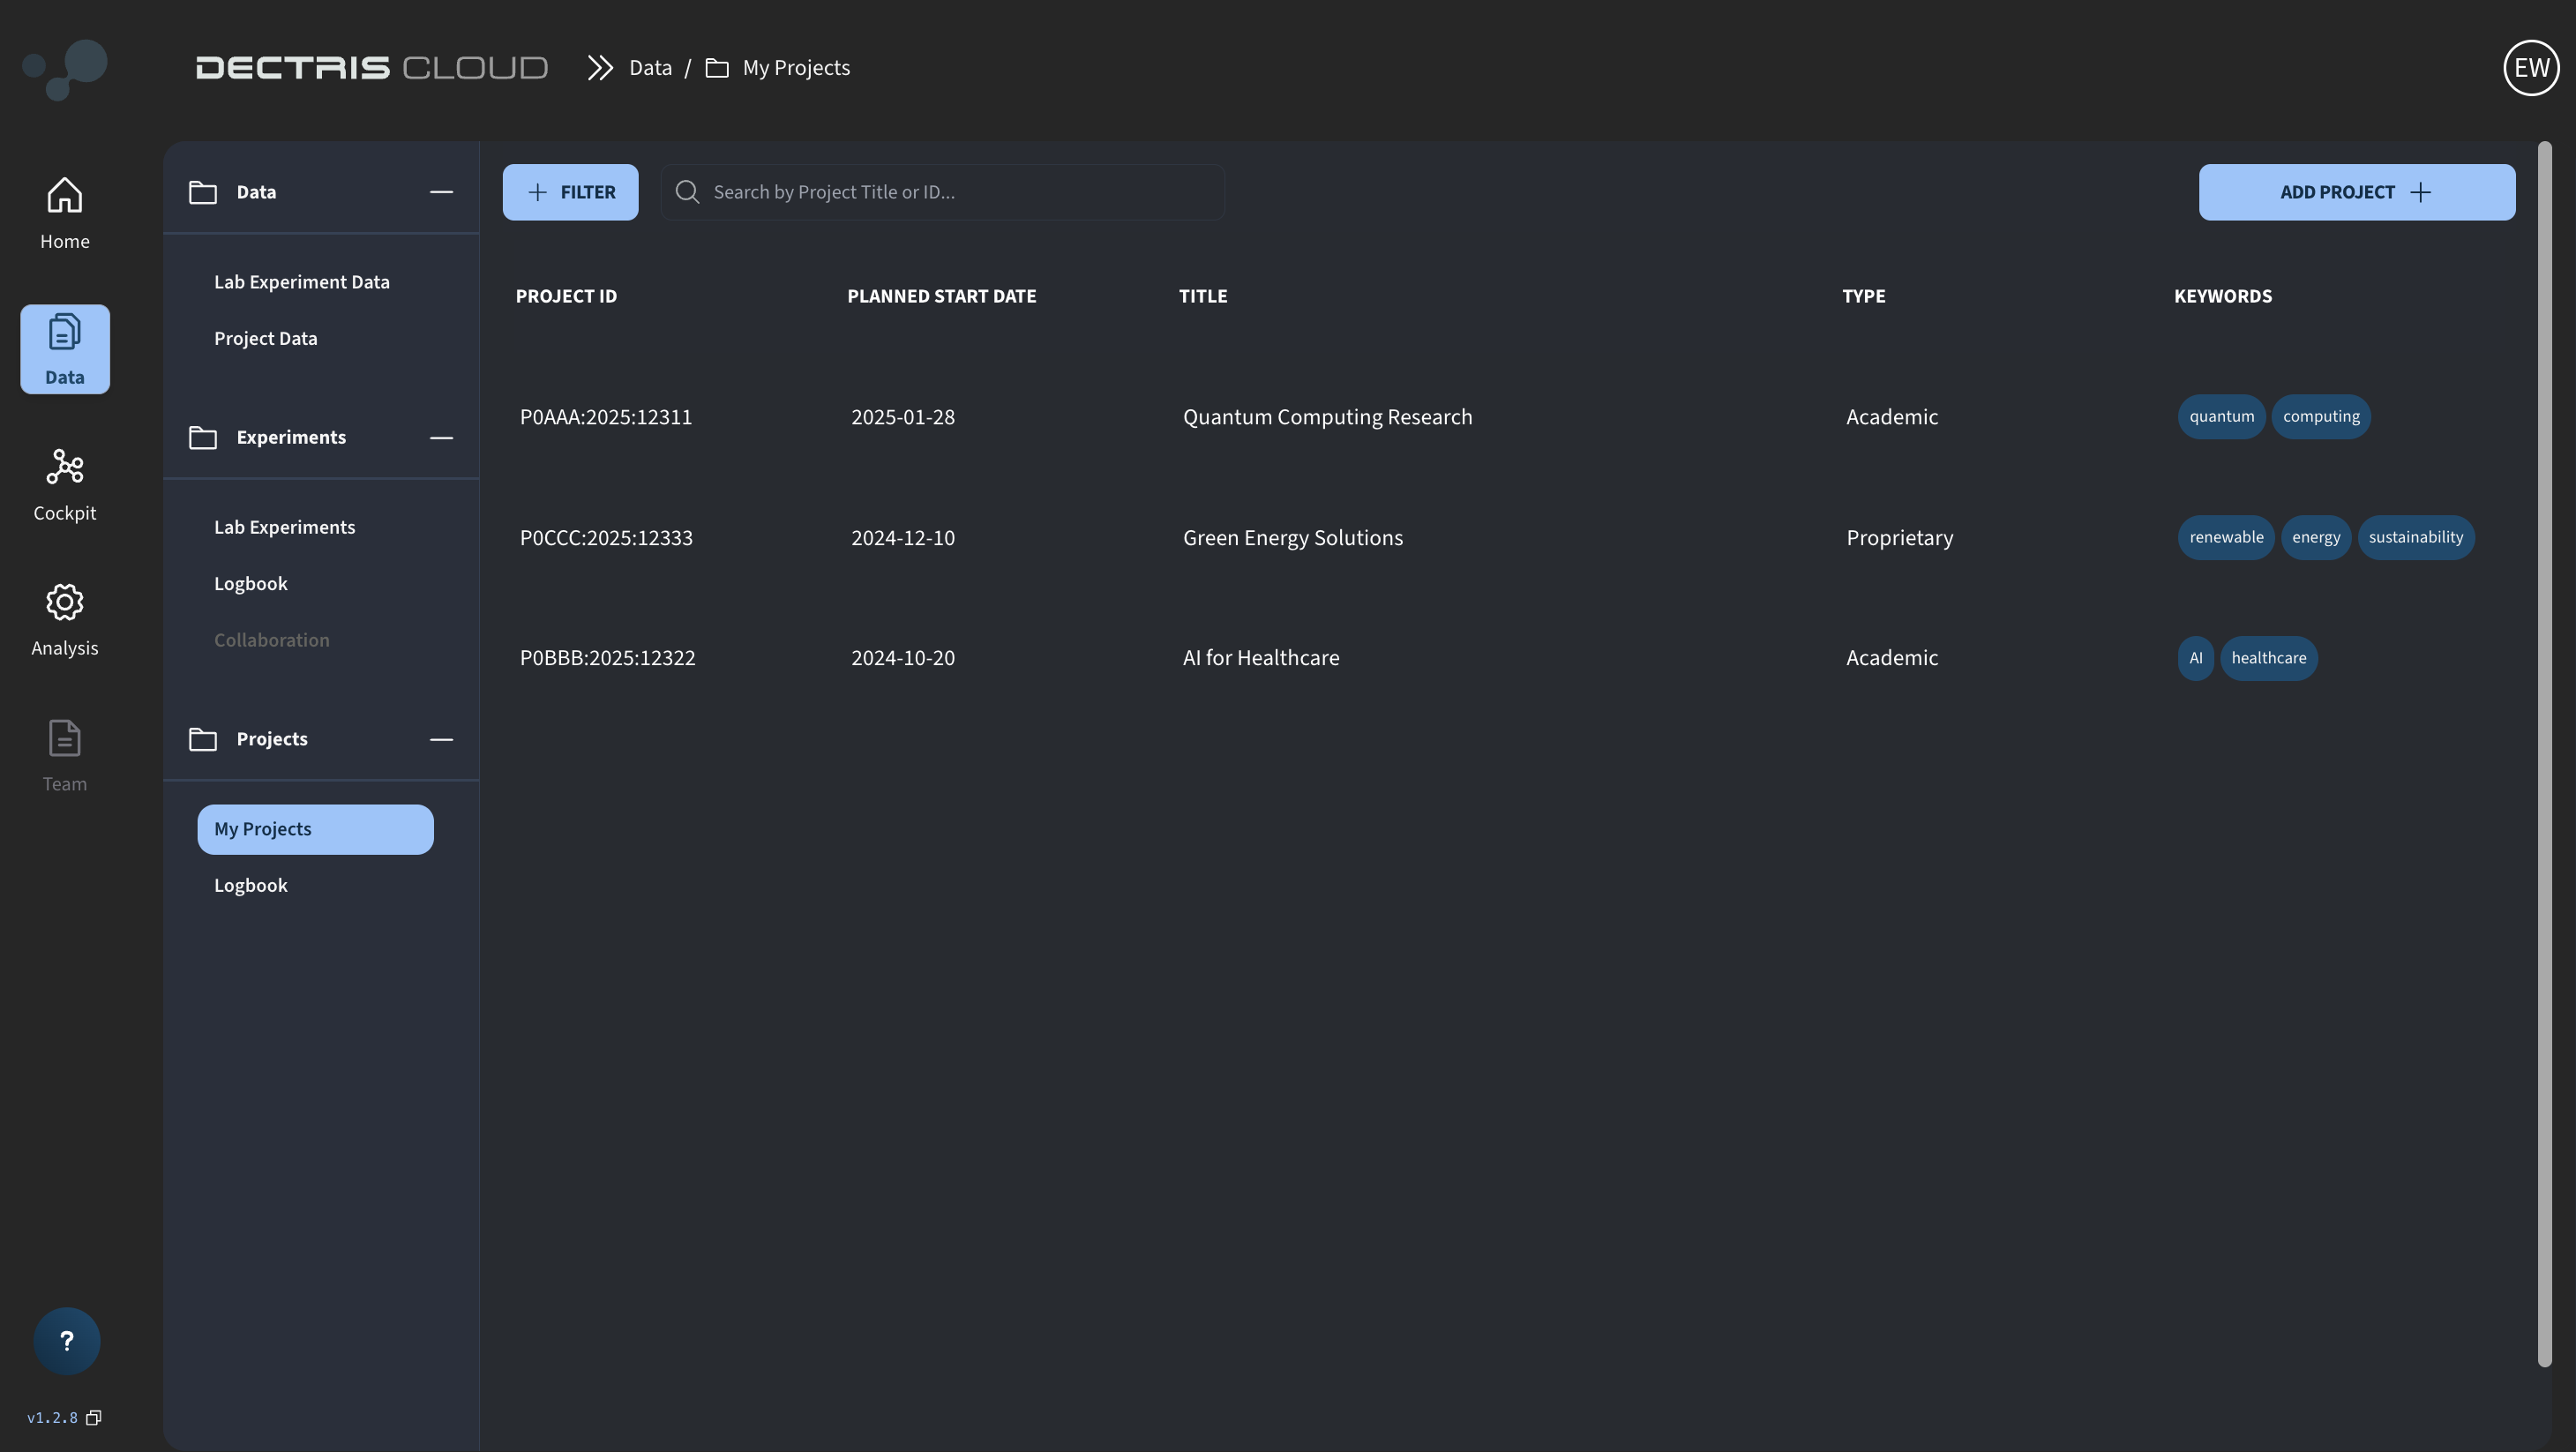
My Projects
The My Projects area is the central hub where you can view, manage, and collaborate on your projects. It provides an organized structure for accessing and working with project-related data, fostering a collaborative and efficient workflow. This is the place where all your projects are displayed in a comprehensive list:
The project entity
The entity “Project” at DECTRIS CLOUD can be seen as a flexible container for research data and related experiments. In practical terms, a project corresponds to:
- One overarching research topic or initiative.
- One or more related experiments grouped under a shared goal.
- A collection of datasets, results, and materials that are not tied to a specific instrument.
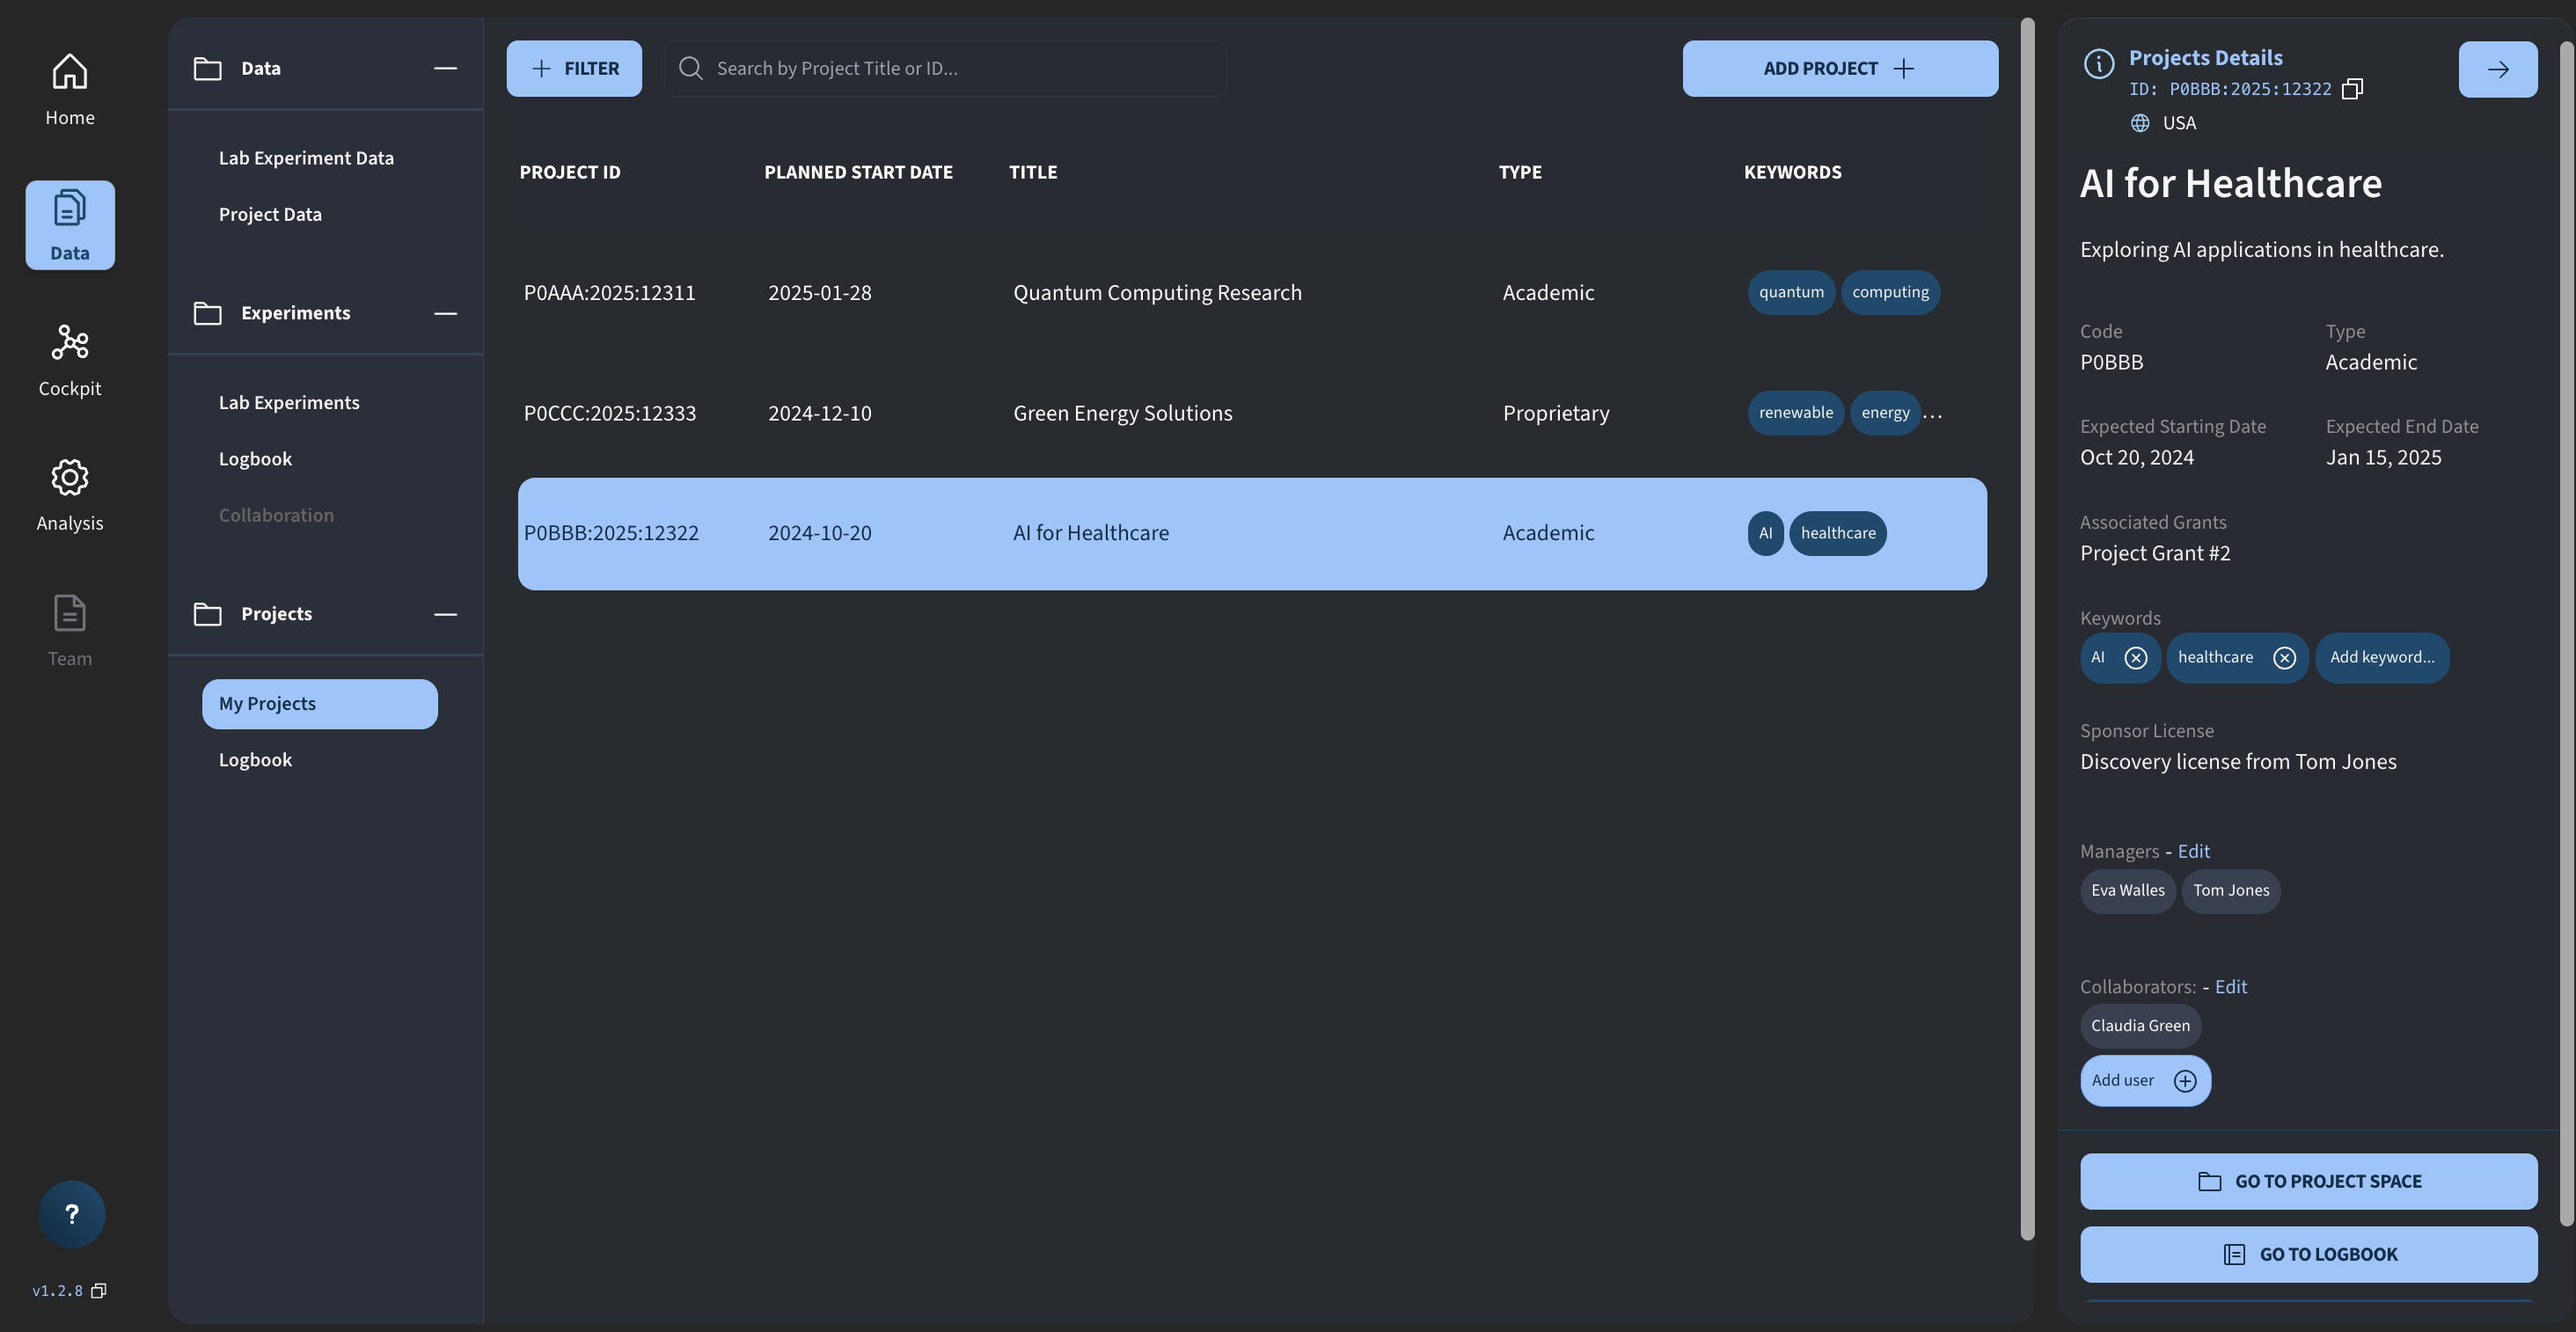
A Project has the following attributes:
- Project ID: A unique identifier which includes letters from the project creators name, the year in which the project was created and a 5-digit tag.
- Region: Specifies the location of the data centers where the project data is stored. Data will always only be stored in data centers via one specific region.
- Planned start date: The date on which the project is expected to begin.
- Expected end date: The date on which the project is expected to finish.
- Title: A descriptive title that assists in identifying the project.
- Keywords: User-defined tags that can be added to enhance findability via filtering and grouping by custom tags.
- Sponsor license: Defines which user license is used to cover storage costs
- Linked experiments: One or more experiments that can be associated with the project, creating a higher-level organizational layer.
- Logbook: A note-taking environment uniquely associated with each project and editable by the manager and all collaborators.
How to create your own project
- On the My Projects page, click on the ADD PROJECT button
- Fill out the required metadata
- Pay attention to the license field, which determines how many projects you can create as well as how much elastic and archival storage you have available.
- Make sure to choose a region that matches your physical location. Project data will be stored in the selected region, and keeping data close to your location ensures minimal latency when starting, for example, virtual machine sessions.
Roles
Projects can be shared with four different roles. Each role includes everything the roles below it can do, plus additional permissions.
- Owner: Full control. Manages all roles and holds legal responsibility for the experiment data, typically the PI or instrument manager. There is exactly one Owner per experiment. The project creator becomes Owner by default but can transfer ownership.
- Manager: Operational management. Can add or remove Members, request deletions of raw data, and manage linked datasets.
- Member: Hands-on contribution. Can upload data, edit the logbook, perform analysis, and add Viewers. Best for PhD students, visiting scientists, and active collaborators.
- Viewer: Read-only access. Can view the uploaded and processed files in the project, but cannot access them in sessions and jobs. Best for passive collaborators or anyone who only needs visibility.
Project data
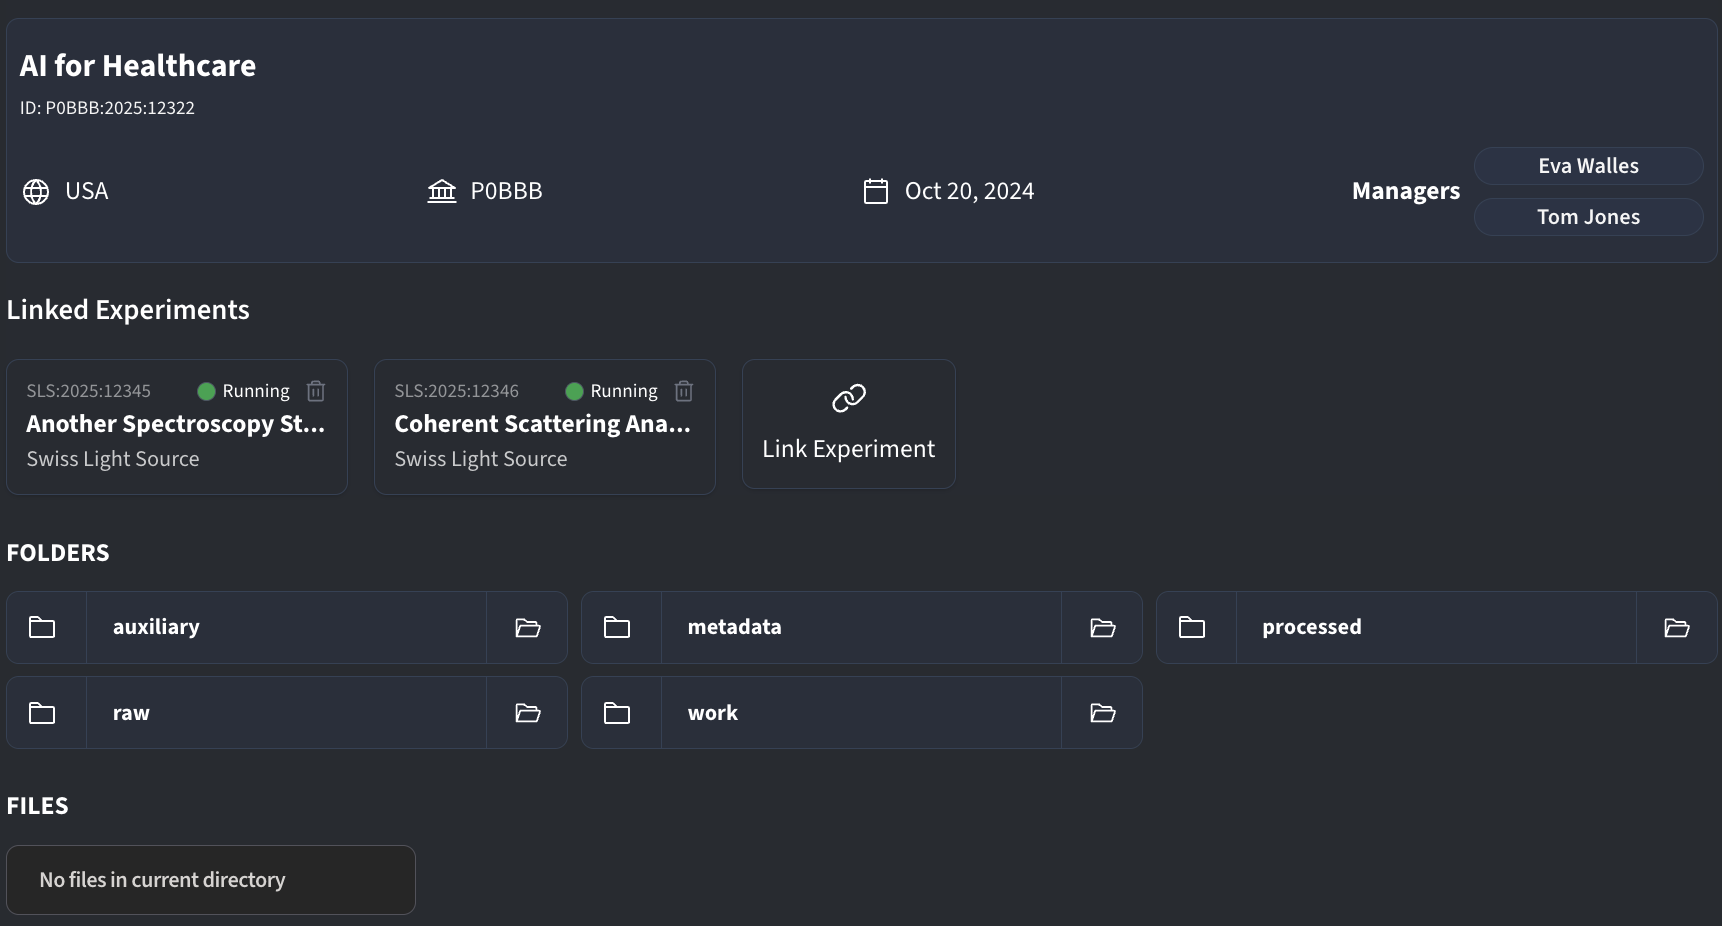
Each project serves as a container for all its associated data, as well as for any related experiments that fall under its scope. Similar to experiments, project data is organized under a root folder with a standard subfolder structure:
How to upload data to your project
- From the My Projects list, access your project folder by clicking on your project and then the "GO TO PROJECT SPACE" button.
- From here go to the raw folder
- Use the upload button to upload data in the web browser.
Linked Experiments
By linking experiments in a project, you can group experiments that are related to the same research question. Collaborators in a project will automatically be given access to data within linked experiments.
How to link an experiment to your project
- Within the project space, click the Link Experiment button
- From the list, choose the experiments you want to link within the project