XDS: Creating and running a job for peak integration
In this tutorial, we will walk through the process of running a configurable xds_par job using the public XDS environment.
We will create a simple job template that performs the following steps in sequence:
- Run
generate_XDS.inpto generate an input file for XDS. - (Optionally) overwrite parameters in the generated input file using input variables defined in the job template.
- Execute
xds_paron a dataset.
This step-by-step example will demonstrate how to configure and launch a basic processing workflow through the job system.
Creating a job template
Step 1: Initial details
Start creating the job template by navigating to Analysis → Jobs → Create Job Template, and fill out the initial details:
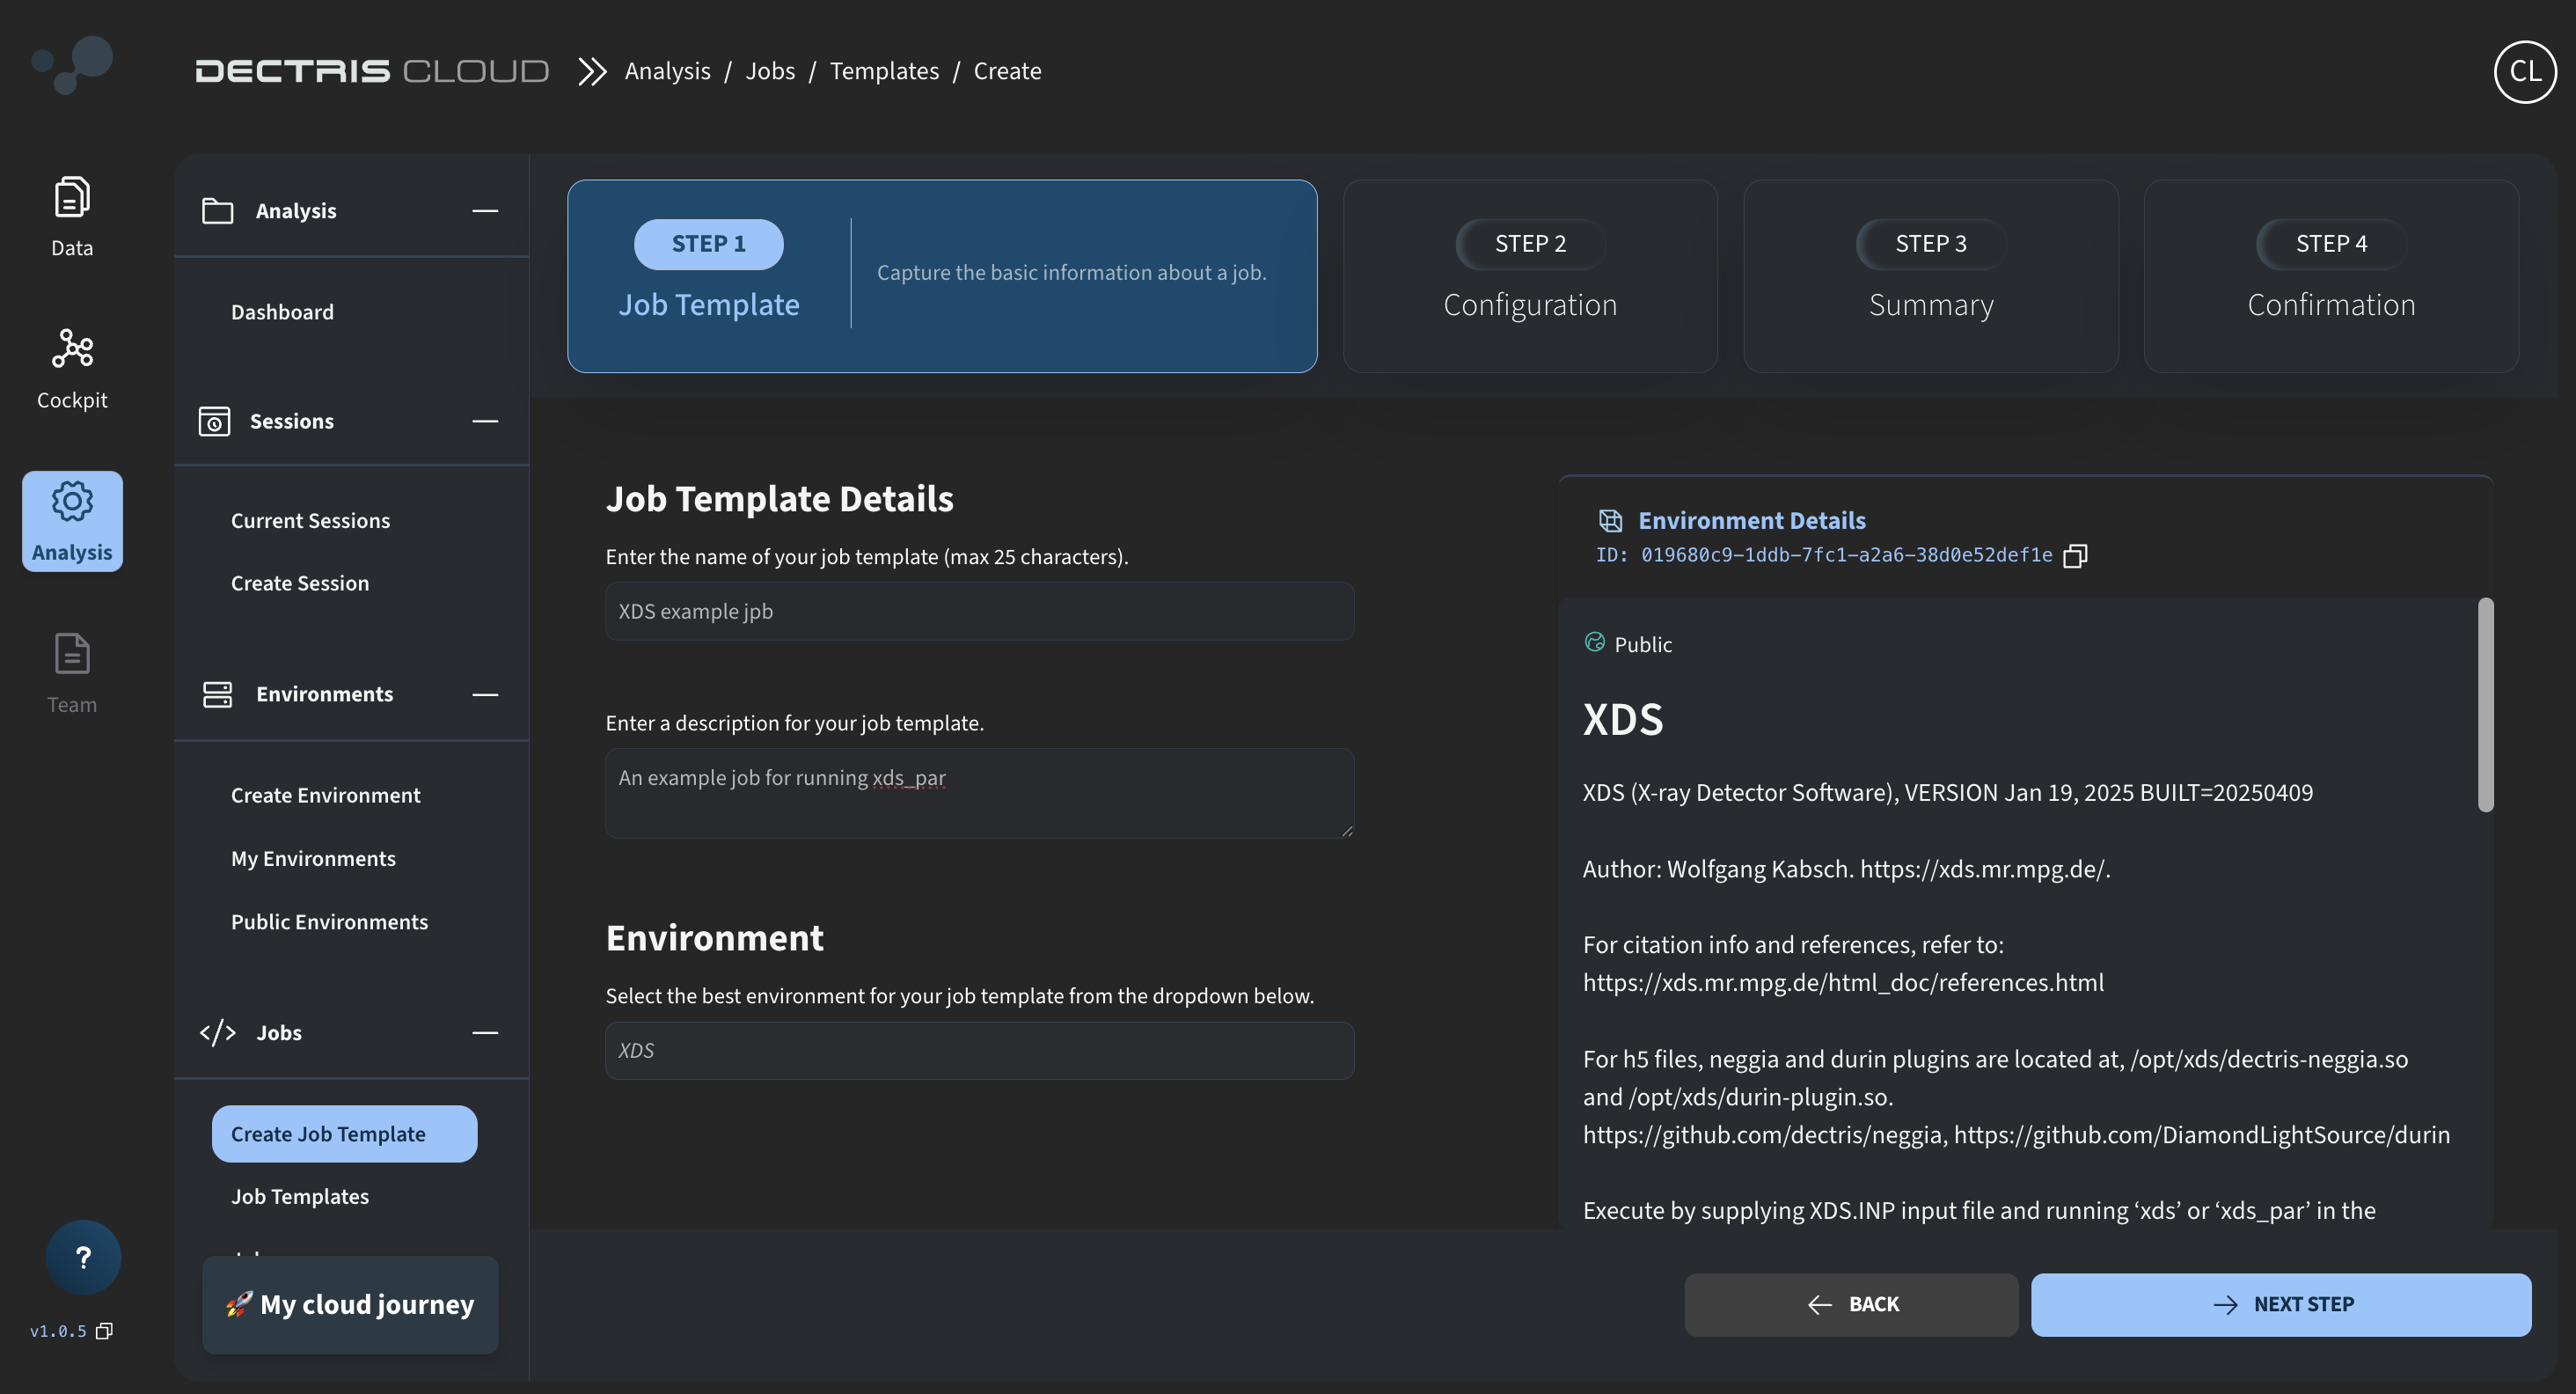
Ensure that you select the XDS (v0) environment, as the commands used in the following job script rely on the specific installation directories provided within that environment.
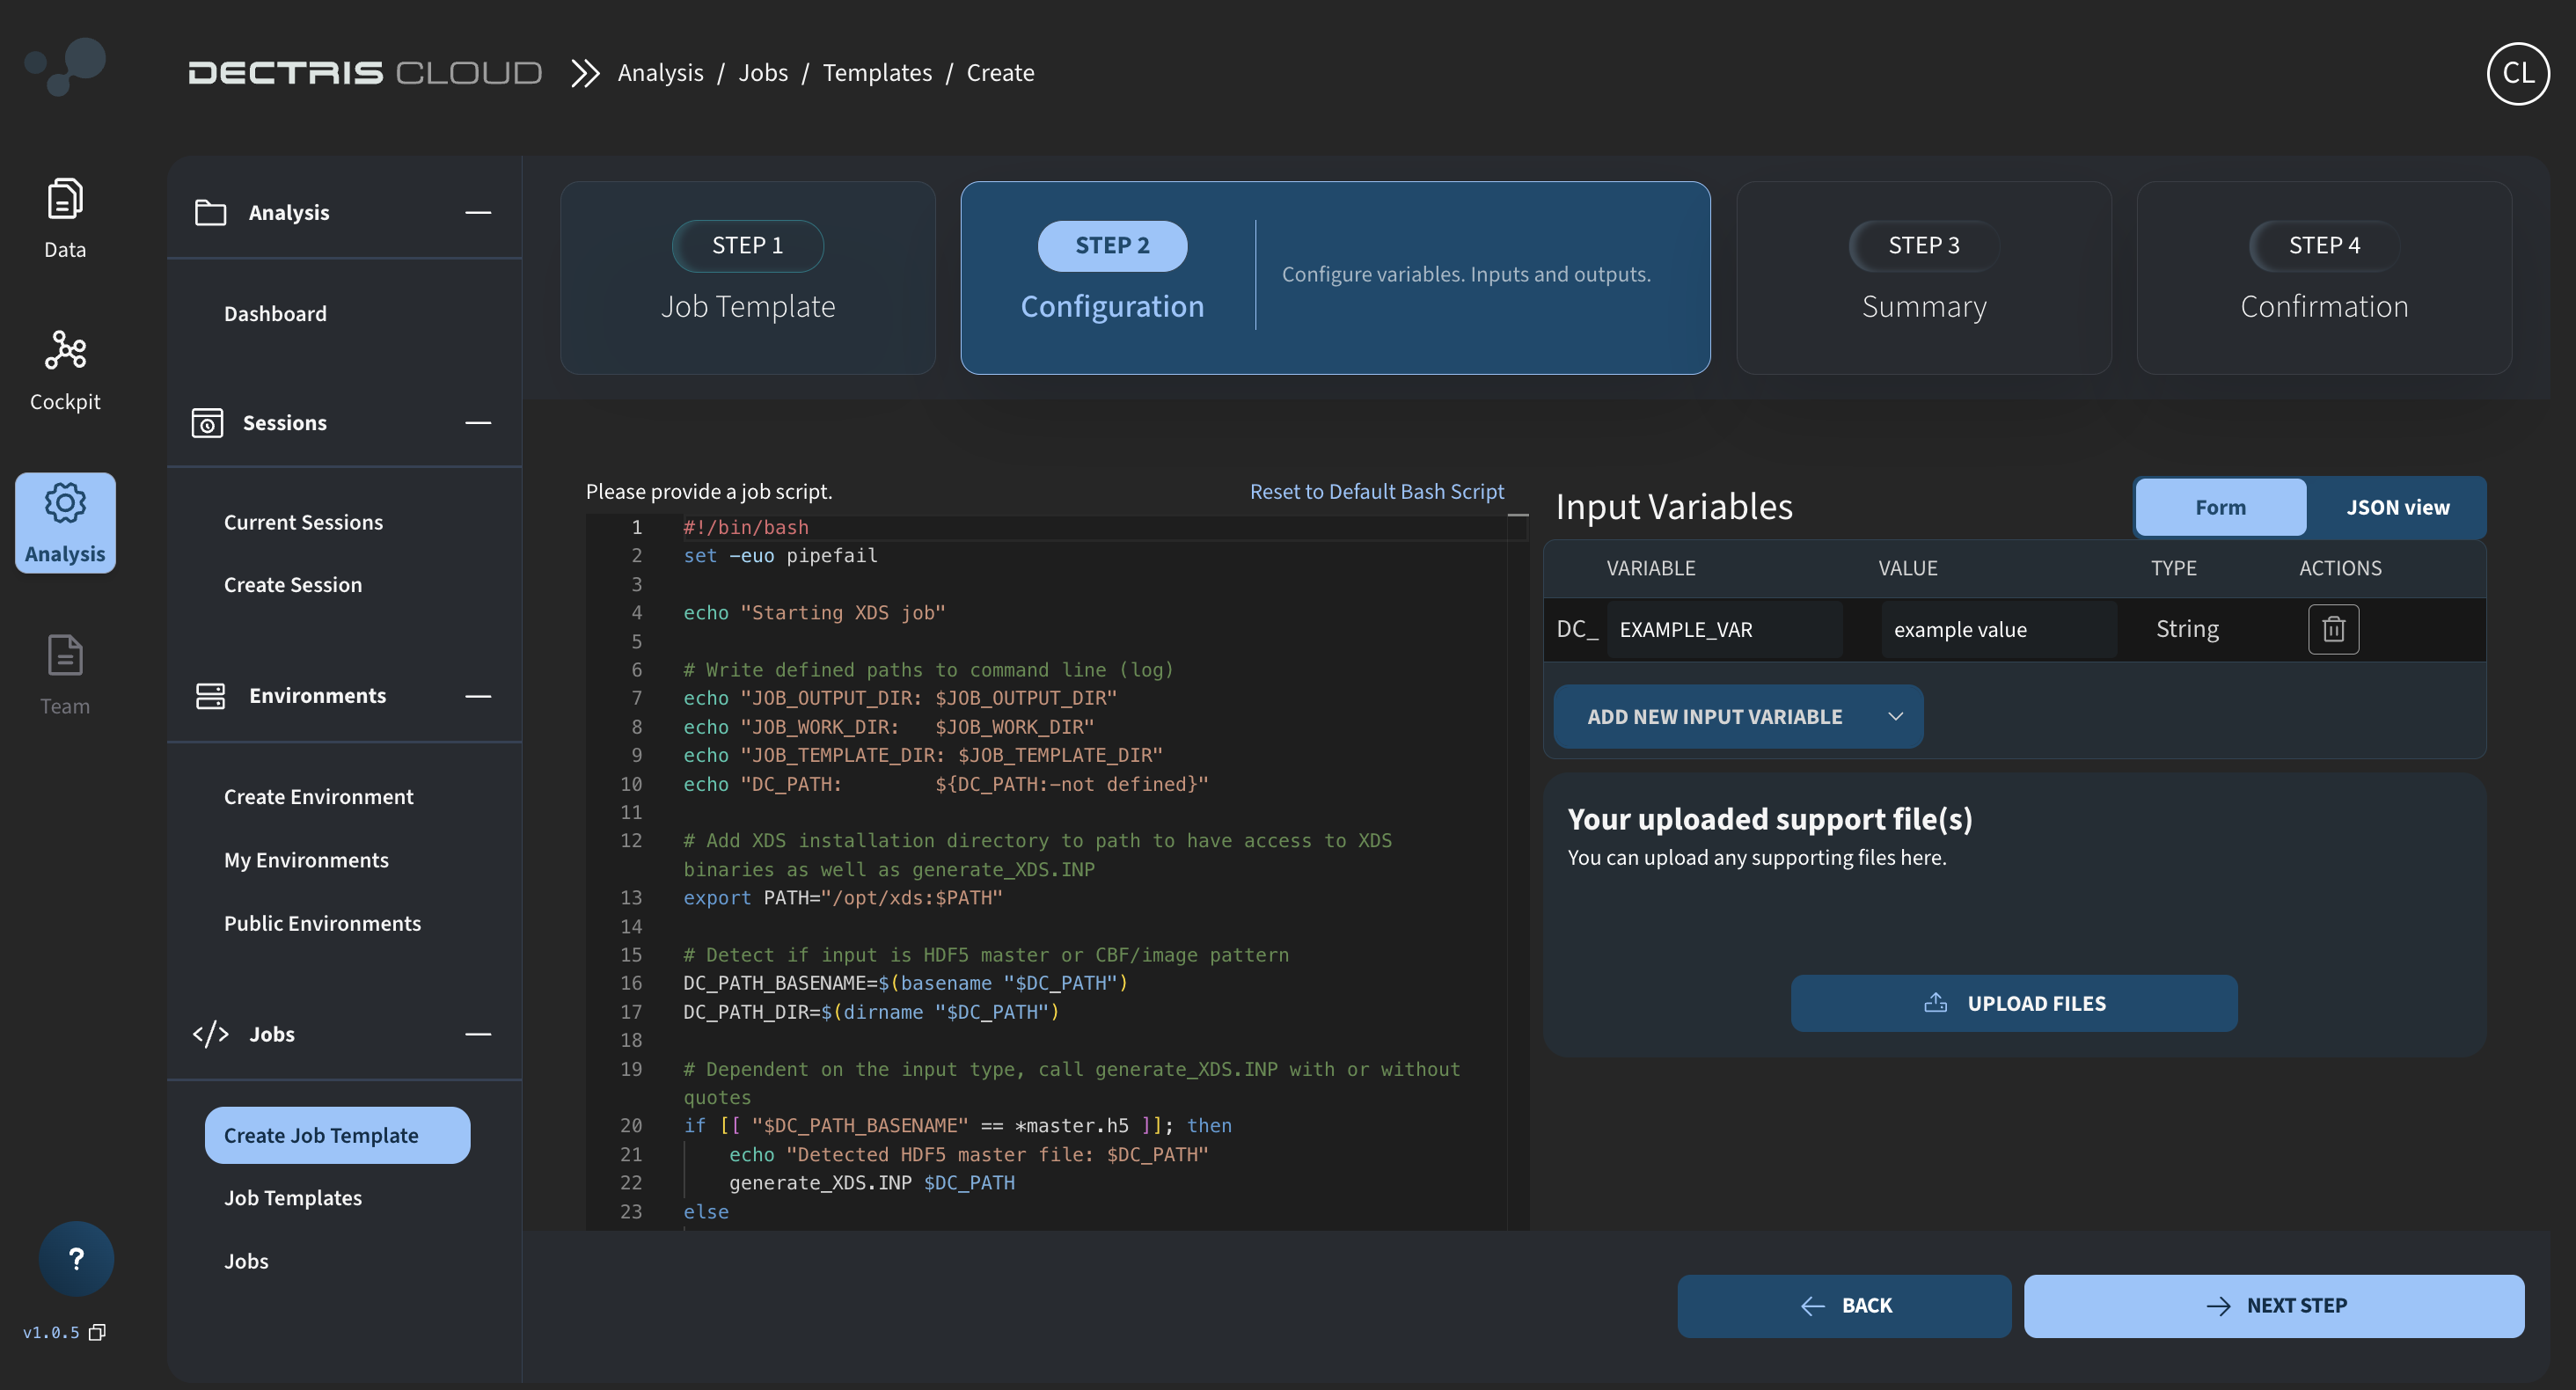
Step 2: Inserting the job script
Click on NEXT STEP, and you will be able to paste in the job script:
The exact job script for you to copy is provided below. Comments are included to explain the different parts of the script. The overall structure of the script is as follows:
- To enable reading of the job logs later, the script echoes the paths to the output directory, work directory, template directory, and input data.
- The path to the XDS installation folder is exported to the
PATHenvironment variable, allowingxds_parandgenerate_XDS.INPto be called directly from within the working directory. - The script detects the file type of the input data — determining whether it is a master HDF5 file or a generic image file.
- If it is a master file,
generate_XDS.INPis called with/path/to/masterfile.h5. - Otherwise, an image pattern such as
"/path/to/image_?????.cbf"is defined and used as input togenerate_XDS.INP.
- If it is a master file,
- In the following steps, the script optionally overwrites specific values inside the generated
XDS.INPfile.
This is done by checking whether environment variables (defined in the job template) have been set.
If an environment variable is not-1, the corresponding keyword inXDS.INPis updated with the new value. - Optionally, a library path for HDF5 plugins is also configured depending on whether the variables
DC_NEGGIAorDC_DURINhave been set to1. - The
xds_parcommand is then executed using the locally modifiedXDS.INP. - After successful completion, all output files are copied to the job output directory for viewing and download.
Job script:
#!/bin/bash
set -euo pipefail

echo "Starting XDS job"

# Write defined paths to command line (log)
echo "JOB_OUTPUT_DIR: $JOB_OUTPUT_DIR"
echo "JOB_WORK_DIR:   $JOB_WORK_DIR"
echo "JOB_TEMPLATE_DIR: $JOB_TEMPLATE_DIR"
echo "DC_PATH:        ${DC_PATH:-not defined}"

# Add XDS installation directory to path to have access to XDS binaries as well as generate_XDS.INP
export PATH="/opt/xds:$PATH"

# Detect if input is HDF5 master or CBF/image pattern
DC_PATH_BASENAME=$(basename "$DC_PATH")
DC_PATH_DIR=$(dirname "$DC_PATH")

# Dependent on the input type, call generate_XDS.INP with or without quotes
if [[ "$DC_PATH_BASENAME" == *master.h5 ]]; then
    echo "Detected HDF5 master file: $DC_PATH"
    generate_XDS.INP $DC_PATH
else
    pattern=$(echo "$DC_PATH_BASENAME" | sed -E 's/[0-9]+(\.[a-zA-Z0-9]+)$/?????\1/')
    TEMPLATE_PATH="$DC_PATH_DIR/$pattern"
    echo "Detected image file. Using wildcard pattern: \"$TEMPLATE_PATH\""
    generate_XDS.INP "$TEMPLATE_PATH"
fi

# Define general XDS.INP parameters to be potentially overwritten
declare -A xds_overrides=(
  [DC_XDS_JOB]="JOB"
  [DC_XDS_ORGX]="ORGX"
  [DC_XDS_ORGY]="ORGY"
  [DC_XDS_DETECTOR_DISTANCE]="DETECTOR_DISTANCE"
  [DC_XDS_STARTING_ANGLE]="STARTING_ANGLE"
  [DC_XDS_WAVELENGTH]="X-RAY_WAVELENGTH"
  [DC_XDS_DATA_RANGE]="DATA_RANGE"
  [DC_XDS_SPOT_RANGE]="SPOT_RANGE"
  [DC_XDS_SPACE_GROUP]="SPACE_GROUP_NUMBER"
  [DC_XDS_UNIT_CELL]="UNIT_CELL_CONSTANTS"
  [DC_XDS_INCLUDE_RES_RANGE]="INCLUDE_RESOLUTION_RANGE"
)

# Detect if the input variables have value different from -1, and if so, overwrite the variable in the generated XDS.INP file:
for var in "${!xds_overrides[@]}"; do
    xds_key="${xds_overrides[$var]}"
    val="${!var:-"-1"}"
    if [ "$val" != "-1" ]; then
        echo "Setting $xds_key = $val"
        if grep -q "^$xds_key=" XDS.INP; then
            sed -i "s|^$xds_key=.*|$xds_key= $val|" XDS.INP
        else
            echo "$xds_key= $val" >> XDS.INP
        fi
    fi
done

# Define performance tuning parameters to be potentially overwritten
declare -A perf_overrides=(
  [DC_XDS_MAX_JOBS]="MAXIMUM_NUMBER_OF_JOBS"
  [DC_XDS_MAX_PROCESSORS]="MAXIMUM_NUMBER_OF_PROCESSORS"
  [DC_XDS_DELPHI]="DELPHI"
  [DC_XDS_IMAGE_CACHE]="NUMBER_OF_IMAGES_IN_CACHE"
)

# Overwrite the parameters in XDS.INP if the input variables are not -1
for var in "${!perf_overrides[@]}"; do
    xds_key="${perf_overrides[$var]}"
    val="${!var:-"-1"}"
    if [ "$val" != "-1" ]; then
        echo "Setting $xds_key = $val"
        if grep -q "^$xds_key=" XDS.INP; then
            sed -i "s|^$xds_key=.*|$xds_key= $val|" XDS.INP
        else
            echo "$xds_key= $val" >> XDS.INP
        fi
    fi
done

# If either DC_NEGGIA or DC_DURIN are defined as 1, define the path to the h5 plugin
if [[ "${DC_NEGGIA:-0}" == "1" ]]; then
    echo "Configuring LIB for Neggia plugin"
    if grep -q "^LIB=" XDS.INP; then
        sed -i "s|^LIB=.*|LIB= /opt/xds/dectris-neggia.so|" XDS.INP
    else
        echo "LIB= /opt/xds/dectris-neggia.so" >> XDS.INP
    fi
elif [[ "${DC_DURIN:-0}" == "1" ]]; then
    echo "Configuring LIB for Durin plugin"
    if grep -q "^LIB=" XDS.INP; then
        sed -i "s|^LIB=.*|LIB=/opt/xds/durin-plugin.so|" XDS.INP
    else
        echo "LIB=/opt/xds/durin-plugin.so" >> XDS.INP
    fi
else
    echo "No special LIB configuration requested."
fi

# Run xds_par
echo "Running xds_par..."
xds_par

# Copy all output to JOB_OUTPUT_DIR
echo "Copying results to: $JOB_OUTPUT_DIR"
cp -r ./* "$JOB_OUTPUT_DIR/"

echo "XDS processing complete"
Step 3: Defining the input variables
On the same page as the job script, the job input variables need to be defined. This is done on the right side of the page:
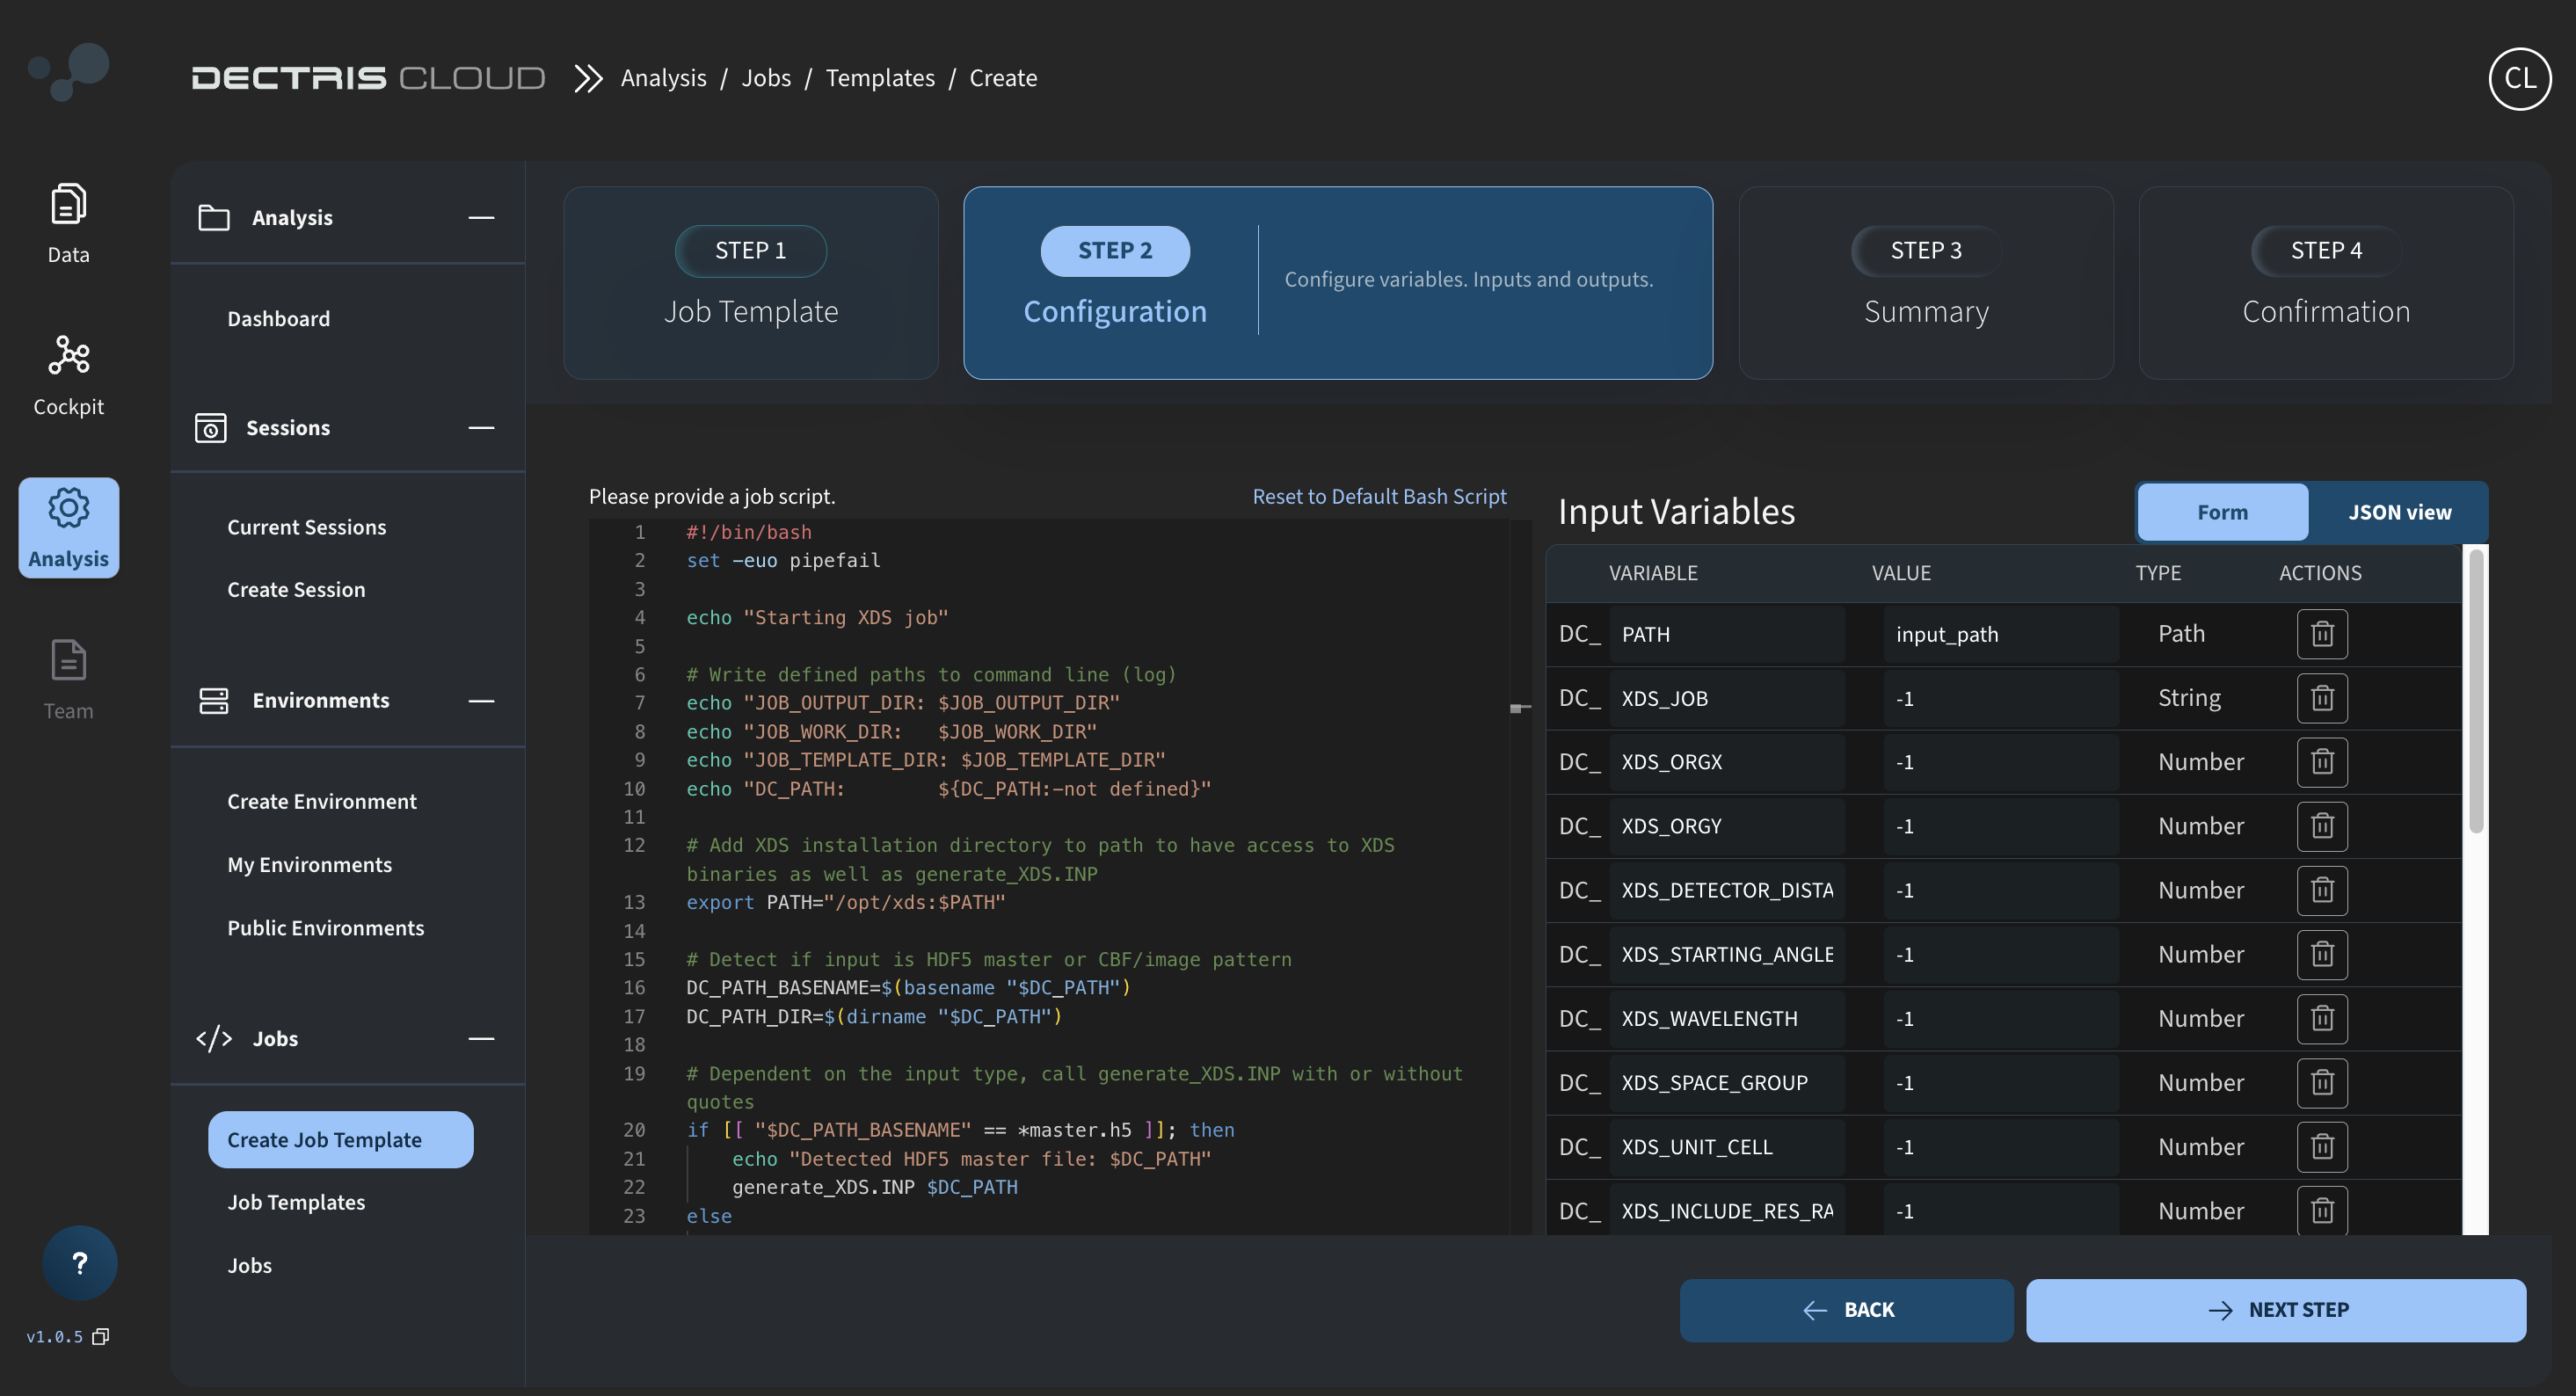
First click on the trash can to remove the default DC_EXAMPLE_VAR variable. Then add the following list of variables using the ADD NEW INPUT VARIABLE button:
| Variable name | Value | Type |
|---|---|---|
DC_PATH | input_path | PATH |
DC_XDS_JOB | -1 | STRING |
DC_XDS_ORGX | -1 | NUMBER |
DC_XDS_ORGY | -1 | NUMBER |
DC_XDS_DETECTOR_DISTANCE | -1 | NUMBER |
DC_XDS_STARTING_ANGLE | -1 | NUMBER |
DC_XDS_WAVELENGTH | -1 | NUMBER |
DC_XDS_DATA_RANGE | -1 | STRING |
DC_XDS_SPOT_RANGE | -1 | STRING |
DC_XDS_SPACE_GROUP | -1 | NUMBER |
DC_XDS_UNIT_CELL | -1 | NUMBER |
DC_XDS_INCLUDE_RES_RANGE | -1 | NUMBER |
DC_XDS_MAX_JOBS | -1 | NUMBER |
DC_XDS_MAX_PROCESSORS | -1 | NUMBER |
DC_XDS_DELPHI | -1 | NUMBER |
DC_XDS_IMAGE_CACHE | -1 | NUMBER |
Note that the DC_ prefix is automatically added to all input variables. The values you provide for the parameters in the template serve as the default values users will see when configuring and running the job. By default, users will need to specify the path to their data. If no other input variables are modified, the xds_par job will execute using the parameters originally generated by generate_XDS.INP.
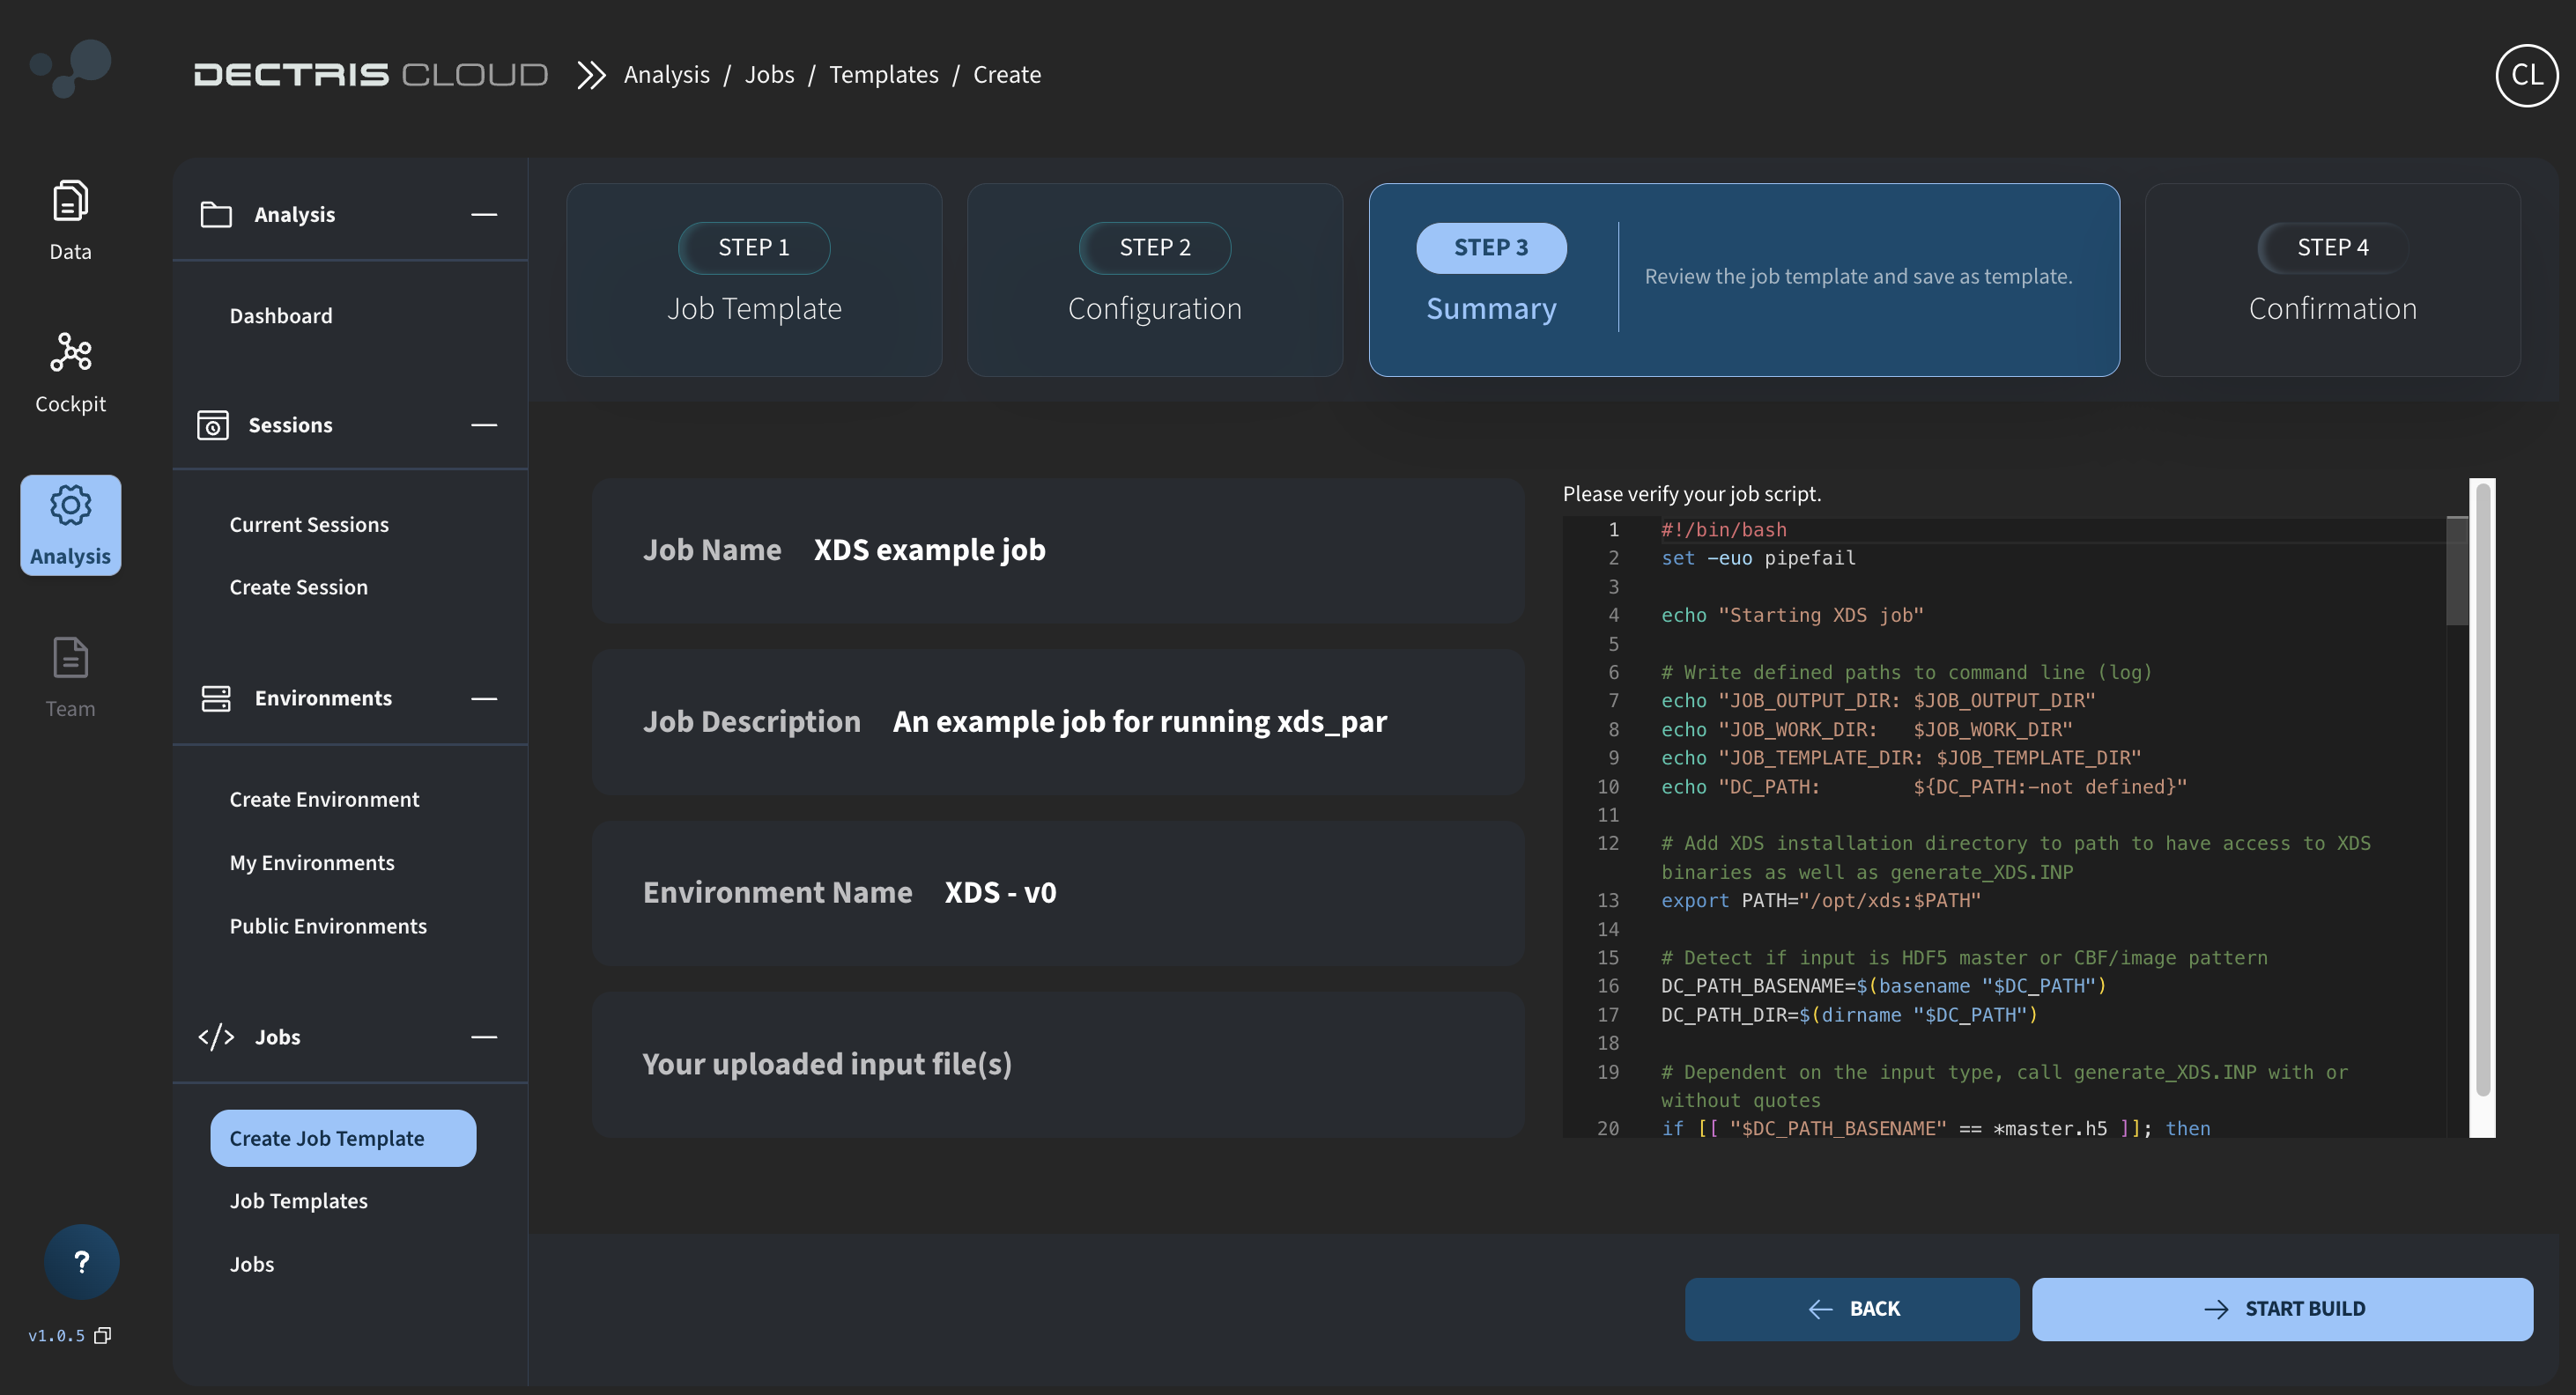
Step 4: Reviewing and saving the job template
Click on NEXT STEP to review your template and save it by clicking START BUILD:
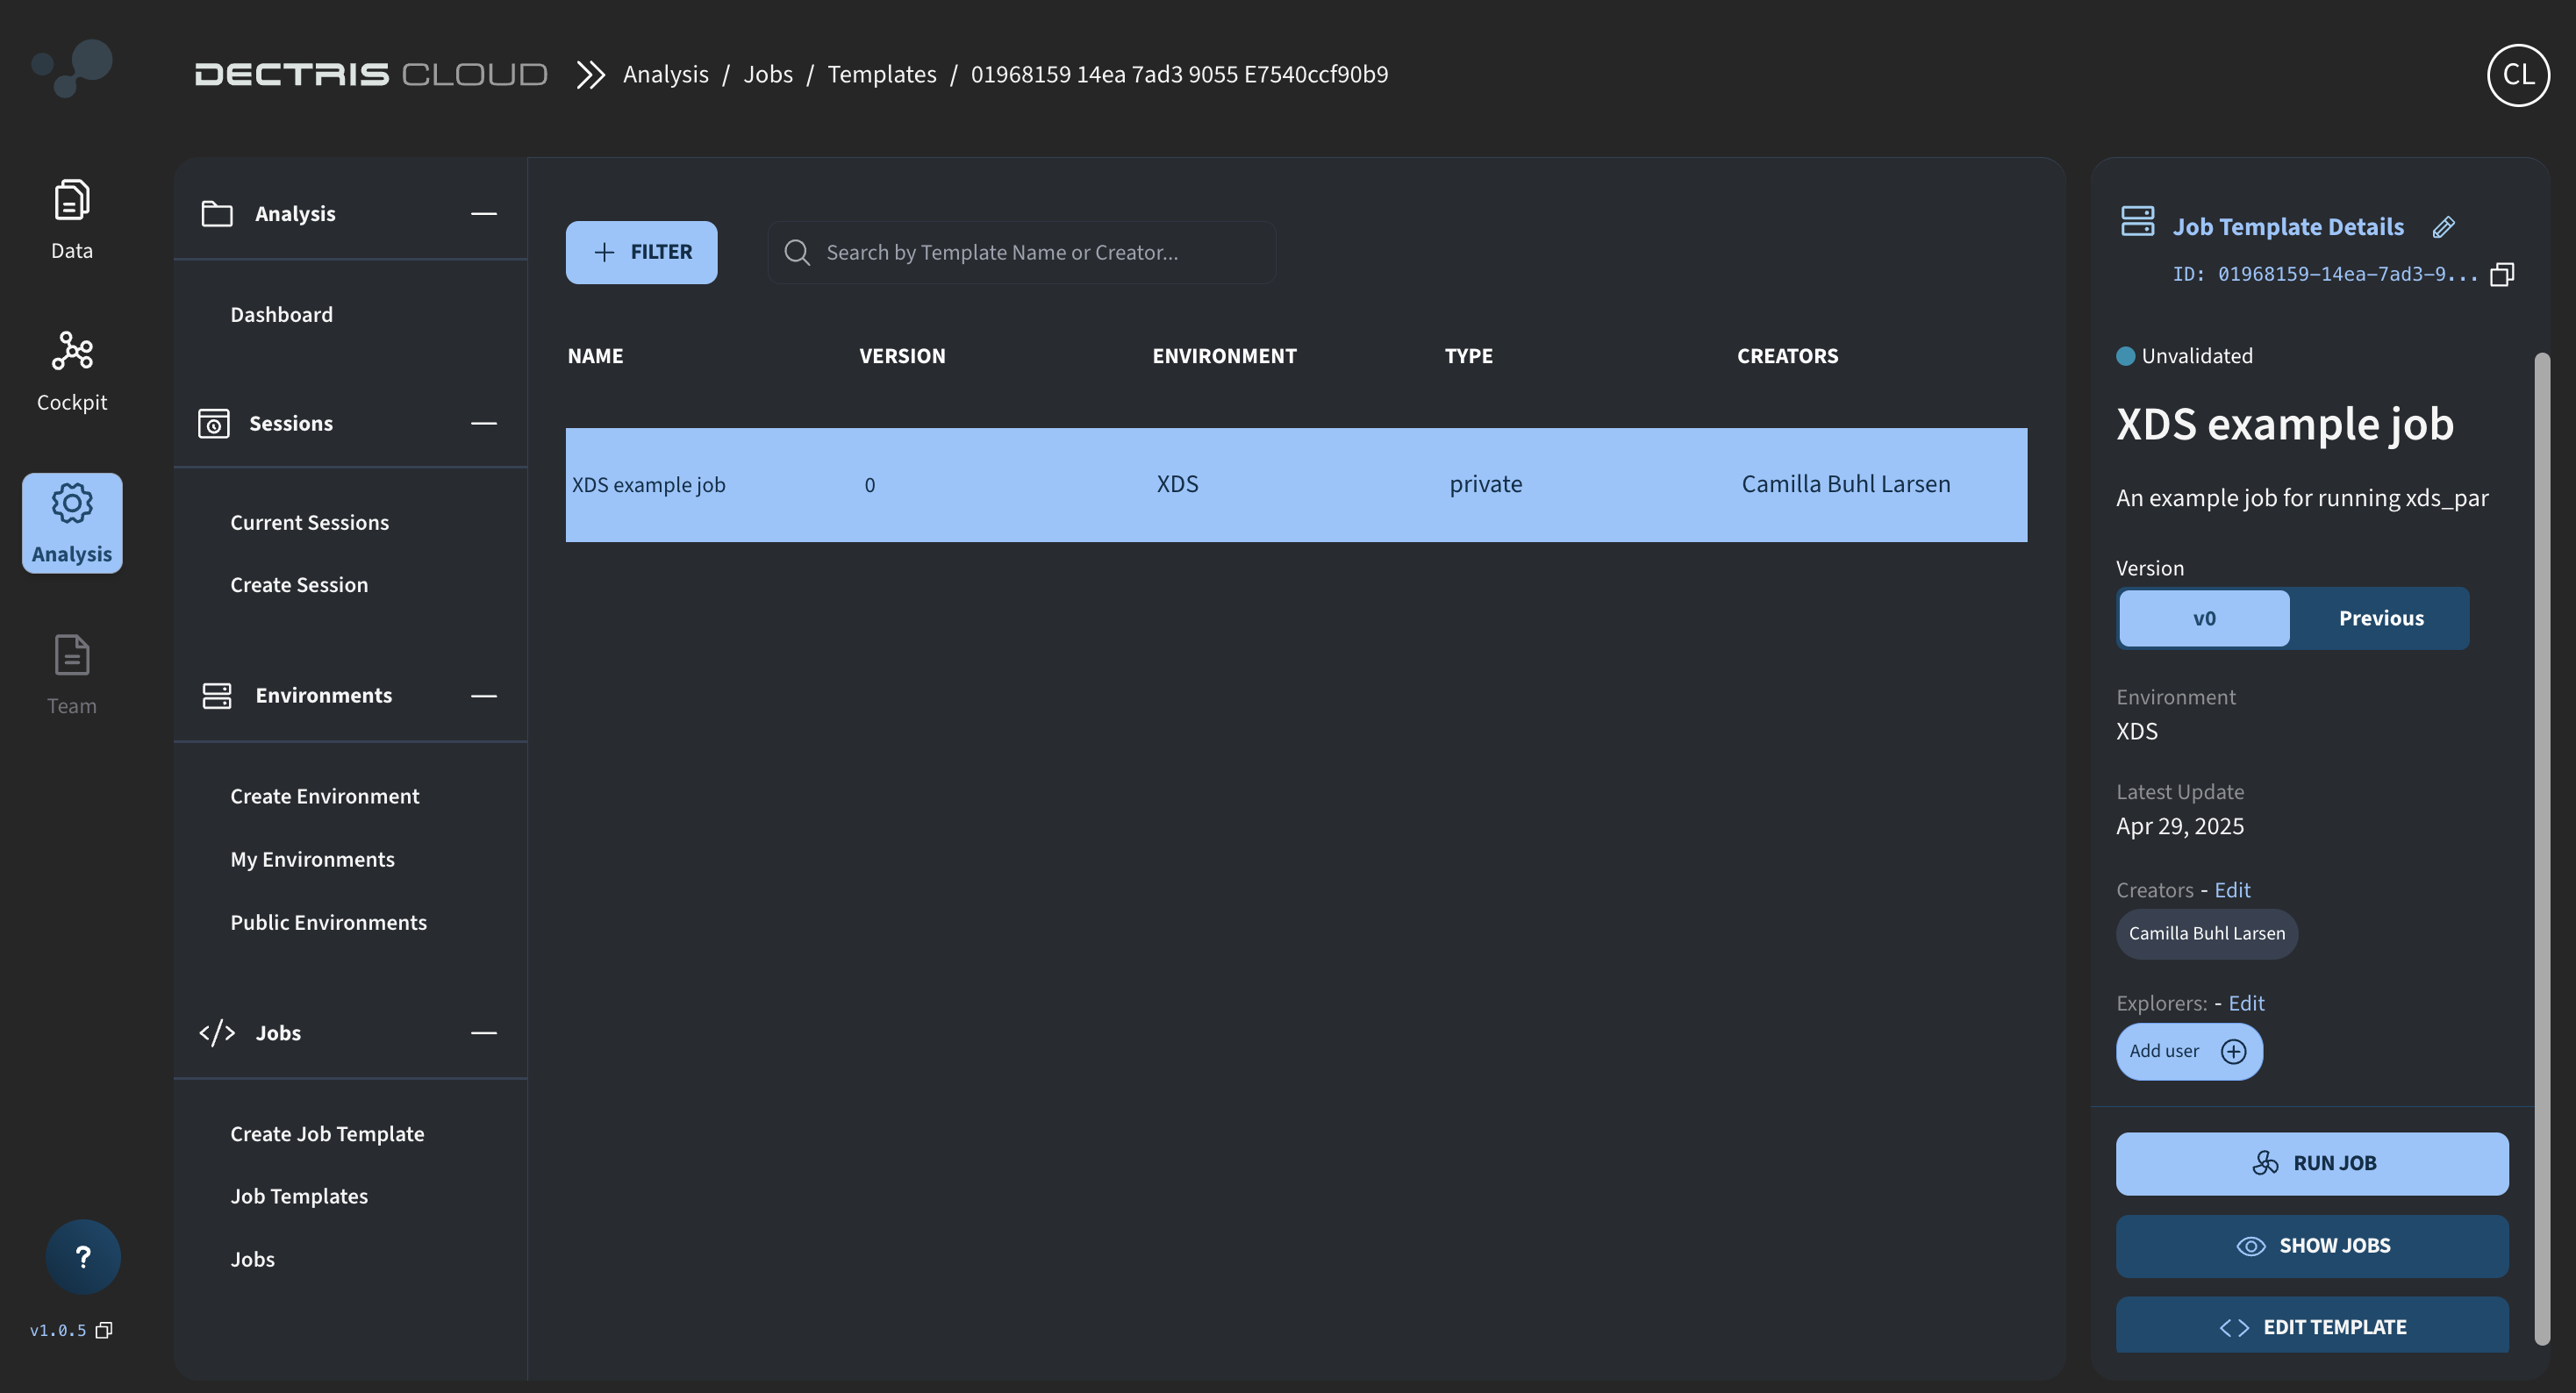
 Step 5: Viewing the job template in the table
Once saved, the Template can be viewed in a table at Analysis → Jobs → Job Templates. From here, a job can be started via the RUN JOB button.
Running the job
Step 1: Defining the experimental data path
Upon clicking the RUN JOB button in the Job Template list, a dialogue window will appear for launching the job. Begin by navigating to the experiment containing the data you wish to analyze by clicking the folder icon in the orange box:
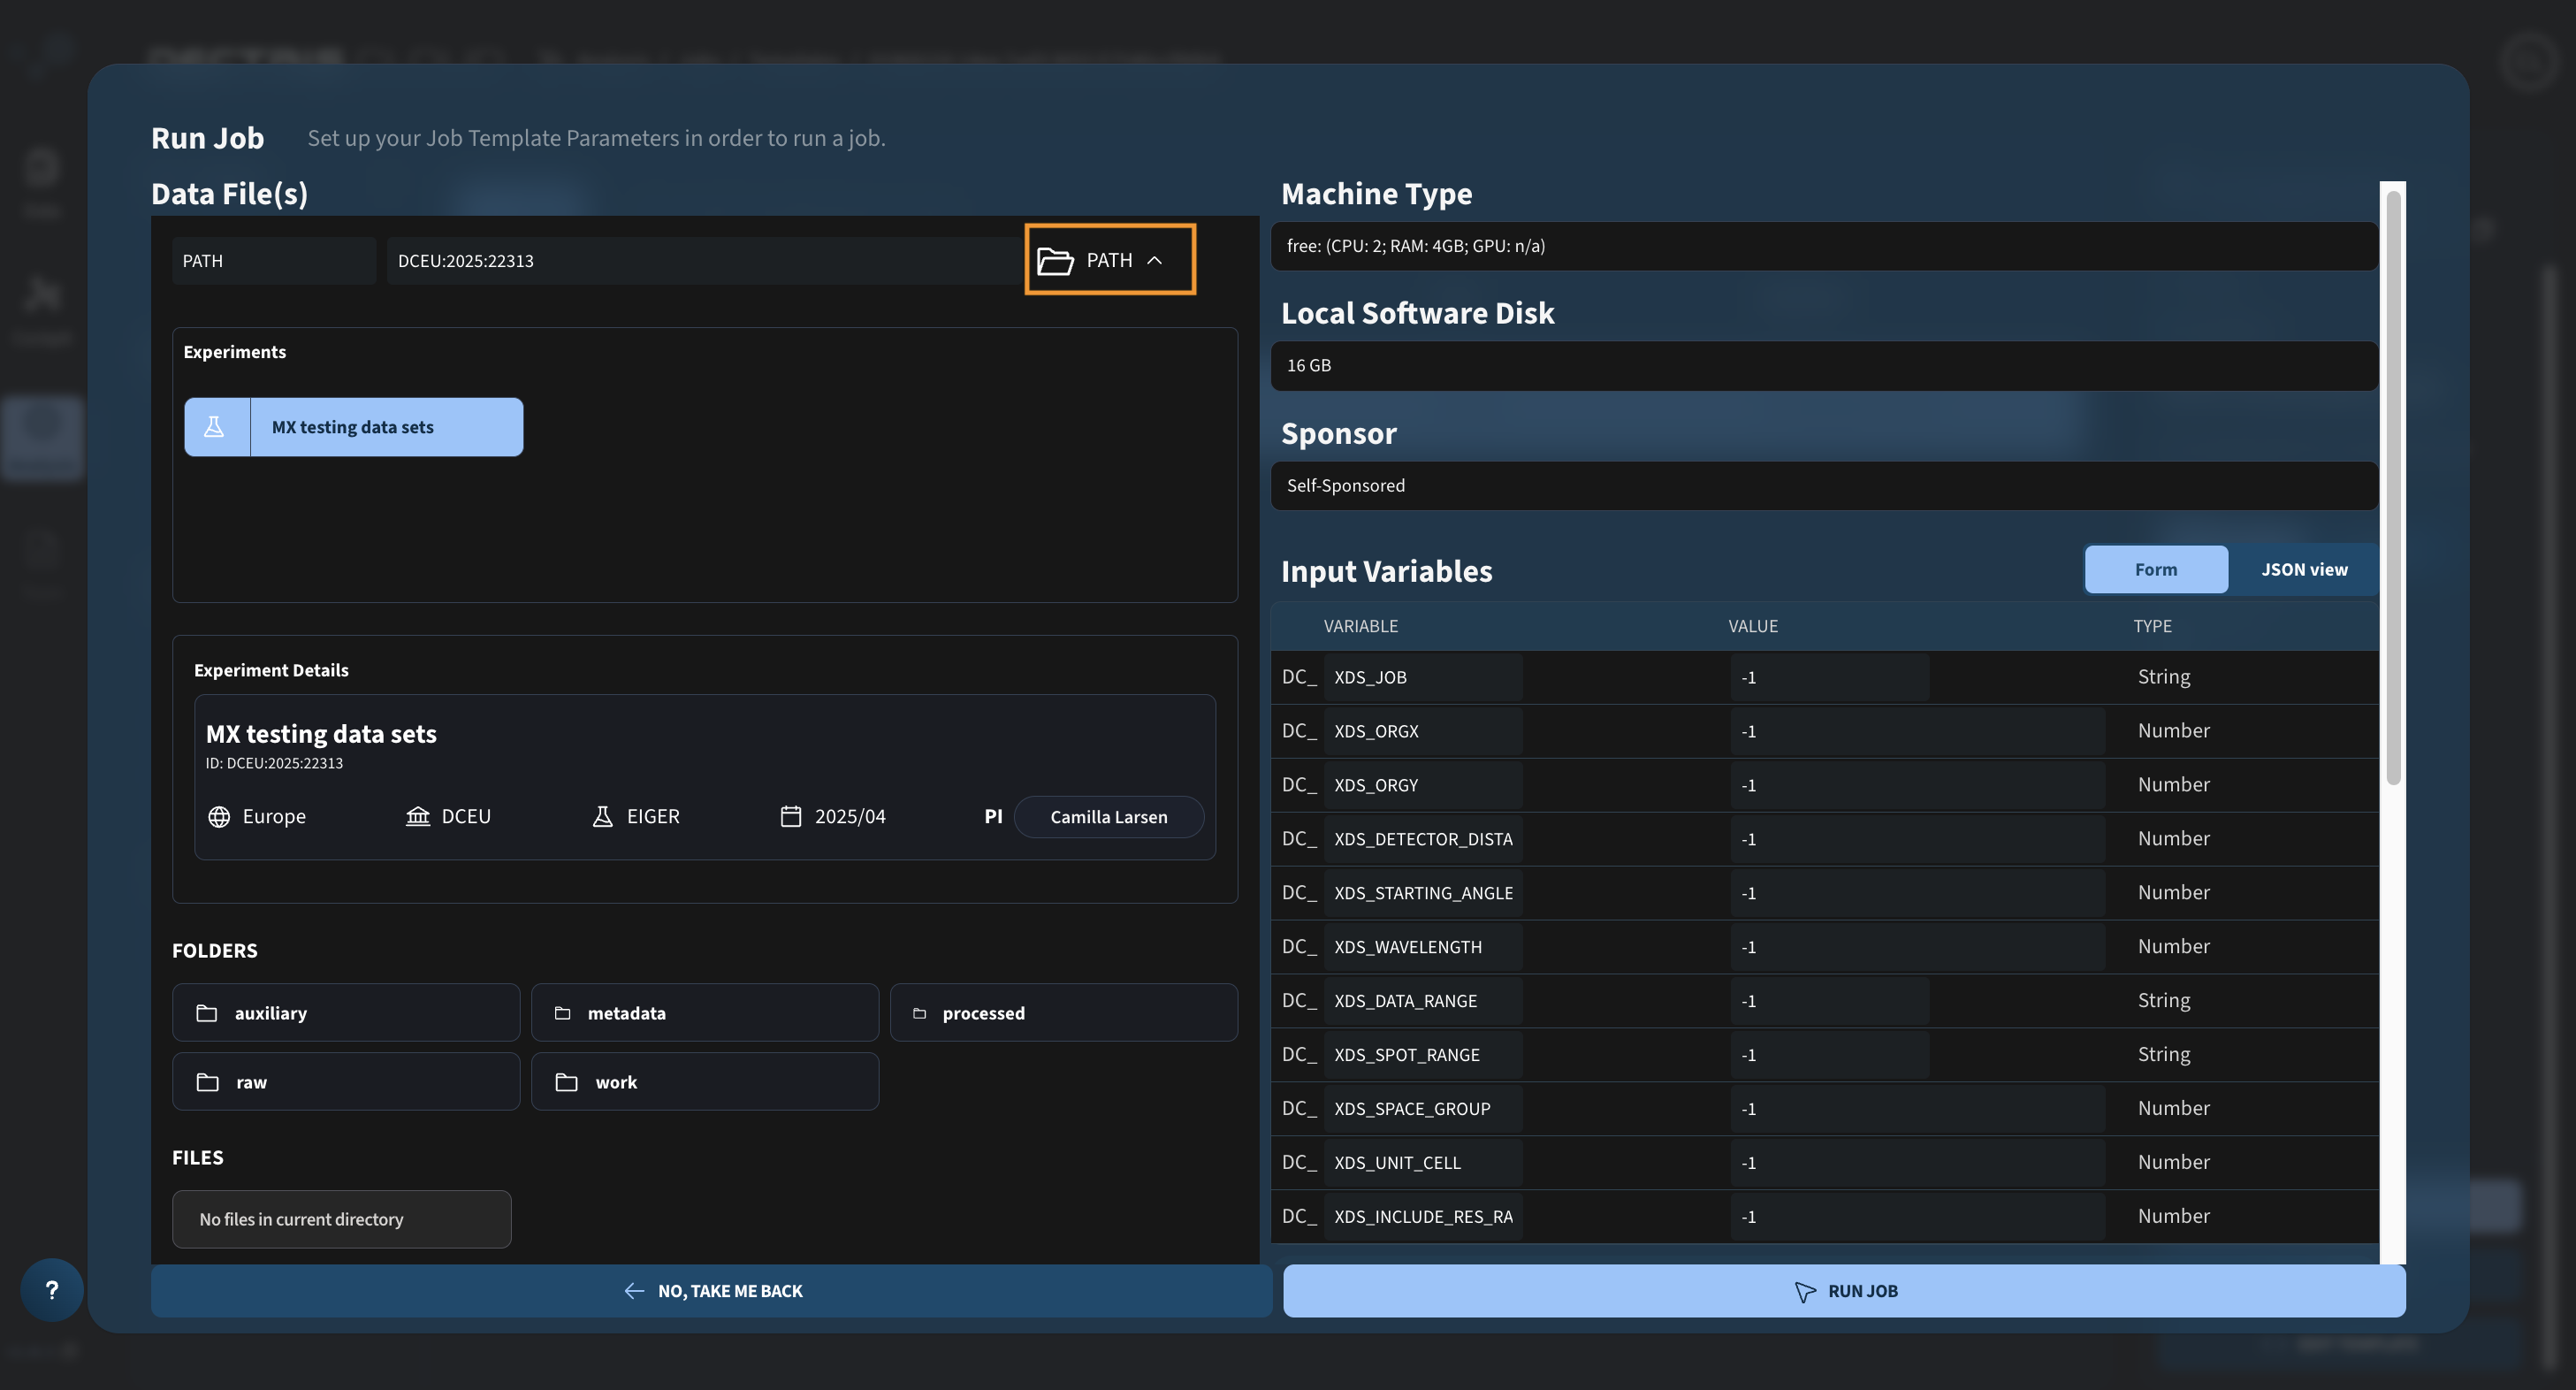
Navigate through experiment folder structure, until you can select the data you wish to analyze:
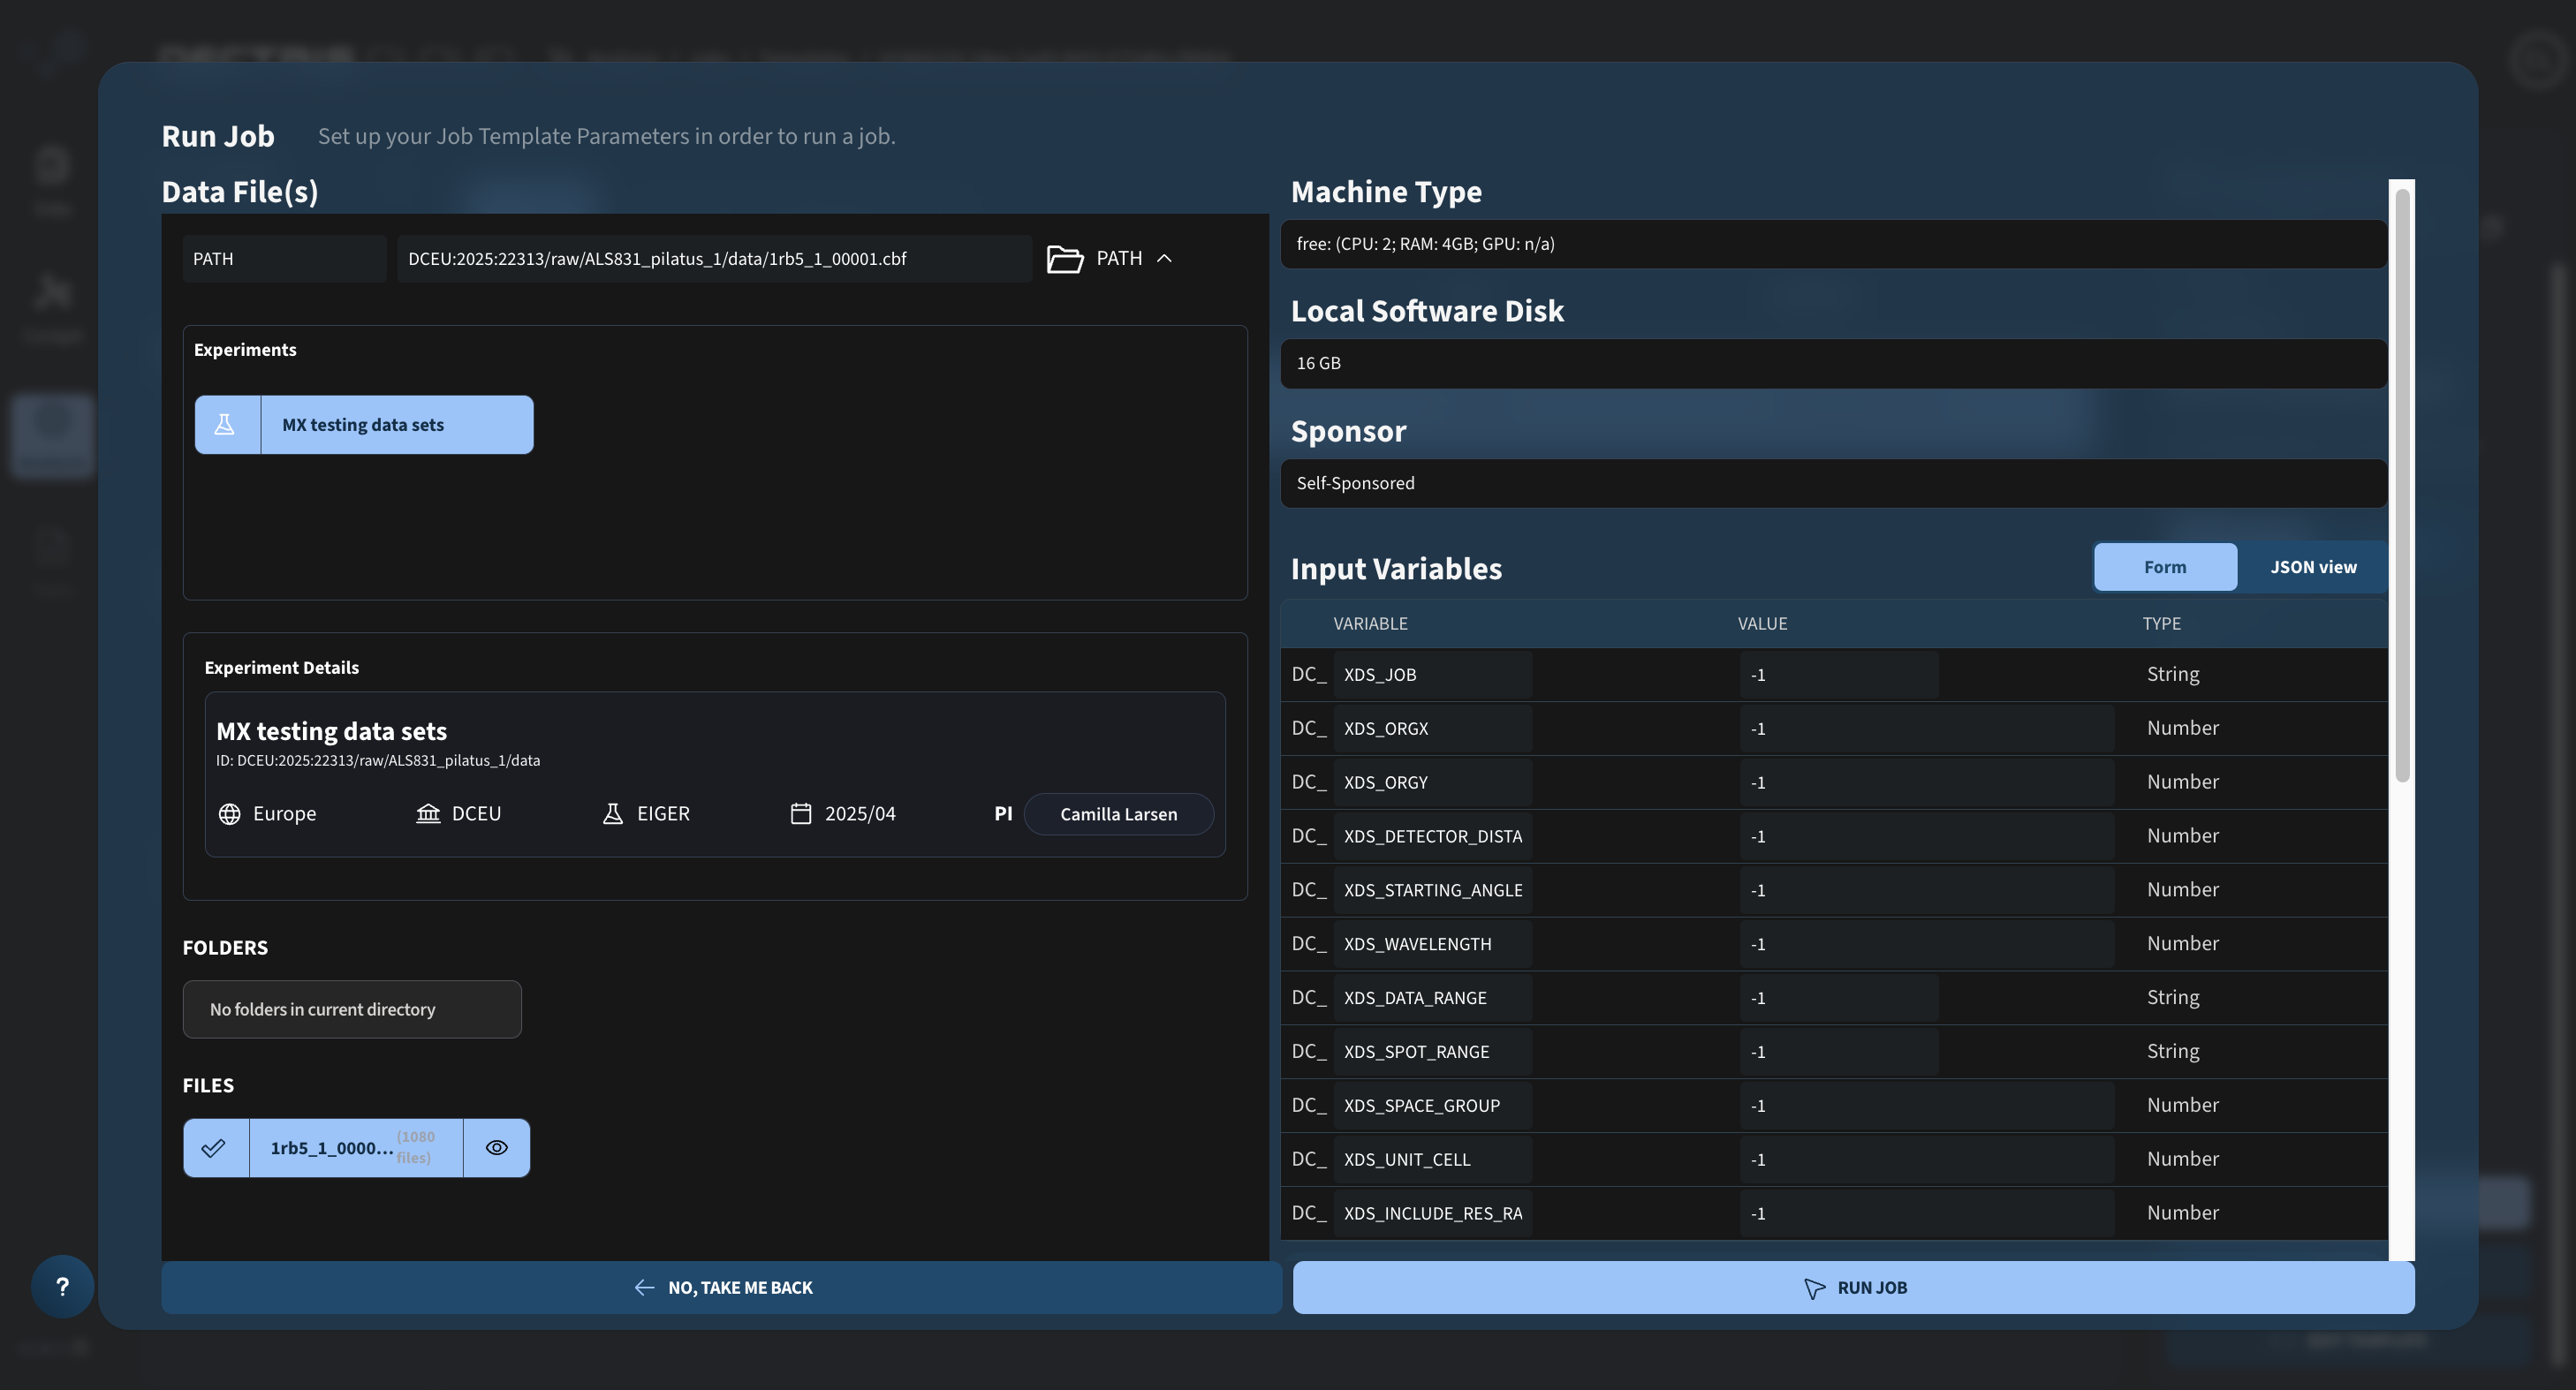
Step 2: Configuring job parameters and launch the job
Configure the machine type, local software disk (for an xds job 16 GB should be enough), the sponsor and the input variables at the right side of the dialogue window. As a first run, all input variables can be left at -1.
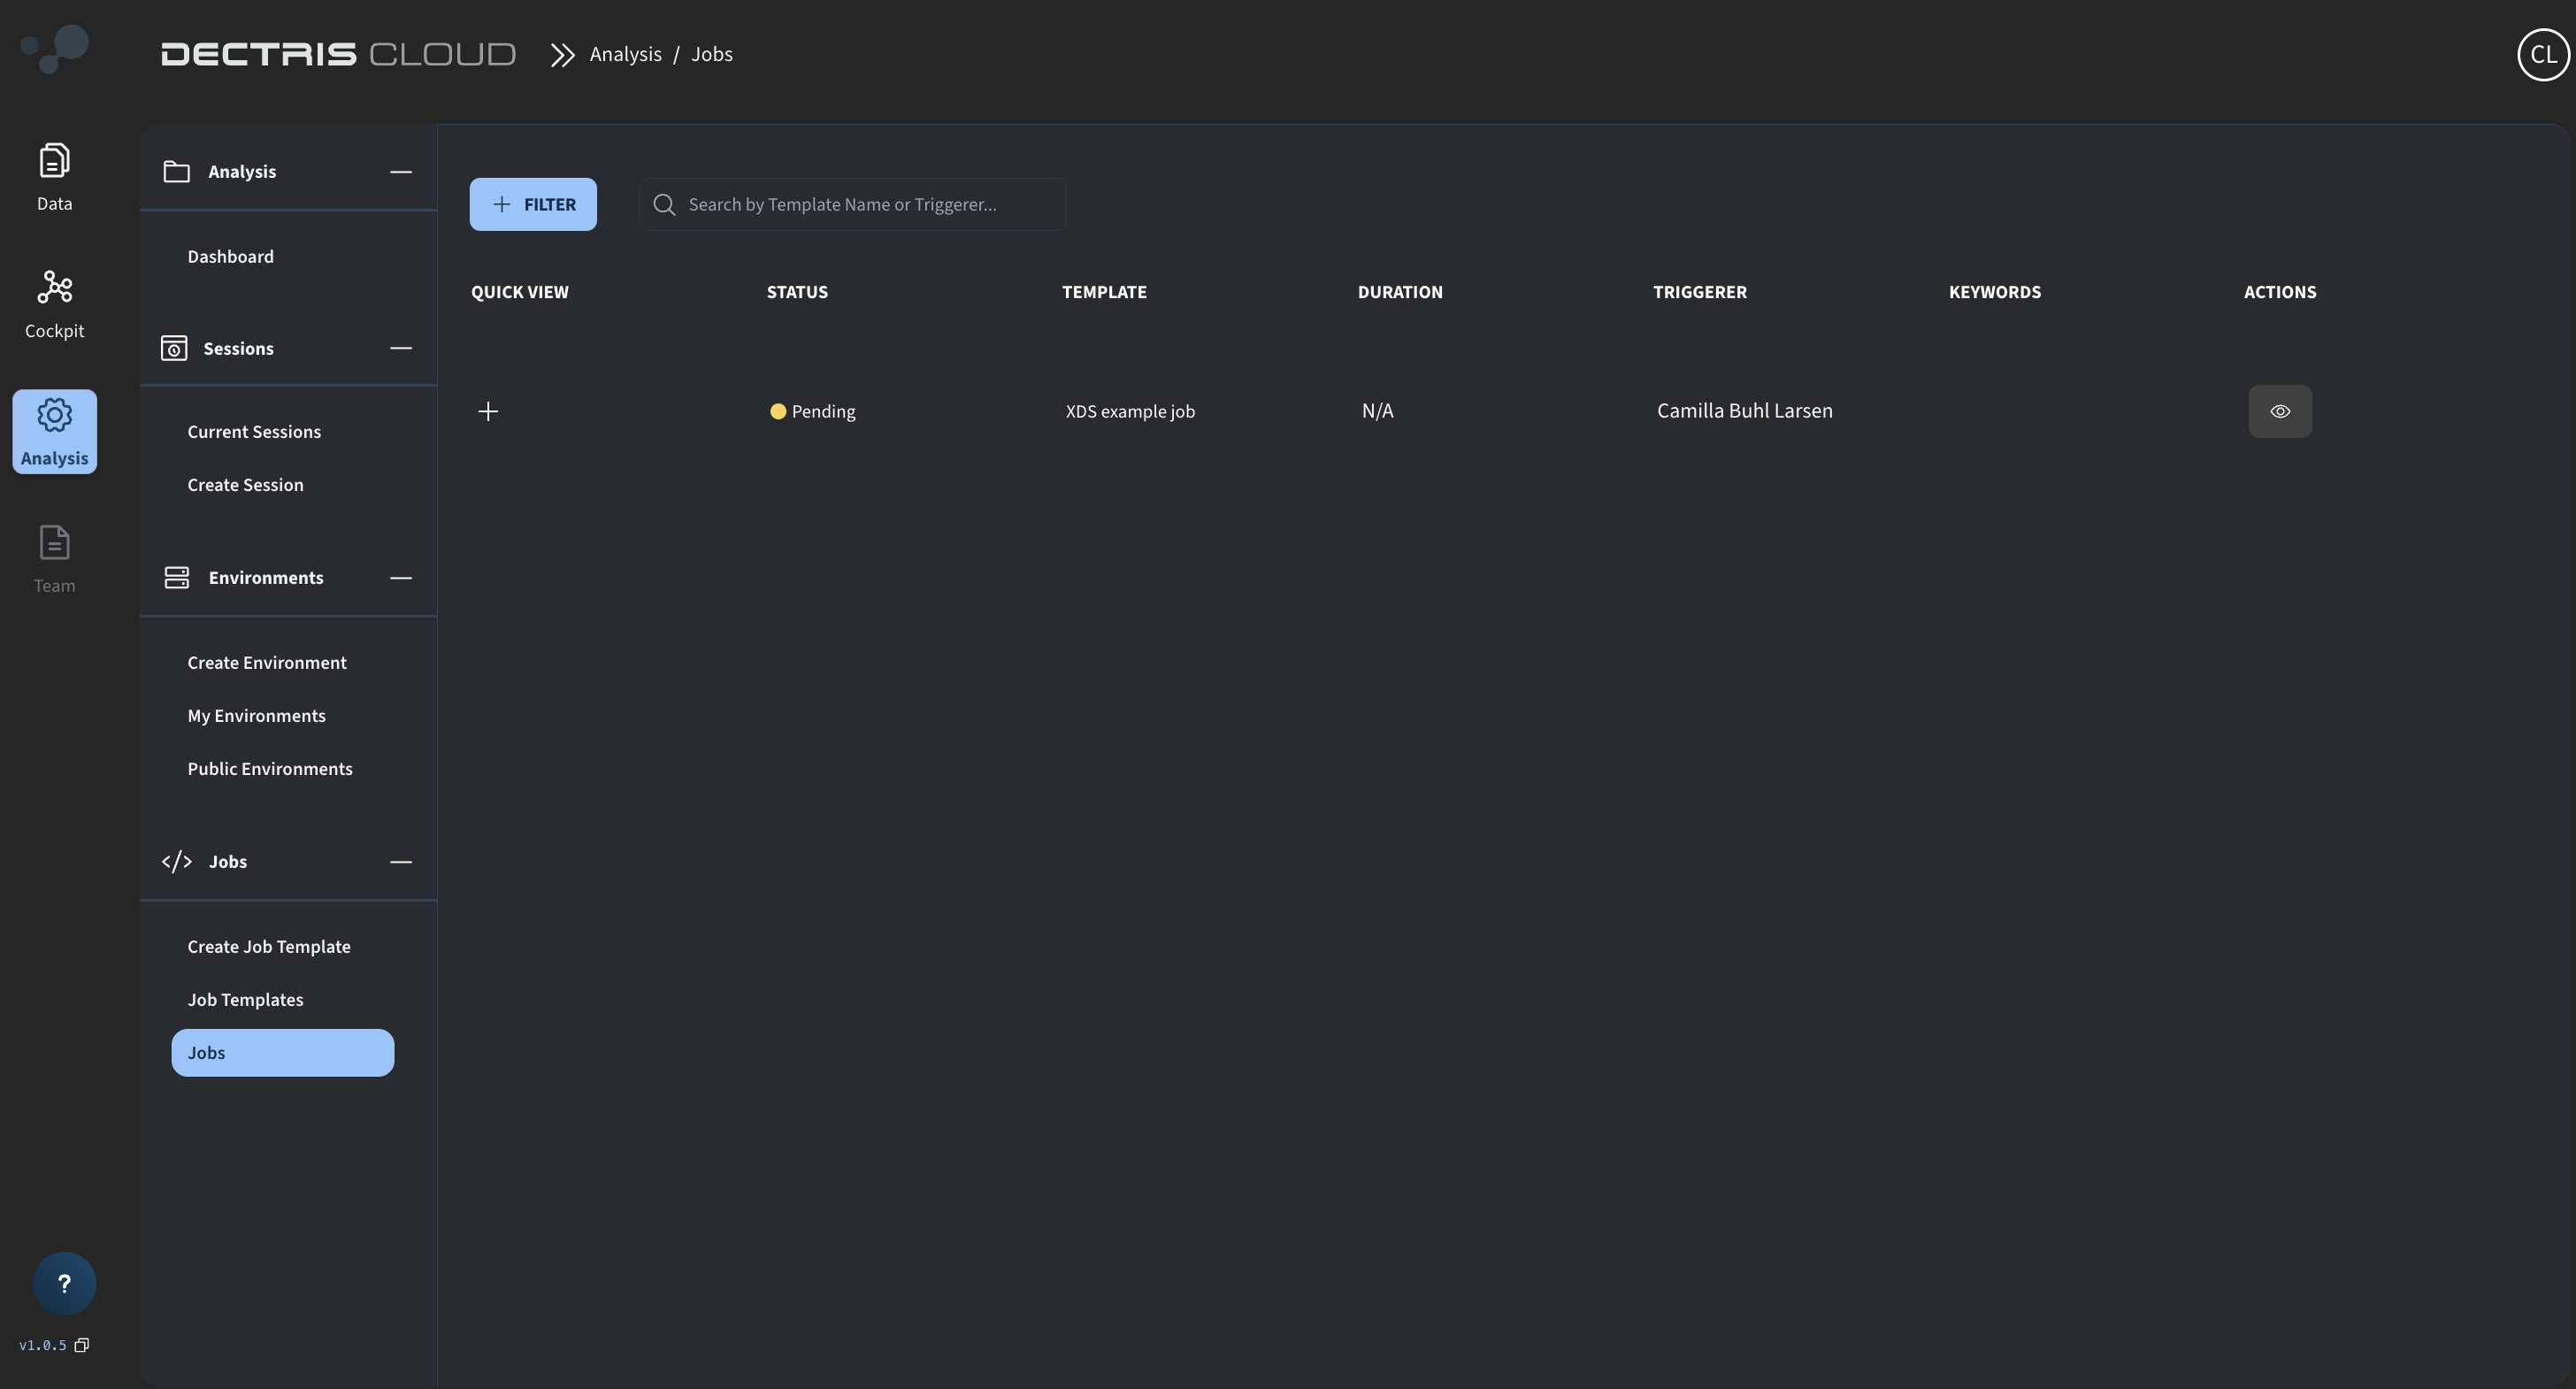
Once configured, click the RUN JOB button to start the job. The status of the job can be viewed in the jobs table at Analysis → Jobs → Jobs:
Viewing the output
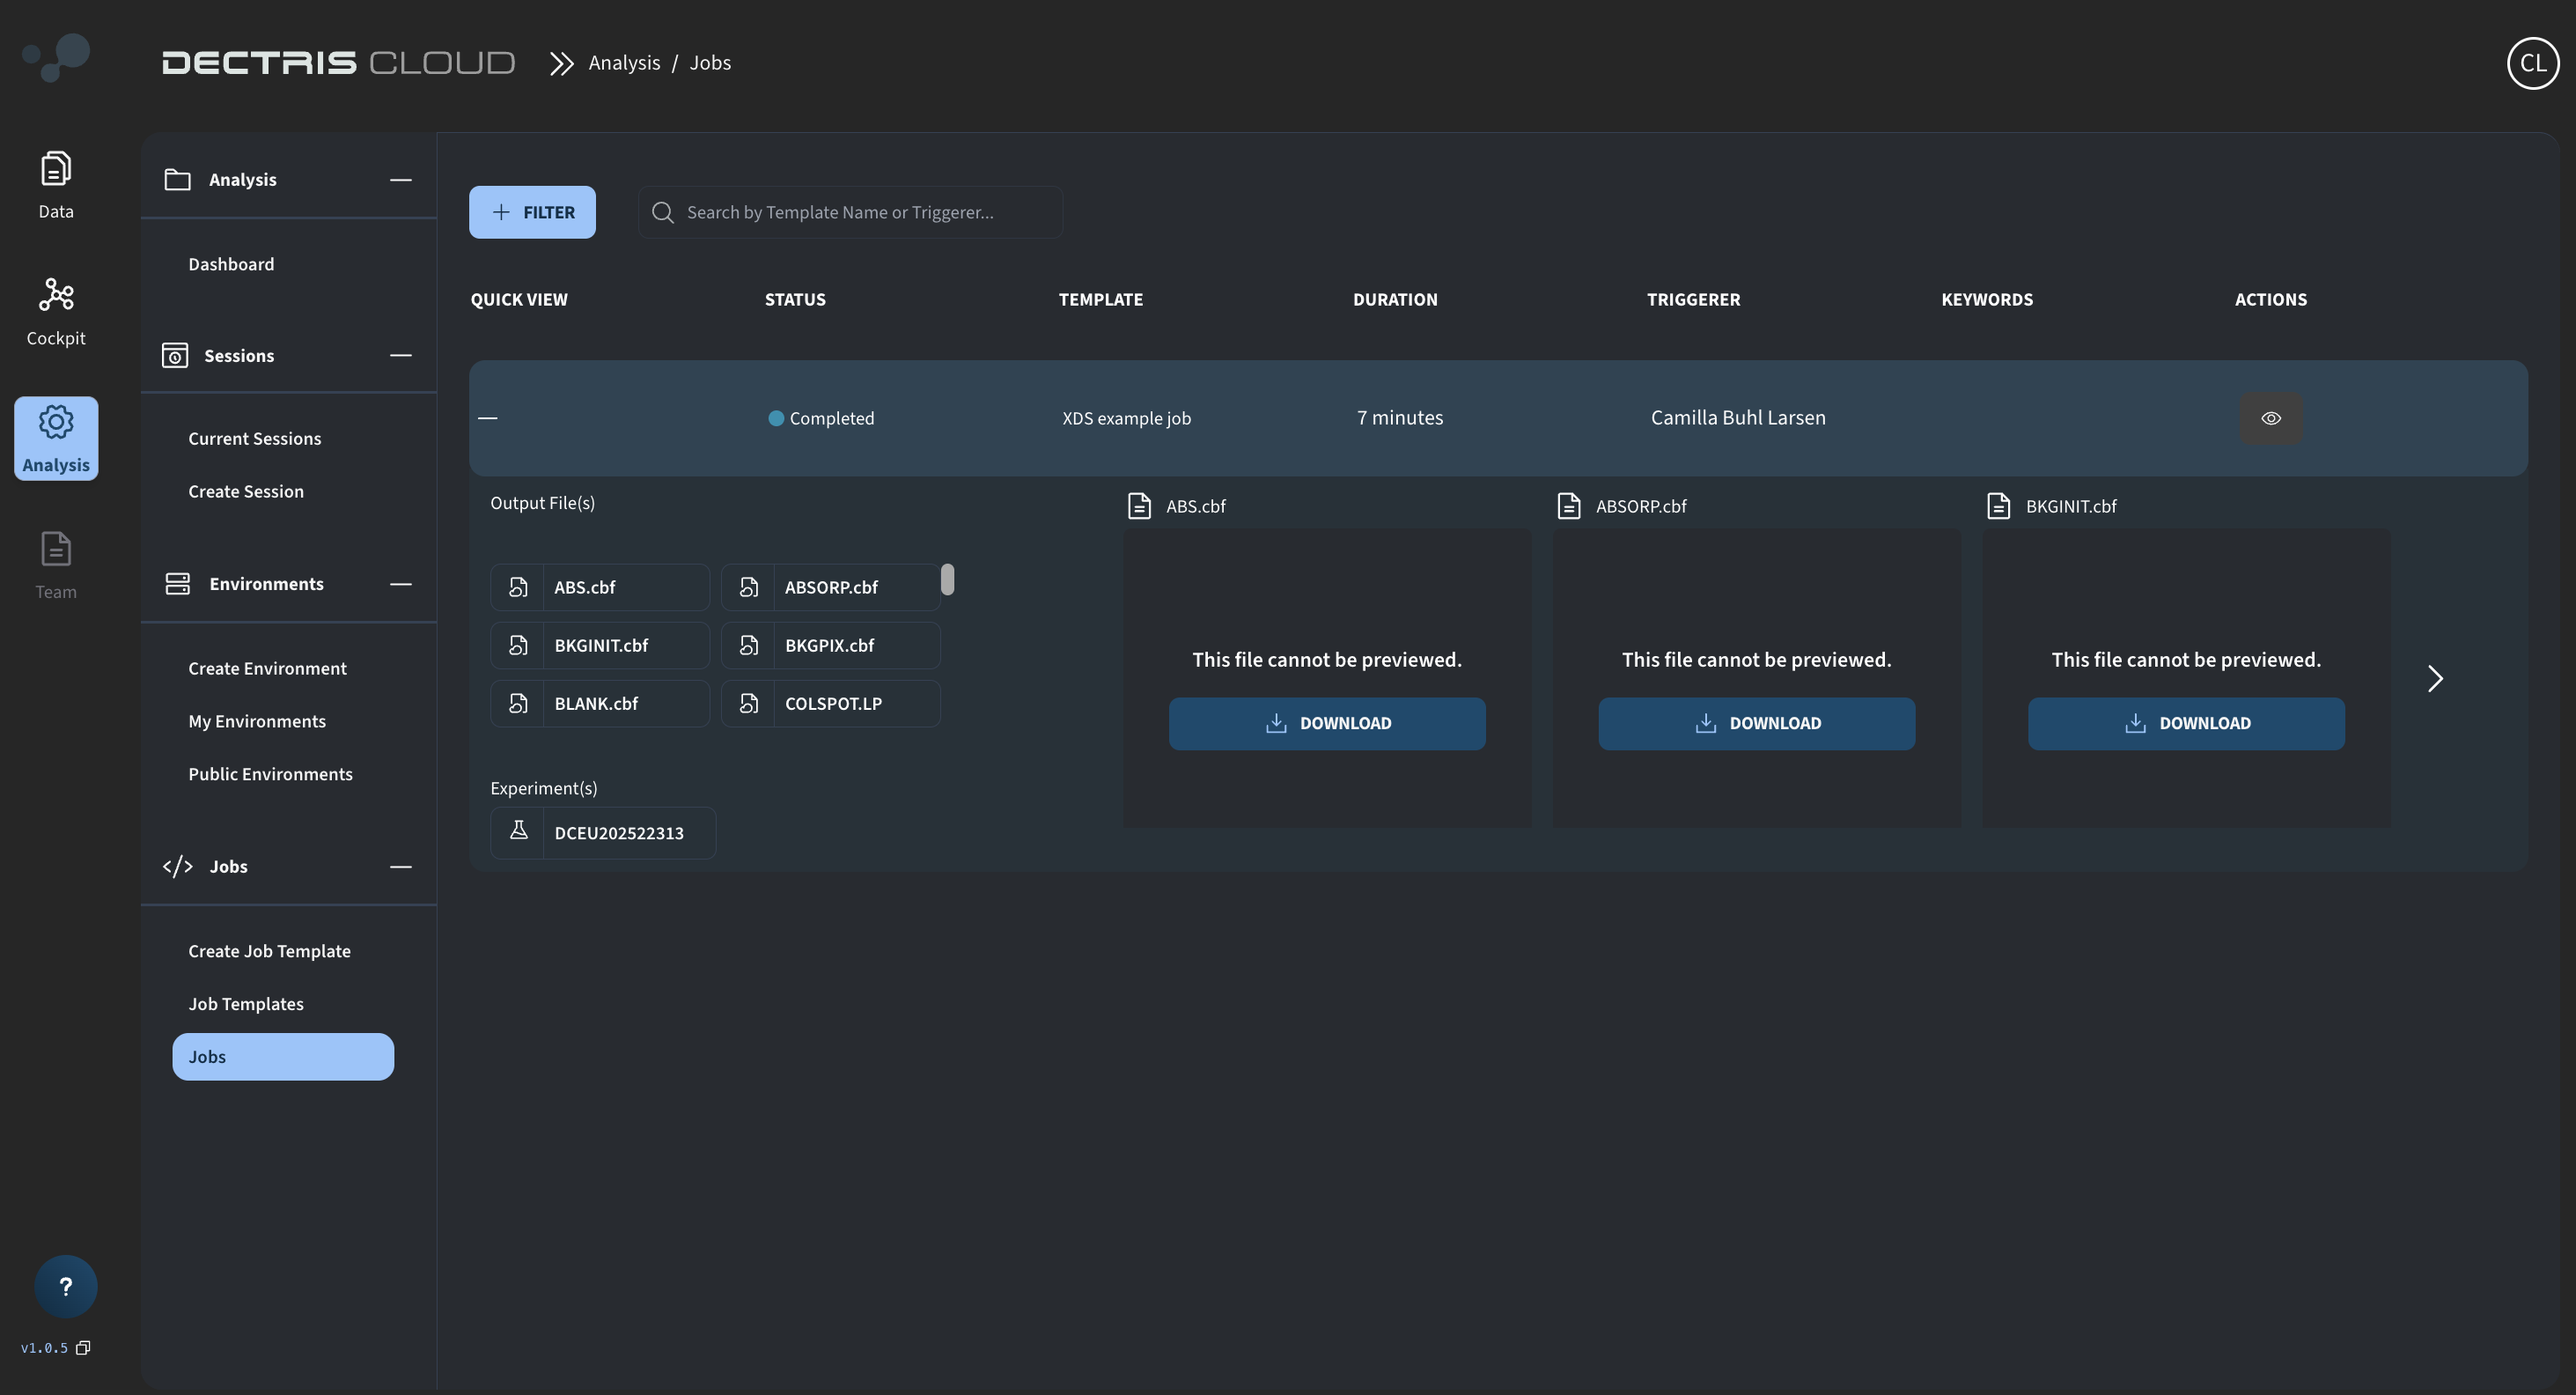
Step 1: Viewing the job output in the table
When completed, the files copied to the job output directory can be directly viewed in and downloaded from the job table:
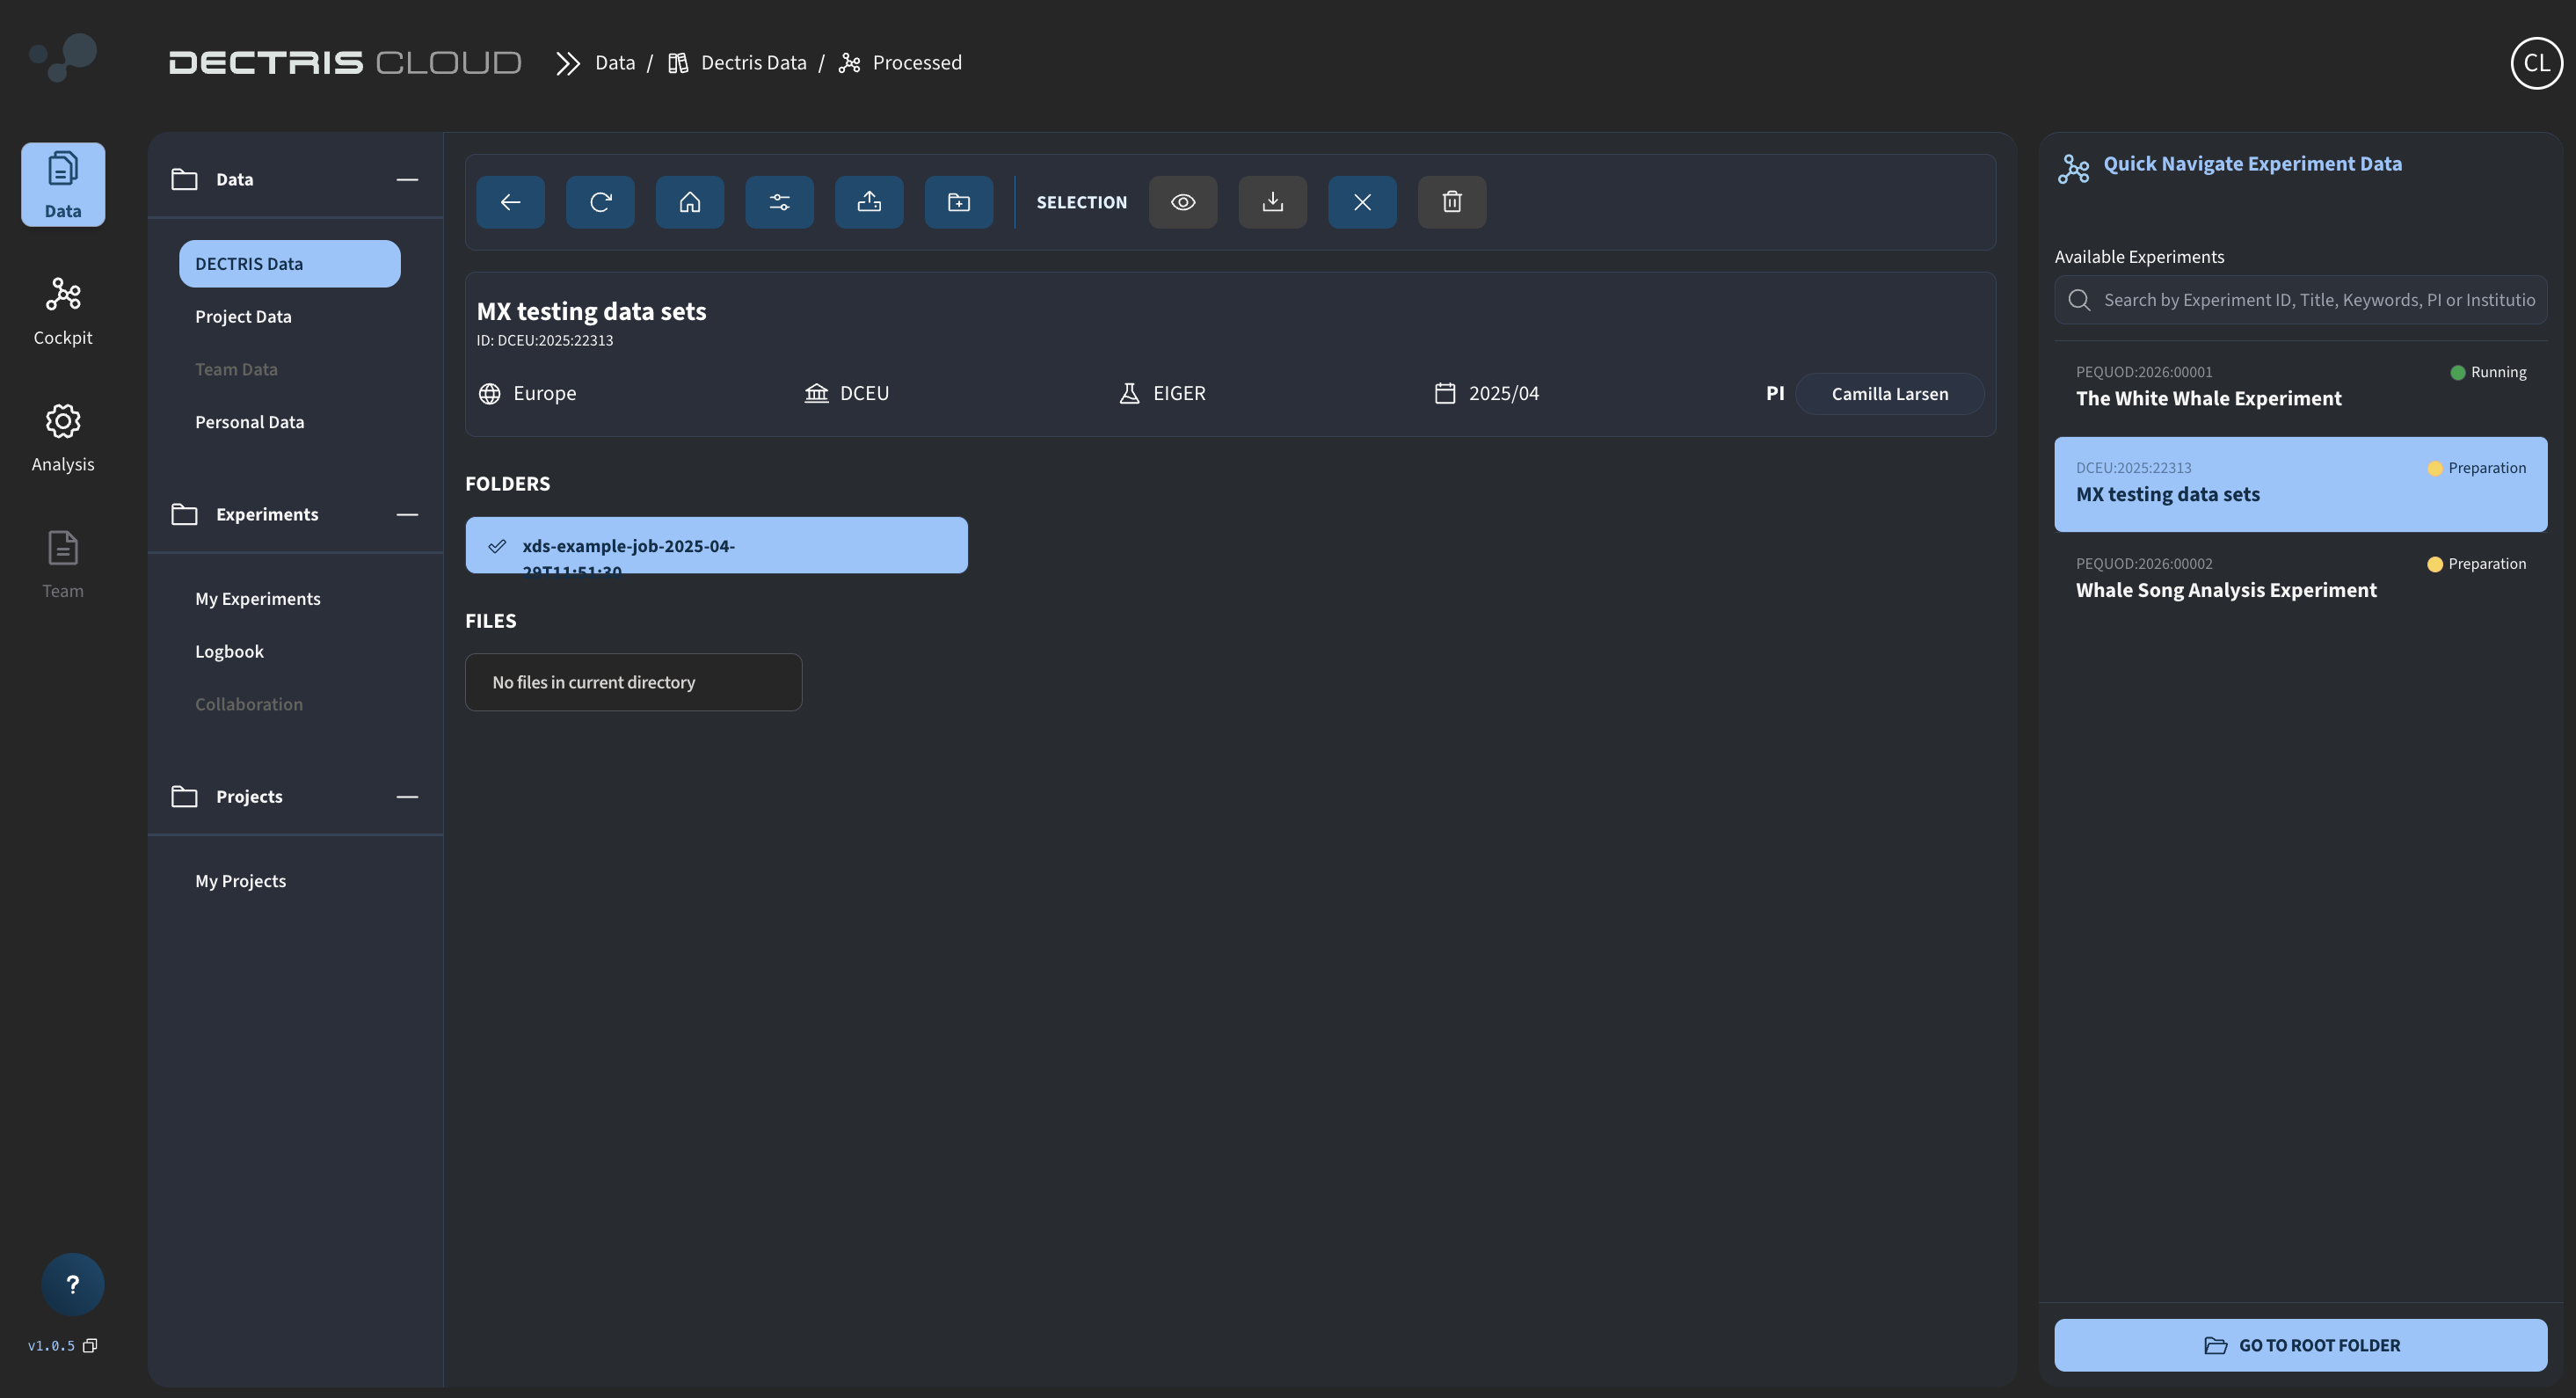
Step 2: Viewing the job output in the processing folder
In addition, the output files are accessible in a subfolder in the "processed" folder of the experiment. The subfolder will be named after the job template and launch time of the job: