DIALS: Creating and running a job for peak integration
In this tutorial, we will show how to create and run a job for peak integration using the public DIALS environment.
Creating a job template
Step 1: Initial details
Navigate to Analysis → Jobs → Create Job Template, and fill out the job template name and description:
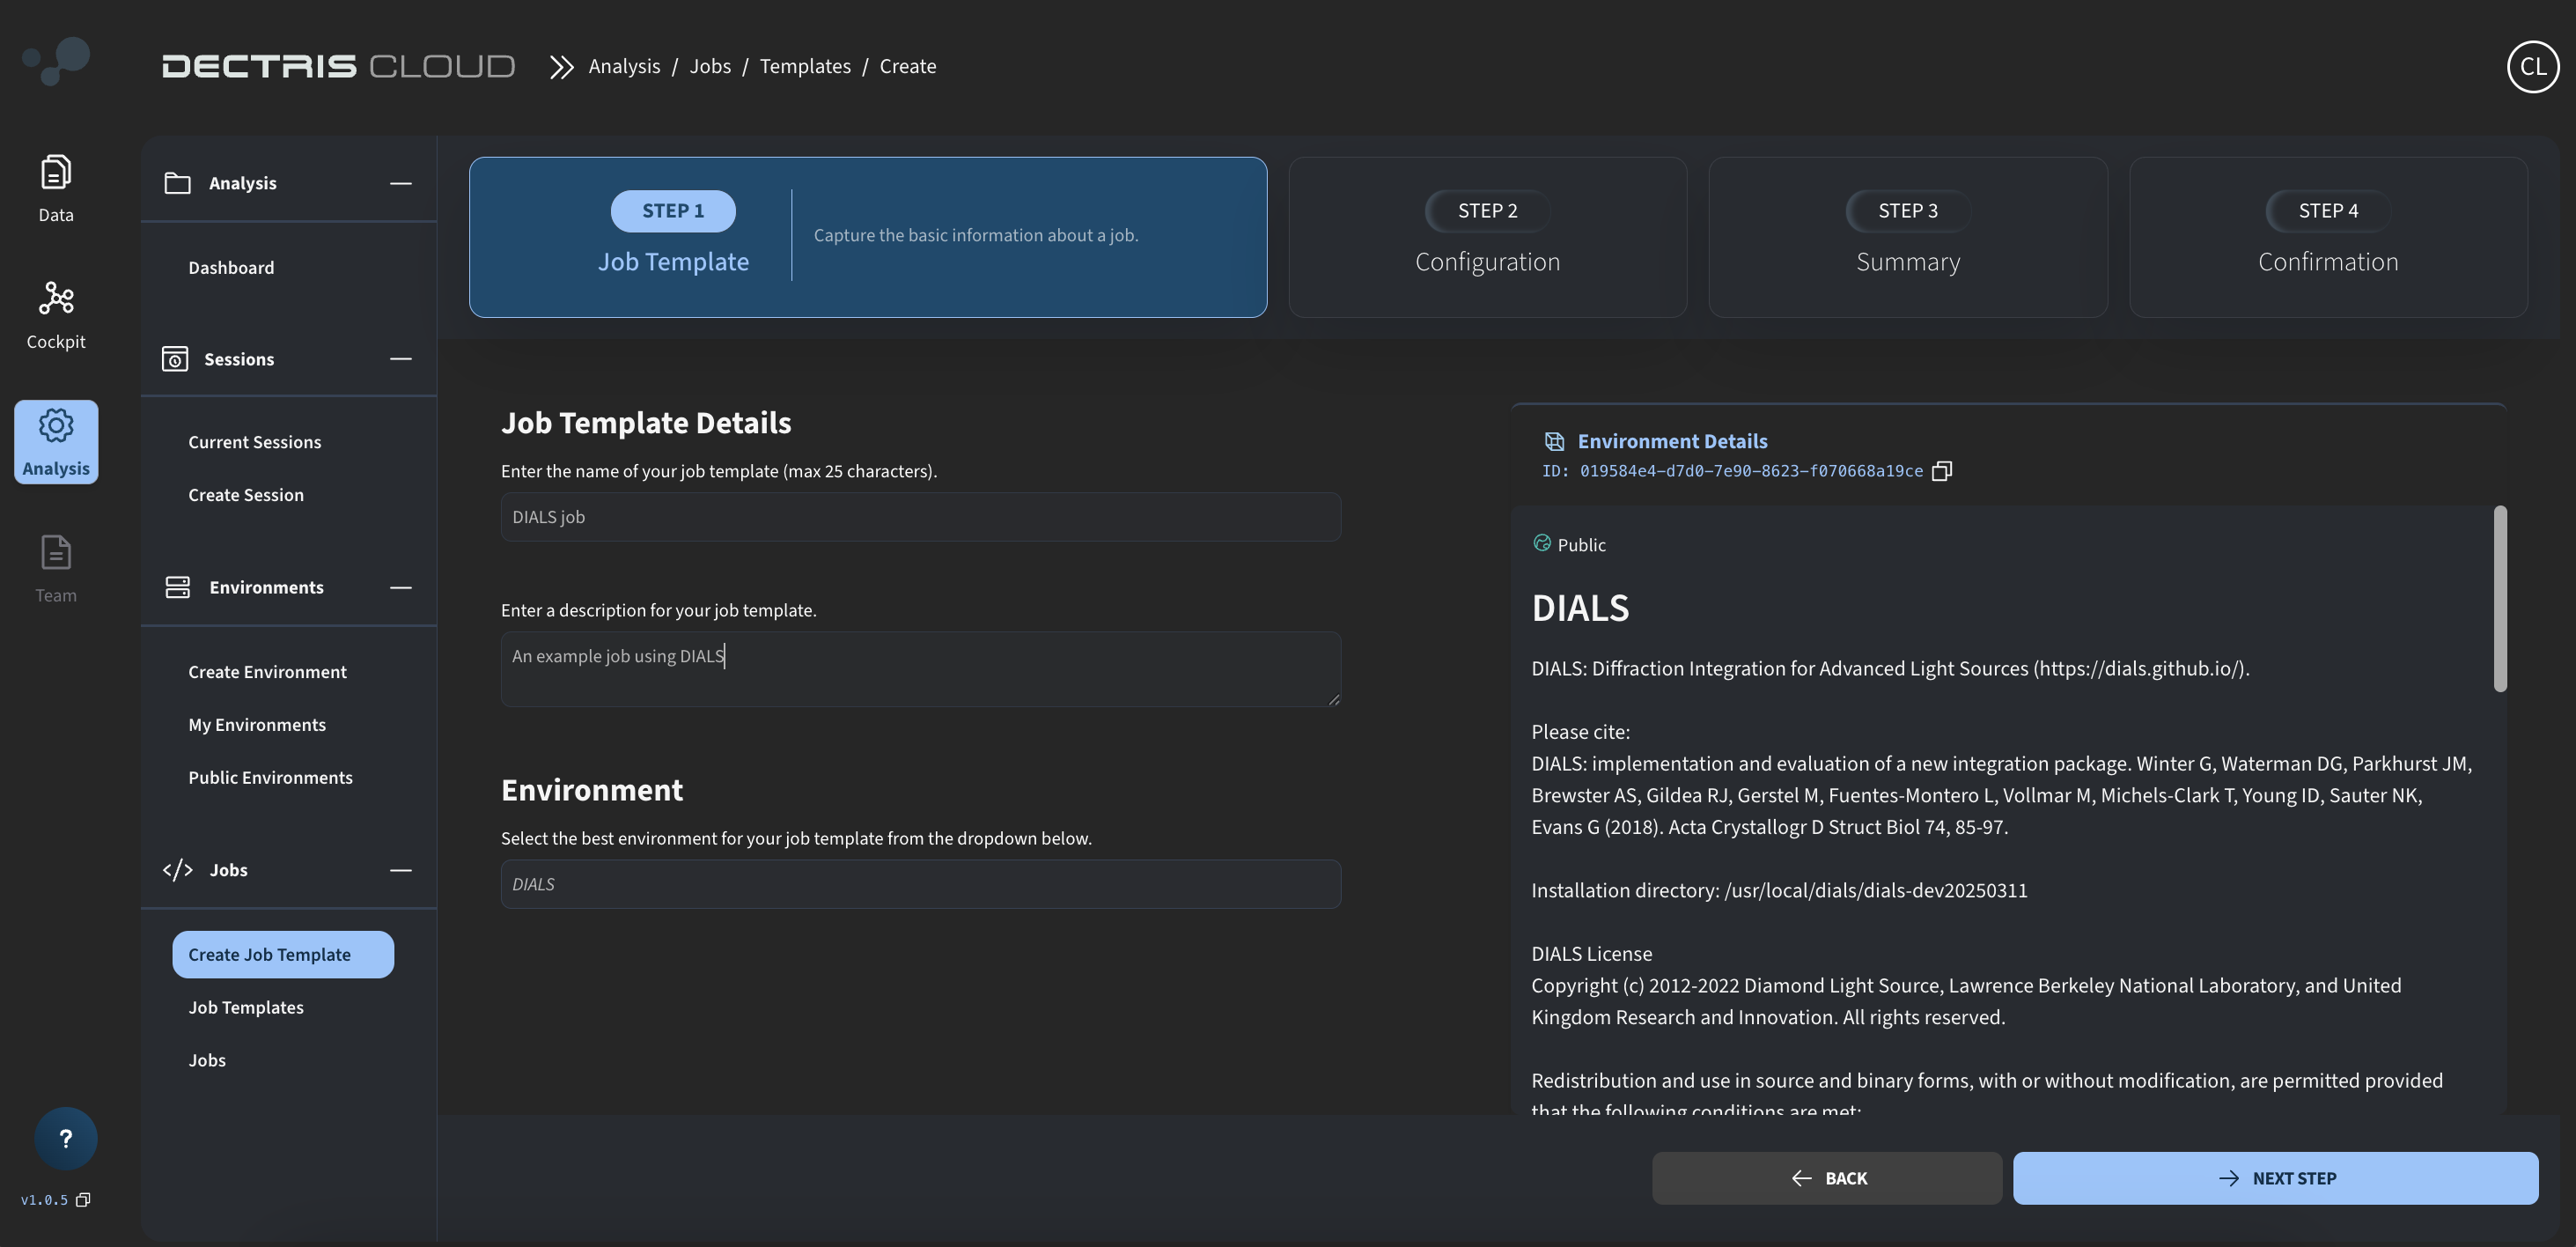
To work with the job script below, make sure to choose the DIALS environment.
Step 2: Inserting the job script
On the next page, you can specify the job script:
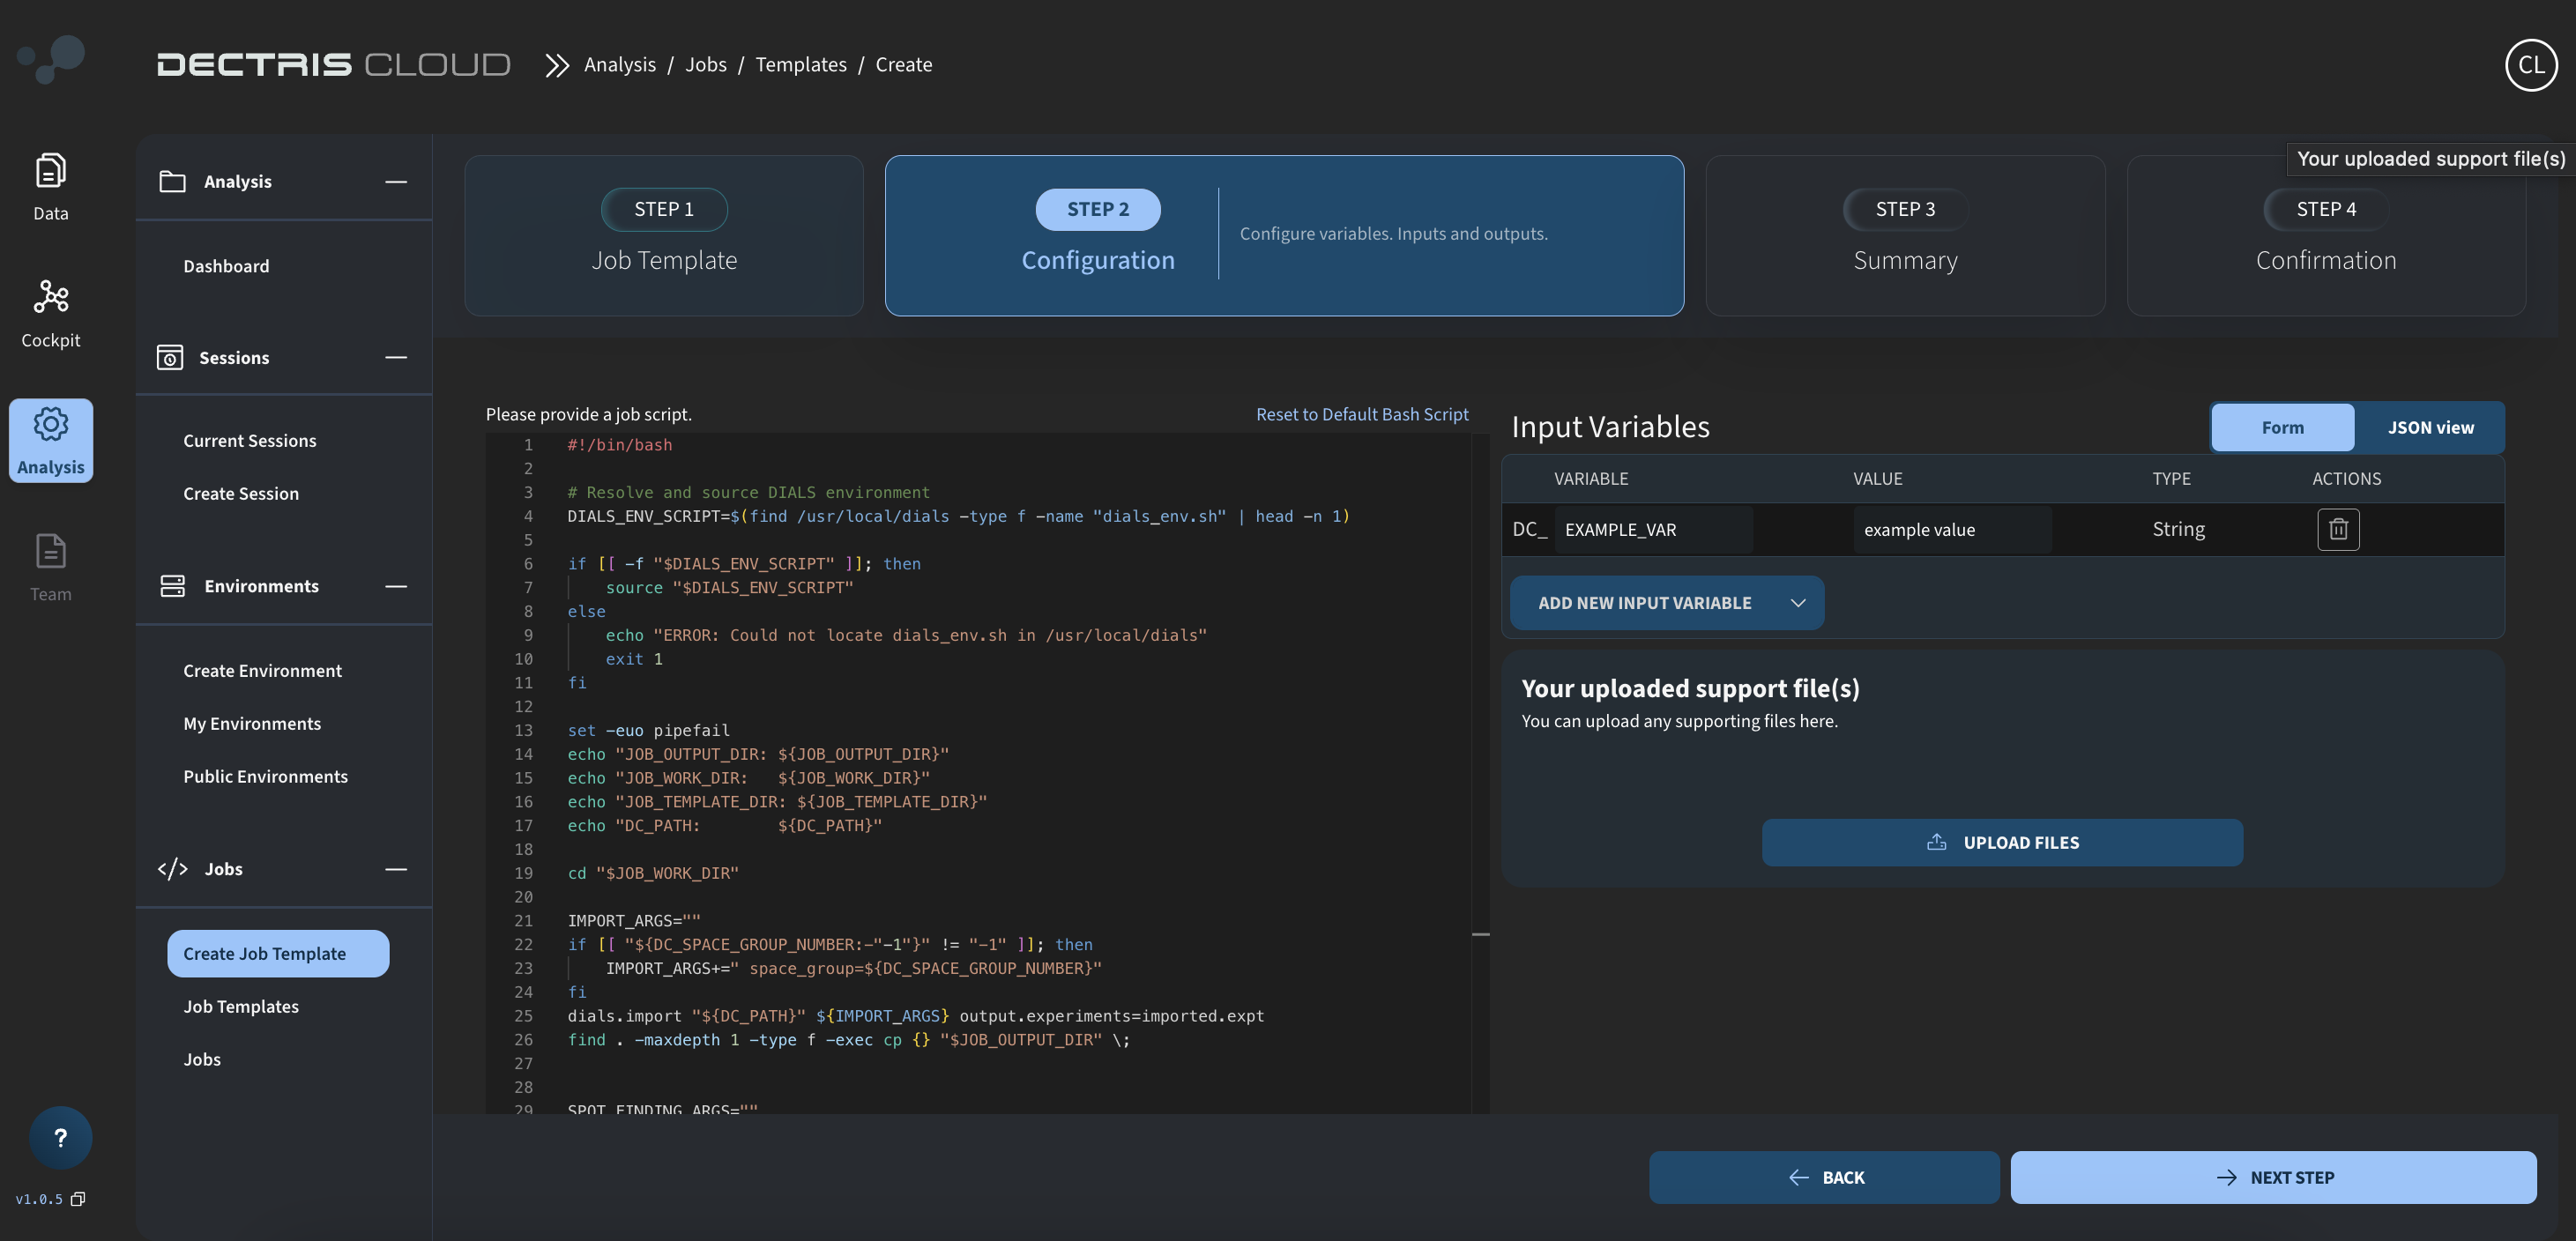
For this tutorial, an example job script for running DIALS is given below, which can be copy-pasted into the box:
#!/bin/bash

# Resolve and source DIALS environment
DIALS_ENV_SCRIPT=$(find /usr/local/dials -type f -name "dials_env.sh" | head -n 1)

if [[ -f "$DIALS_ENV_SCRIPT" ]]; then
    source "$DIALS_ENV_SCRIPT"
else
    echo "ERROR: Could not locate dials_env.sh in /usr/local/dials"
    exit 1
fi

set -euo pipefail
echo "JOB_OUTPUT_DIR: ${JOB_OUTPUT_DIR}"
echo "JOB_WORK_DIR:   ${JOB_WORK_DIR}"
echo "JOB_TEMPLATE_DIR: ${JOB_TEMPLATE_DIR}"
echo "DC_PATH:        ${DC_PATH}"

cd "$JOB_WORK_DIR"

IMPORT_ARGS=""
if [[ "${DC_SPACE_GROUP_NUMBER:-"-1"}" != "-1" ]]; then
    IMPORT_ARGS+=" space_group=${DC_SPACE_GROUP_NUMBER}"
fi
dials.import "${DC_PATH}" ${IMPORT_ARGS} output.experiments=imported.expt
find . -maxdepth 1 -type f -exec cp {} "$JOB_OUTPUT_DIR" \;


SPOT_FINDING_ARGS=""
if [[ "${DC_SPOT_THRESHOLD:-"-1"}" != "-1" ]]; then
    SPOT_FINDING_ARGS+=" threshold.algorithm=overload threshold.overload=${DC_SPOT_THRESHOLD}"
fi
dials.find_spots imported.expt ${SPOT_FINDING_ARGS} output.reflections=spots.refl
find . -maxdepth 1 -type f -exec cp {} "$JOB_OUTPUT_DIR" \;

INDEX_ARGS=""
if [[ "${DC_INDEX_METHOD:-"-1"}" != "-1" ]]; then
    INDEX_ARGS+=" method=${DC_INDEX_METHOD}"
fi
if [[ "${DC_CELLSIZE_MAXIMUM:-"-1"}" != "-1" ]]; then
    INDEX_ARGS+=" max_cell=${DC_CELLSIZE_MAXIMUM}"
fi
dials.index imported.expt spots.refl ${INDEX_ARGS} output.experiments=indexed.expt output.reflections=indexed.refl
find . -maxdepth 1 -type f -exec cp {} "$JOB_OUTPUT_DIR" \;

REFINE_ARGS=""
if [[ "${DC_REFINE_MODE:-"-1"}" != "-1" ]]; then
    REFINE_ARGS+=" refinement.reflections.outlier.algorithm=${DC_REFINE_MODE}"
fi
dials.refine indexed.expt indexed.refl ${REFINE_ARGS} output.experiments=refined.expt output.reflections=refined.refl
find . -maxdepth 1 -type f -exec cp {} "$JOB_OUTPUT_DIR" \;

INTEGRATE_ARGS=""
if [[ "${DC_INTEGRATION_PADDING:-"-1"}" != "-1" ]]; then
    INTEGRATE_ARGS+=" integration.padding=${DC_INTEGRATION_PADDING}"
fi
dials.integrate refined.expt refined.refl ${INTEGRATE_ARGS} output.experiments=integrated.expt output.reflections=integrated.refl
find . -maxdepth 1 -type f -exec cp {} "$JOB_OUTPUT_DIR" \;

dials.symmetry integrated.expt integrated.refl output.experiments=symmetrized.expt output.reflections=symmetrized.refl
find . -maxdepth 1 -type f -exec cp {} "$JOB_OUTPUT_DIR" \;

dials.scale symmetrized.expt symmetrized.refl output.experiments=scaled.expt output.reflections=scaled.refl
find . -maxdepth 1 -type f -exec cp {} "$JOB_OUTPUT_DIR" \;

dials.export scaled.expt scaled.refl mtz.hklout=final.mtz
find . -maxdepth 1 -type f -exec cp {} "$JOB_OUTPUT_DIR" \;
The job script carries out the following tasks:
- Sources the DIALS environment, so that DIALS commands can be readily used.
- Calls a series of DIALS command. Before each command, it checks for input variables with the "DC_" prefix and uses them as input arguments, if they do not have the value -1.
- After each command, the contents of the JOB_WORK_DIR is copied to the output folder. In this way, you will still have some output if the analysis fails, and you can also see the output appearing gradually as the job is running.
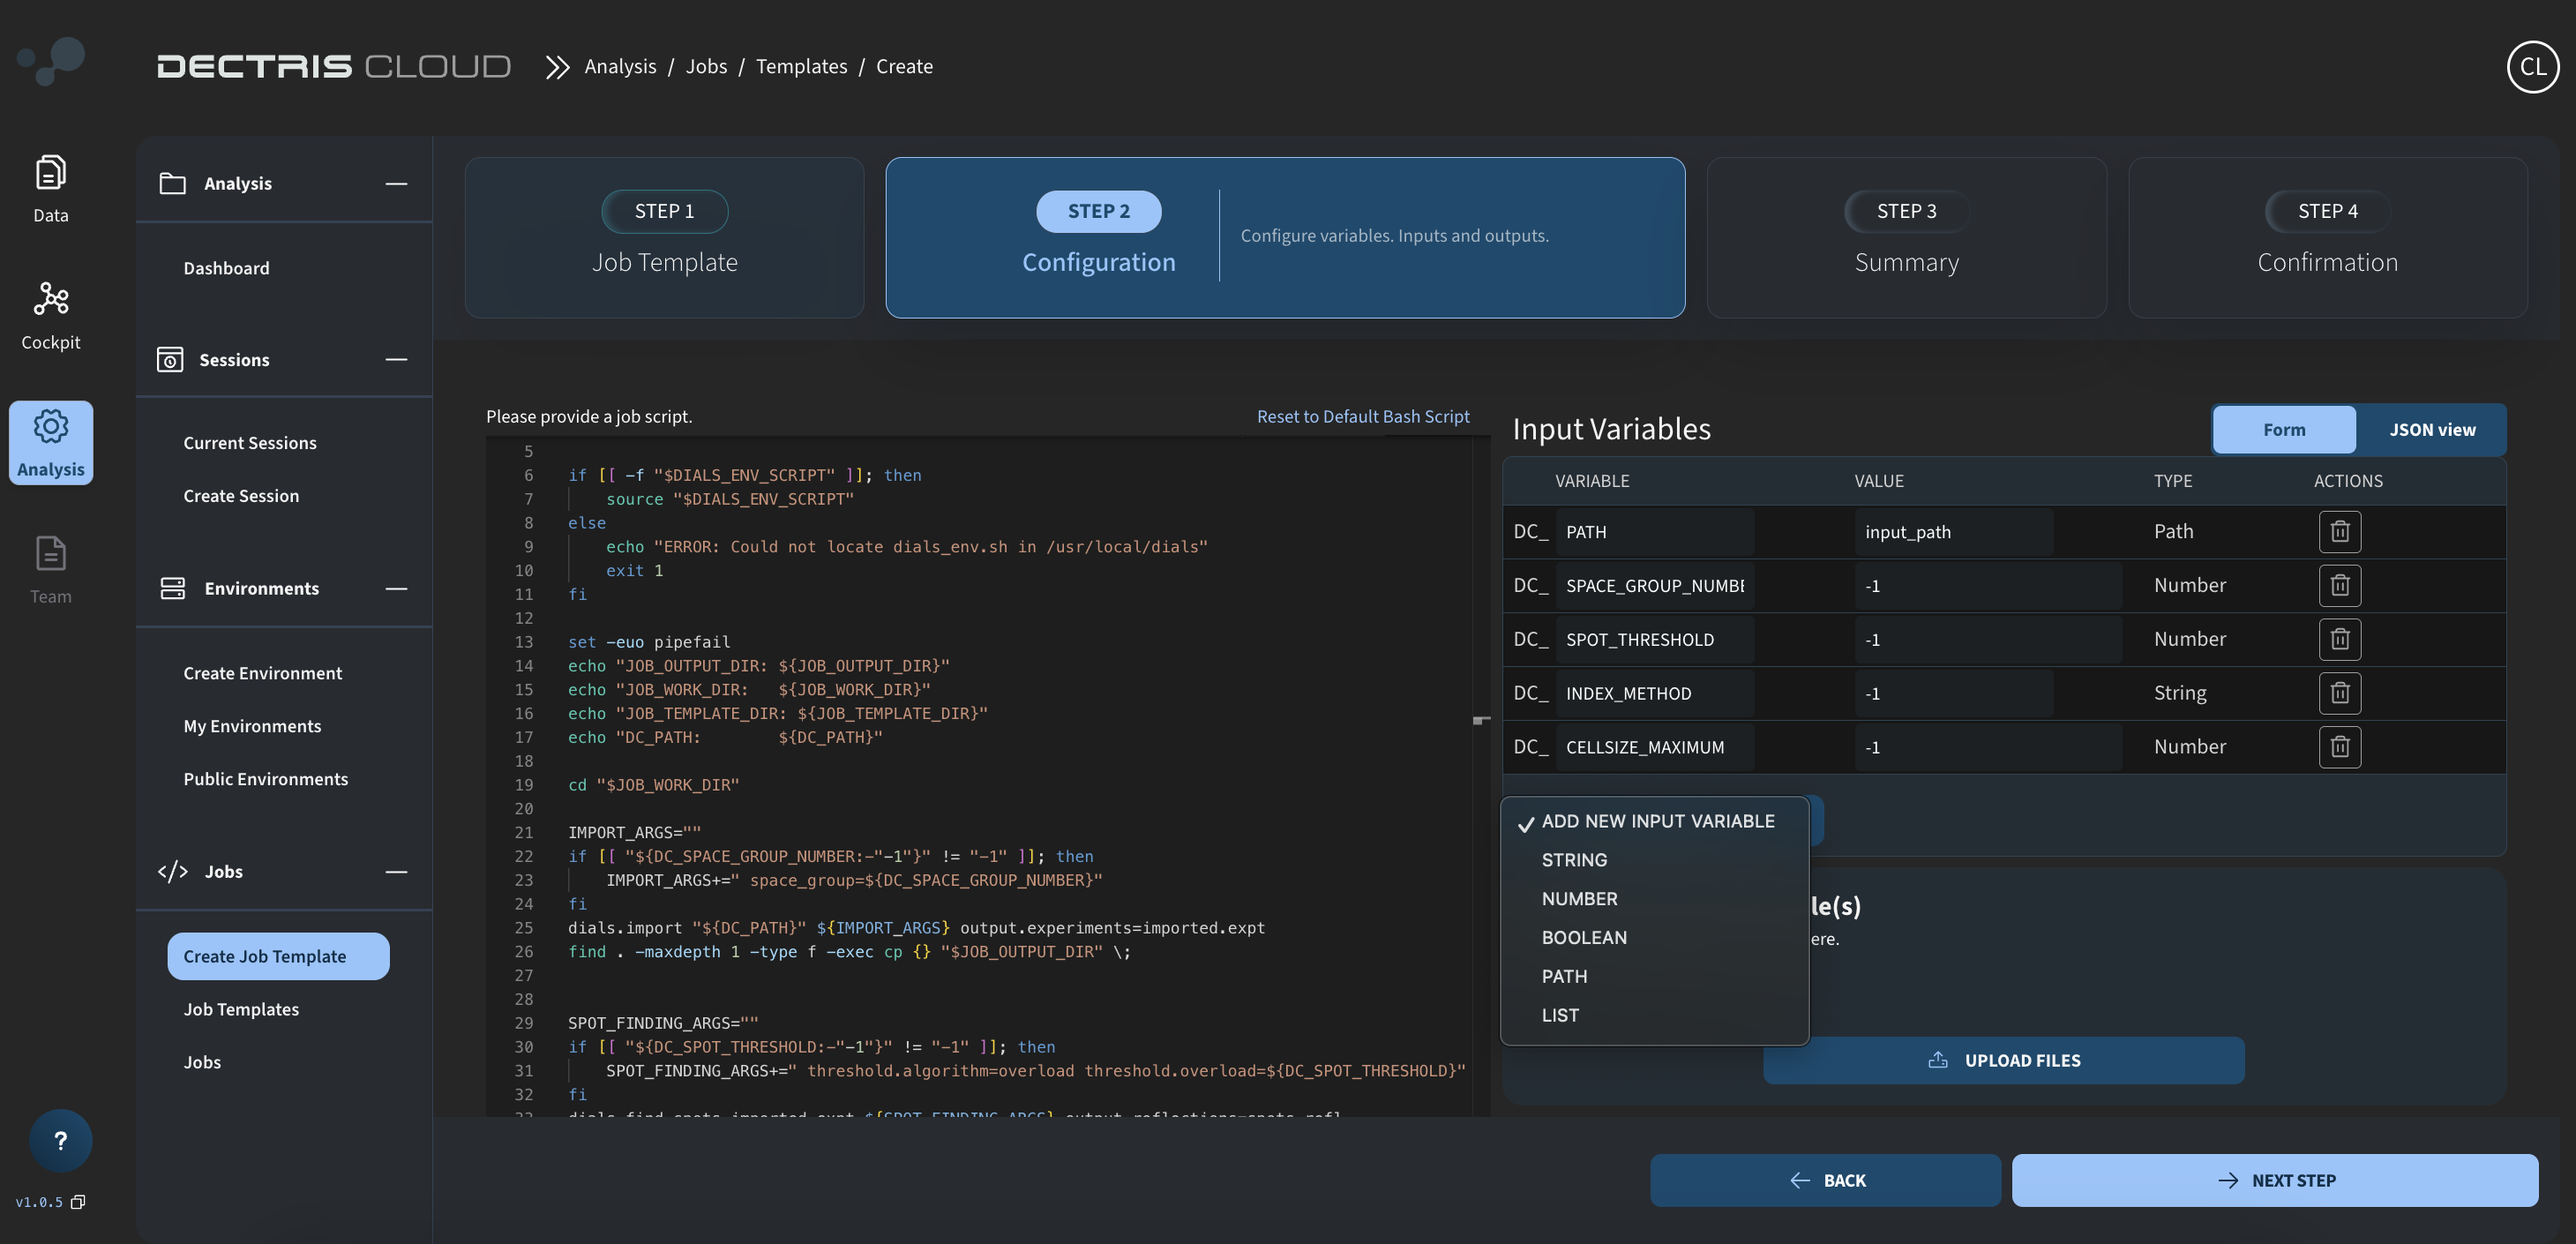
Step 3: Defining the input variables
To the right on the same page, you can define configurable input variables. Most importantly is the DC_PATH variable of type PATH, which defines the path to the data folder.
In addition, other DC_ input variables, referred to in the script will need to be defined here:
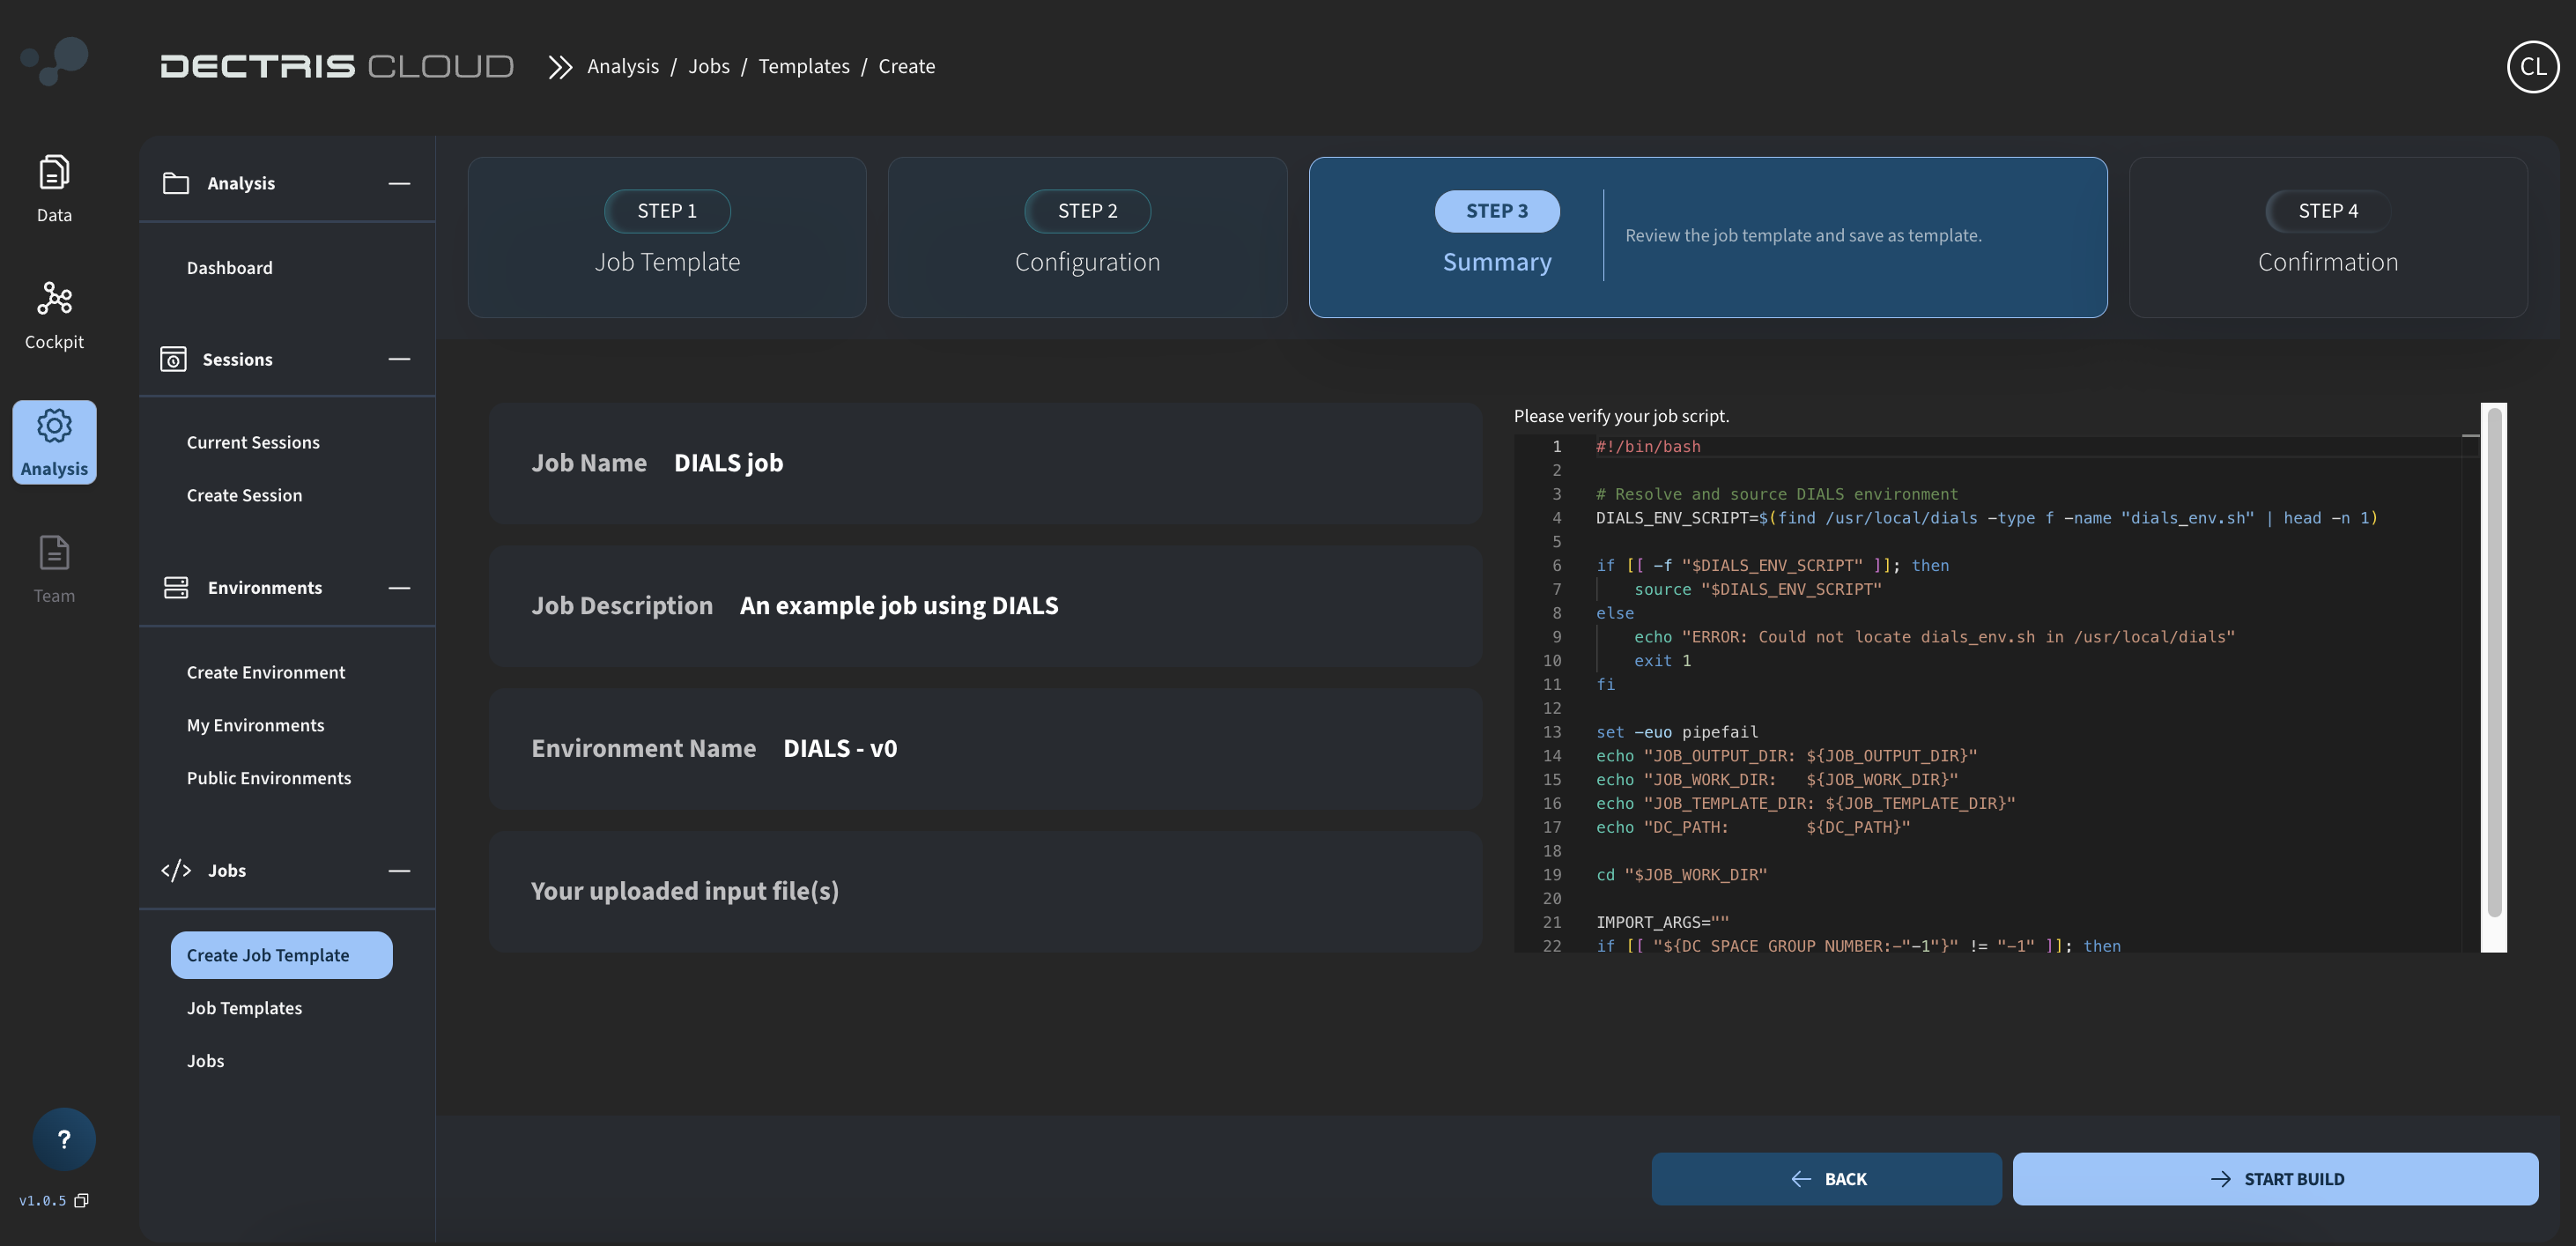
Step 4: Reviewing and saving the job template
On the next page, you can review your template and save it by clicking START BUILD:
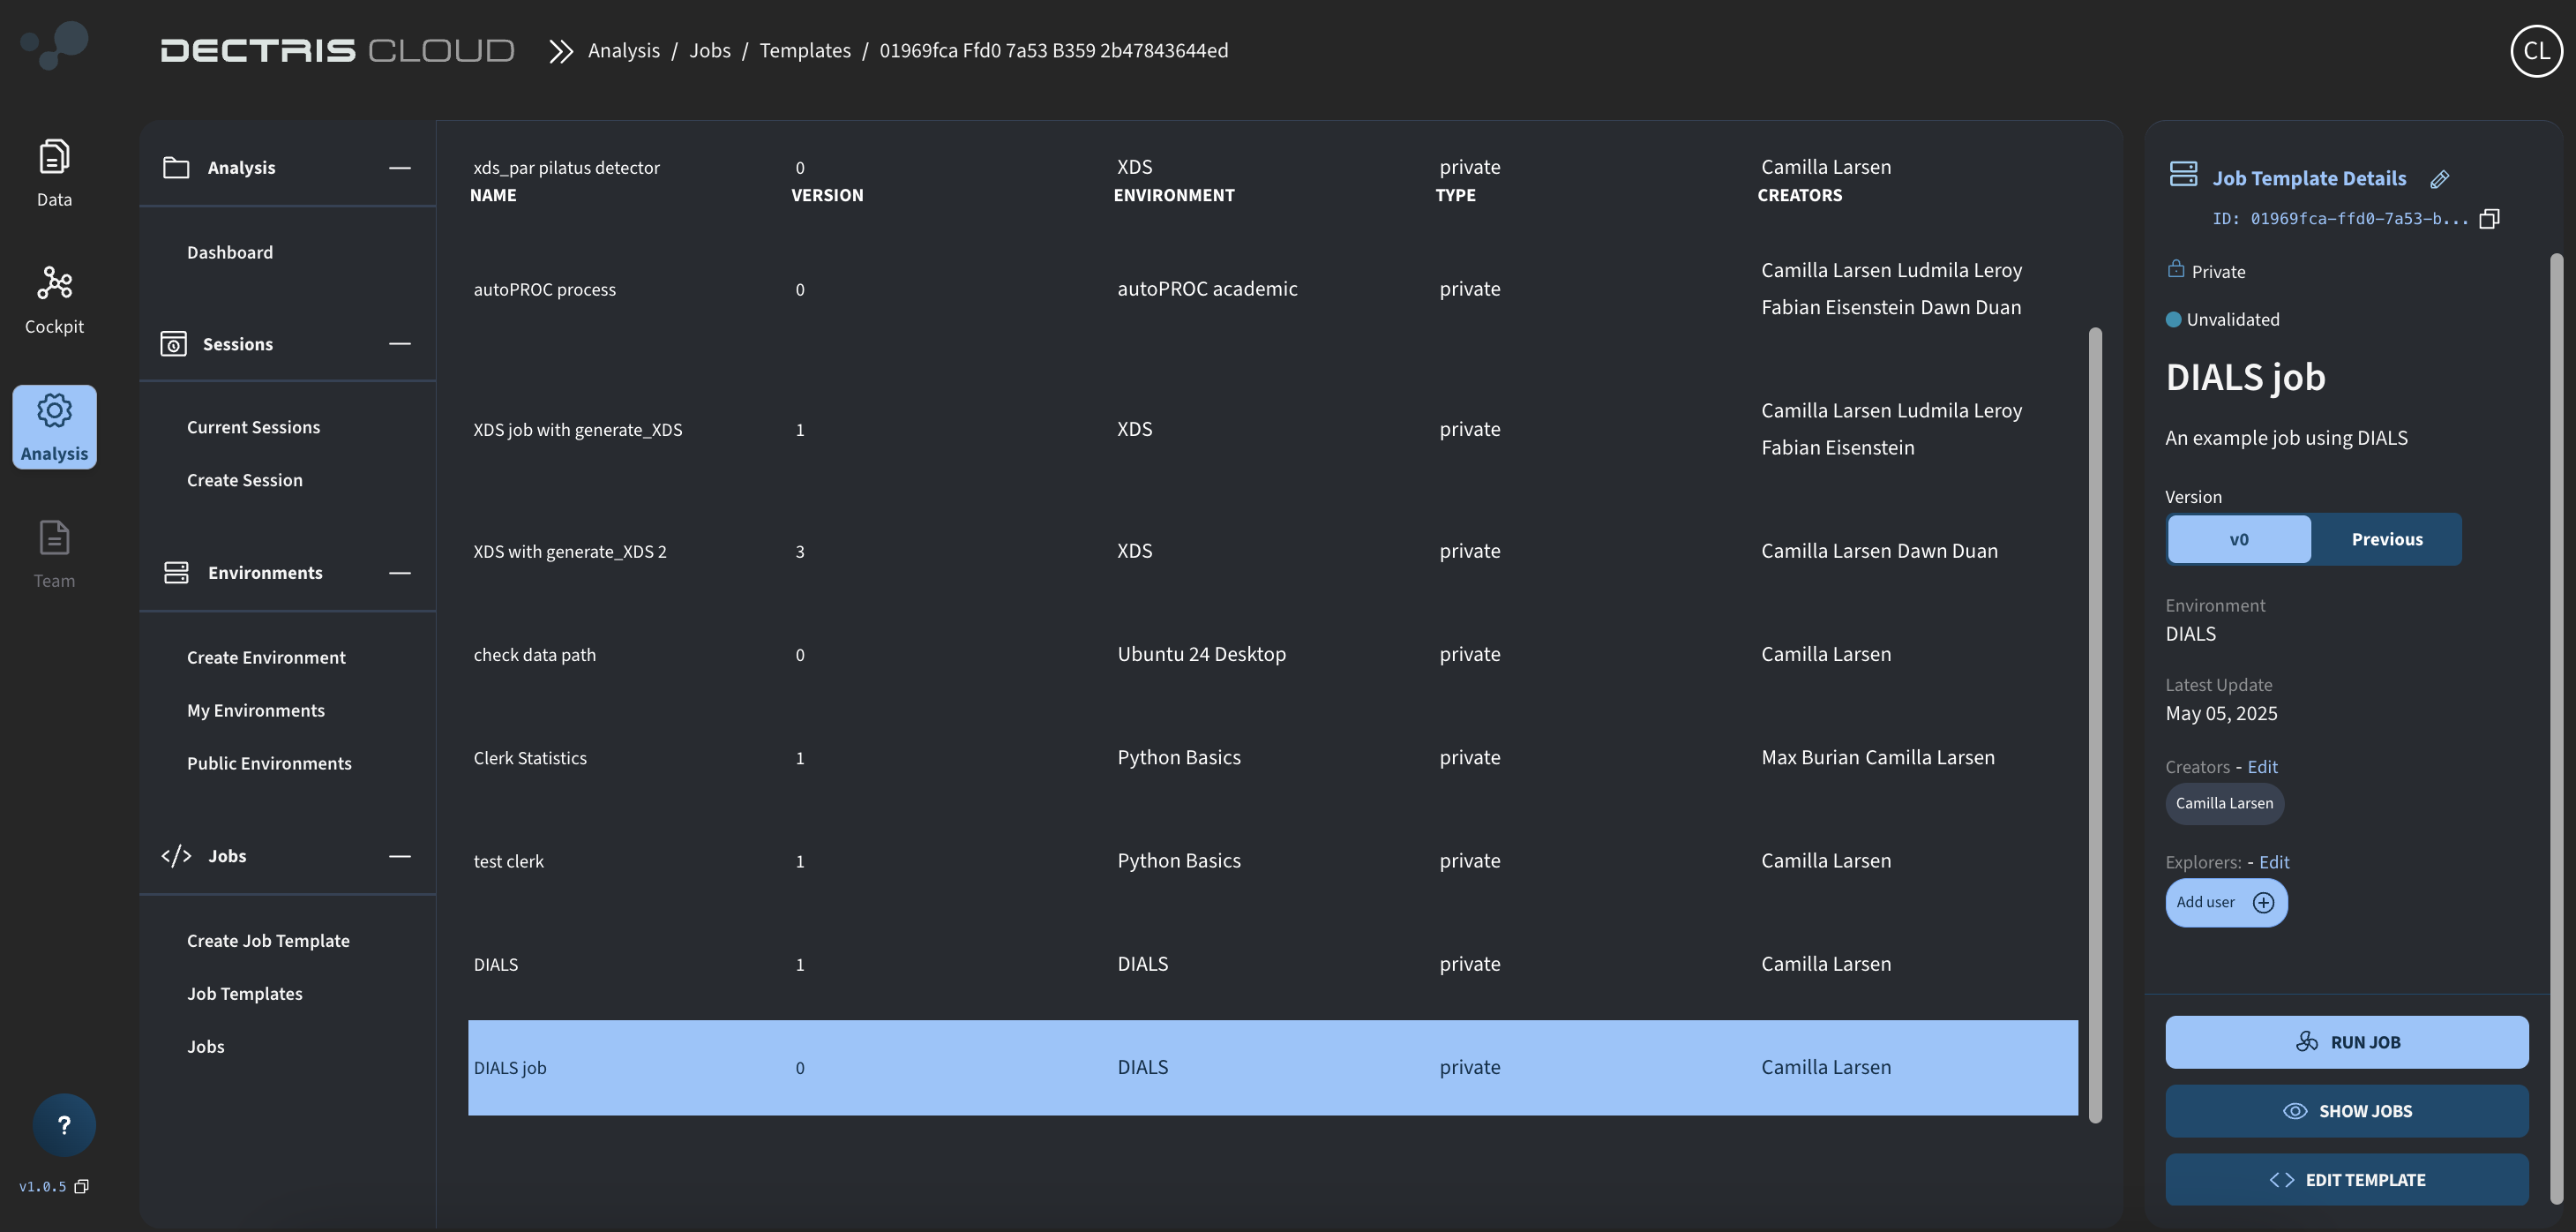
Step 5: Viewing the job template in the table
Once saved, the Template can be viewed in a table at Analysis → Jobs → Job Templates. From here, a job can be started via the RUN JOB button:
Running the job
Step 1: Defining the experimental data path
To start the DIALS job, after clicking the RUN JOB button in the job template table, use the file browser wizard to choose the folder with the data to analyze:
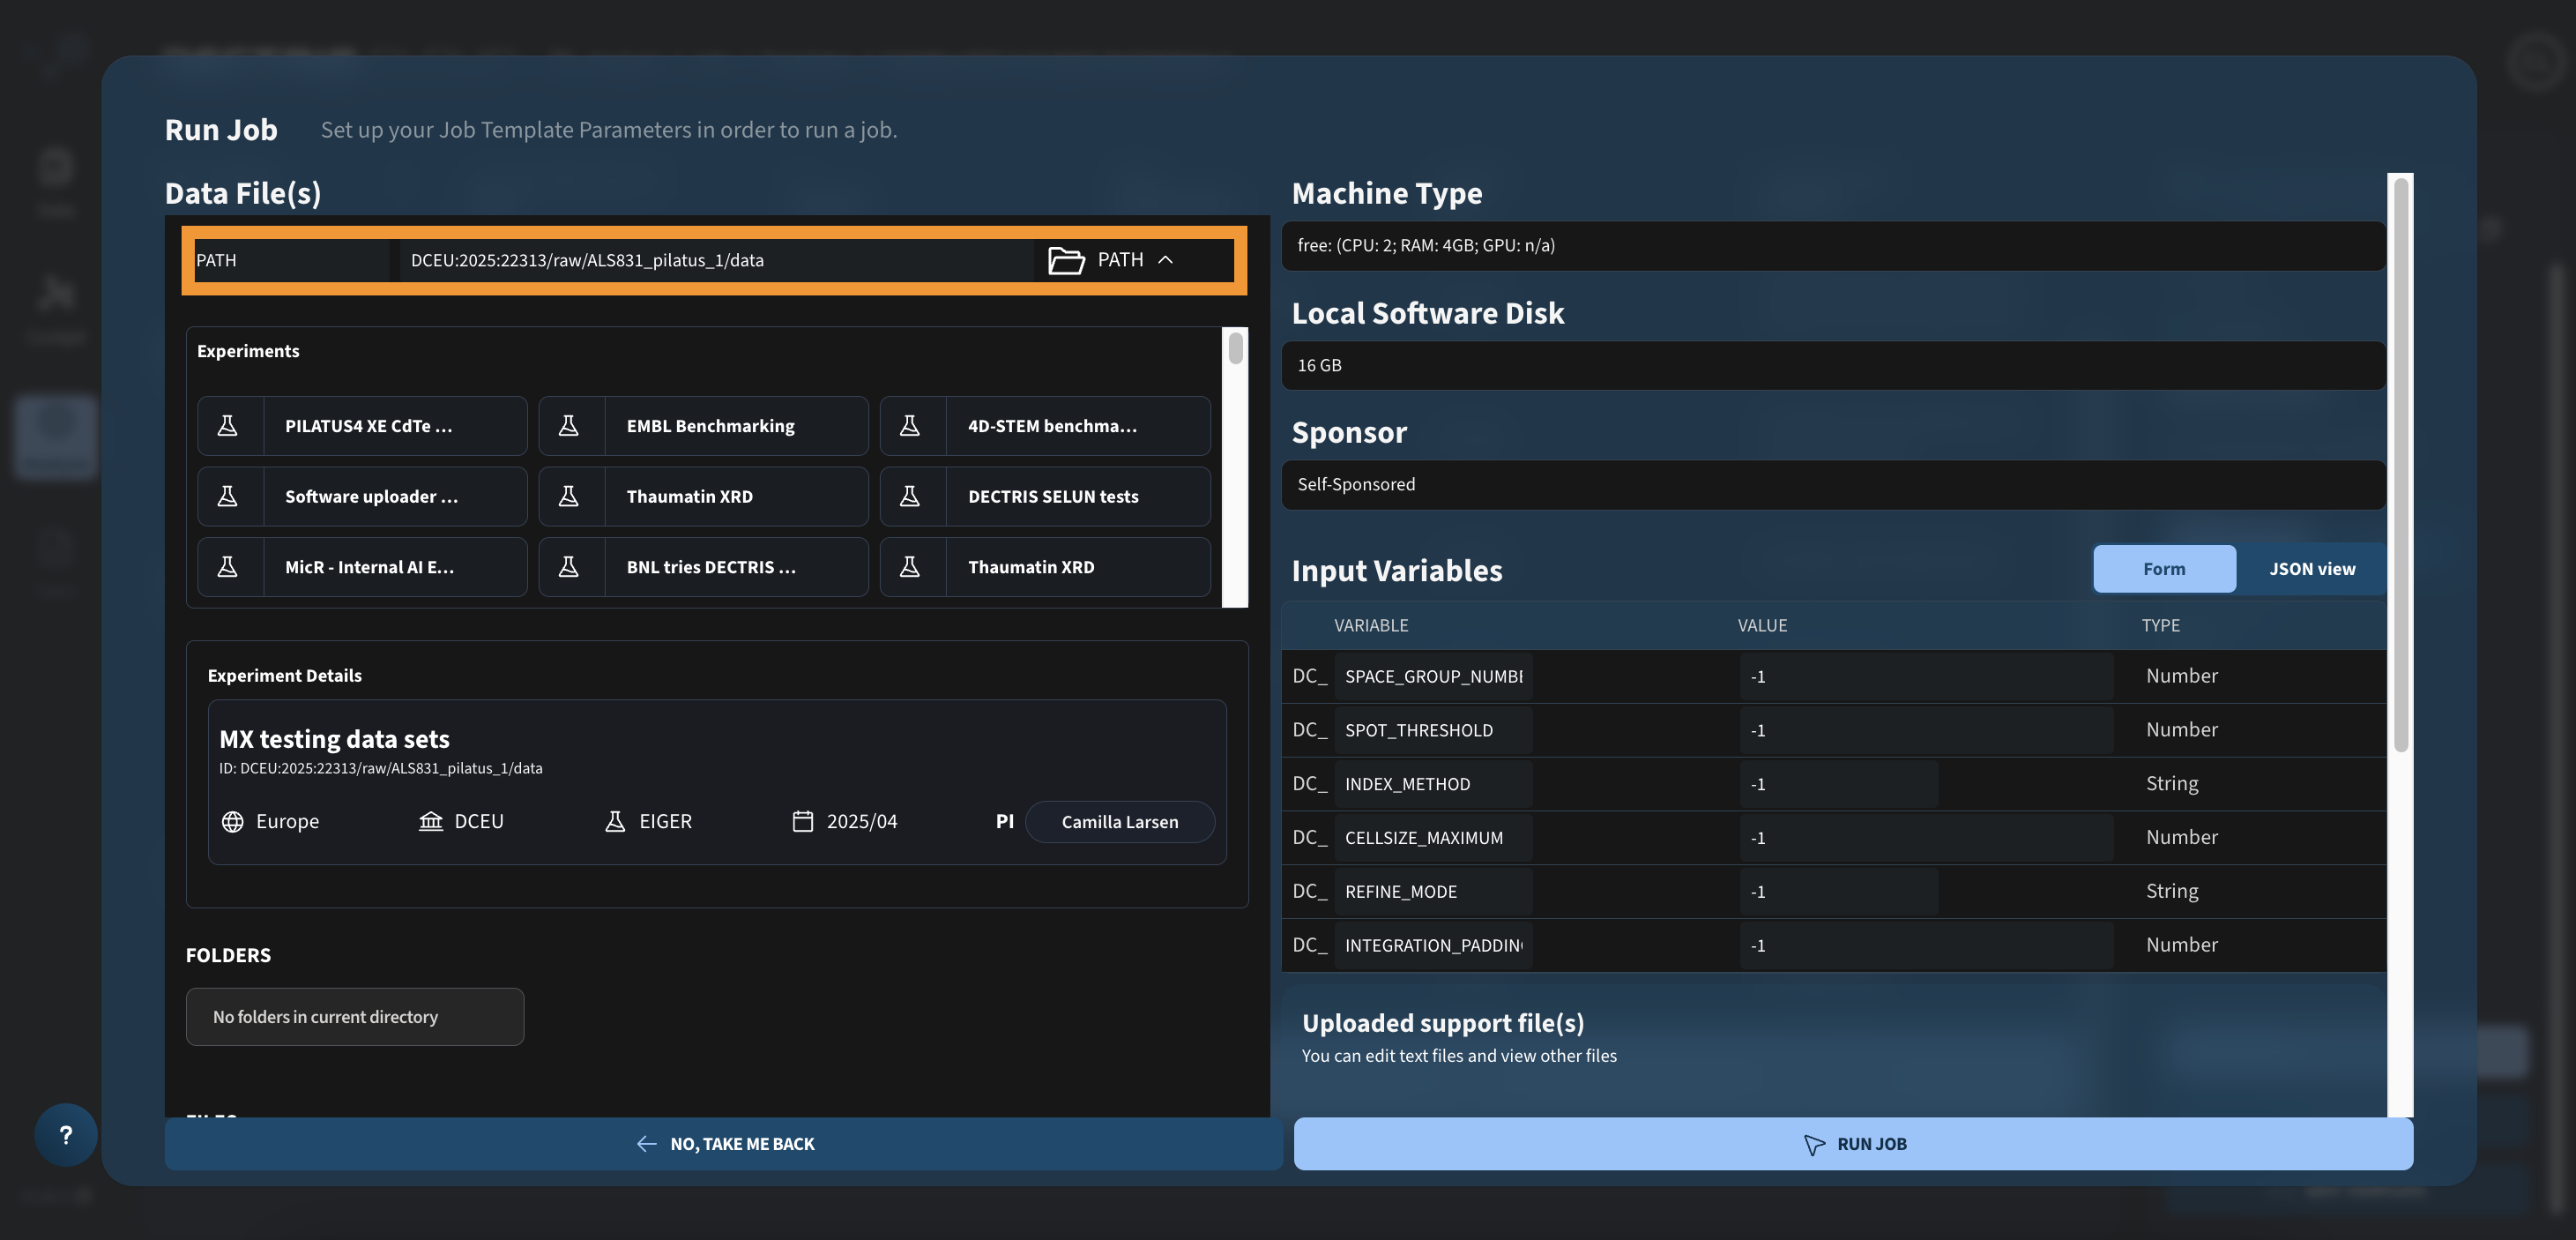
The PATH variable at the top (orange box), should contain the full path to the folder with the files you want to analyze.
Step 2: Configuring the input parameters and launching the job
Choose the machine type and local software disk appropriate for your job. For the DIALS job, it is essential that you make sure that you have enough RAM for analyzing your data. Additionally, the local software disk should be large enough to store any temporary or results files generated during the process:
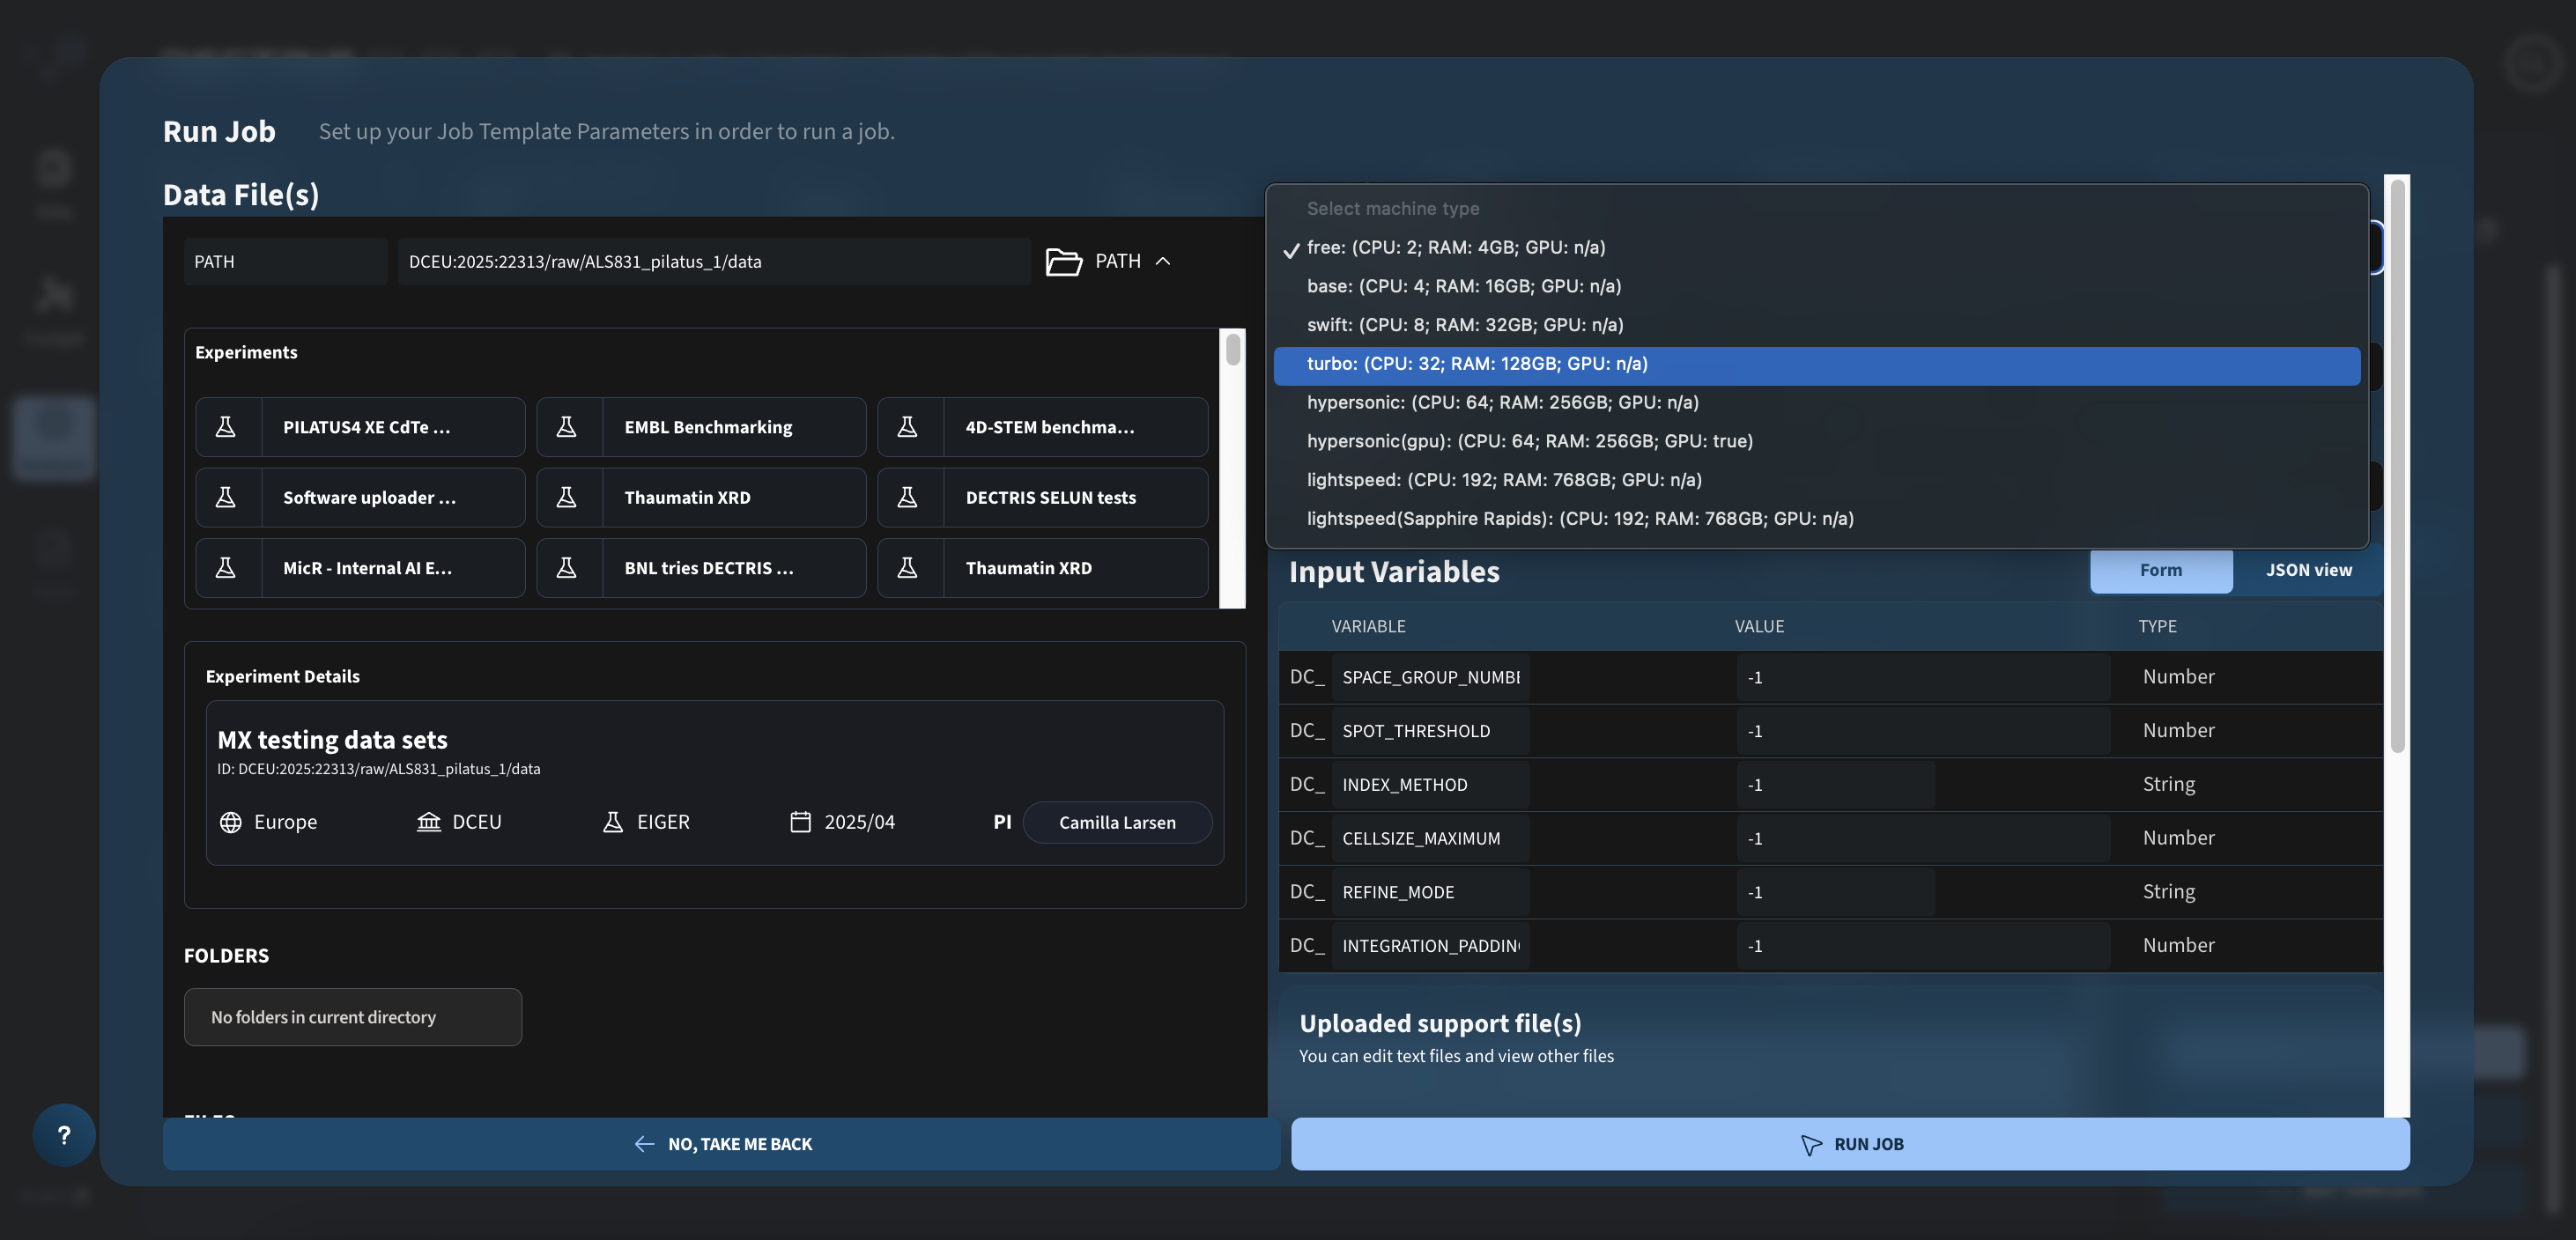
Finally, the input variables can be given values different from -1, if you want to include them as input arguments for the DIALS commands.
Once you have configured the job for your liking, launch it by pressing RUN JOB.
Viewing the output
Step 1: Viewing the output in the table
Once launched, the job and its output can be viewed in the jobs table: Analysis → Jobs → Jobs. Clicking the eye symvol will bring up details such as the job ID, current duration of the job, as well as the job log:
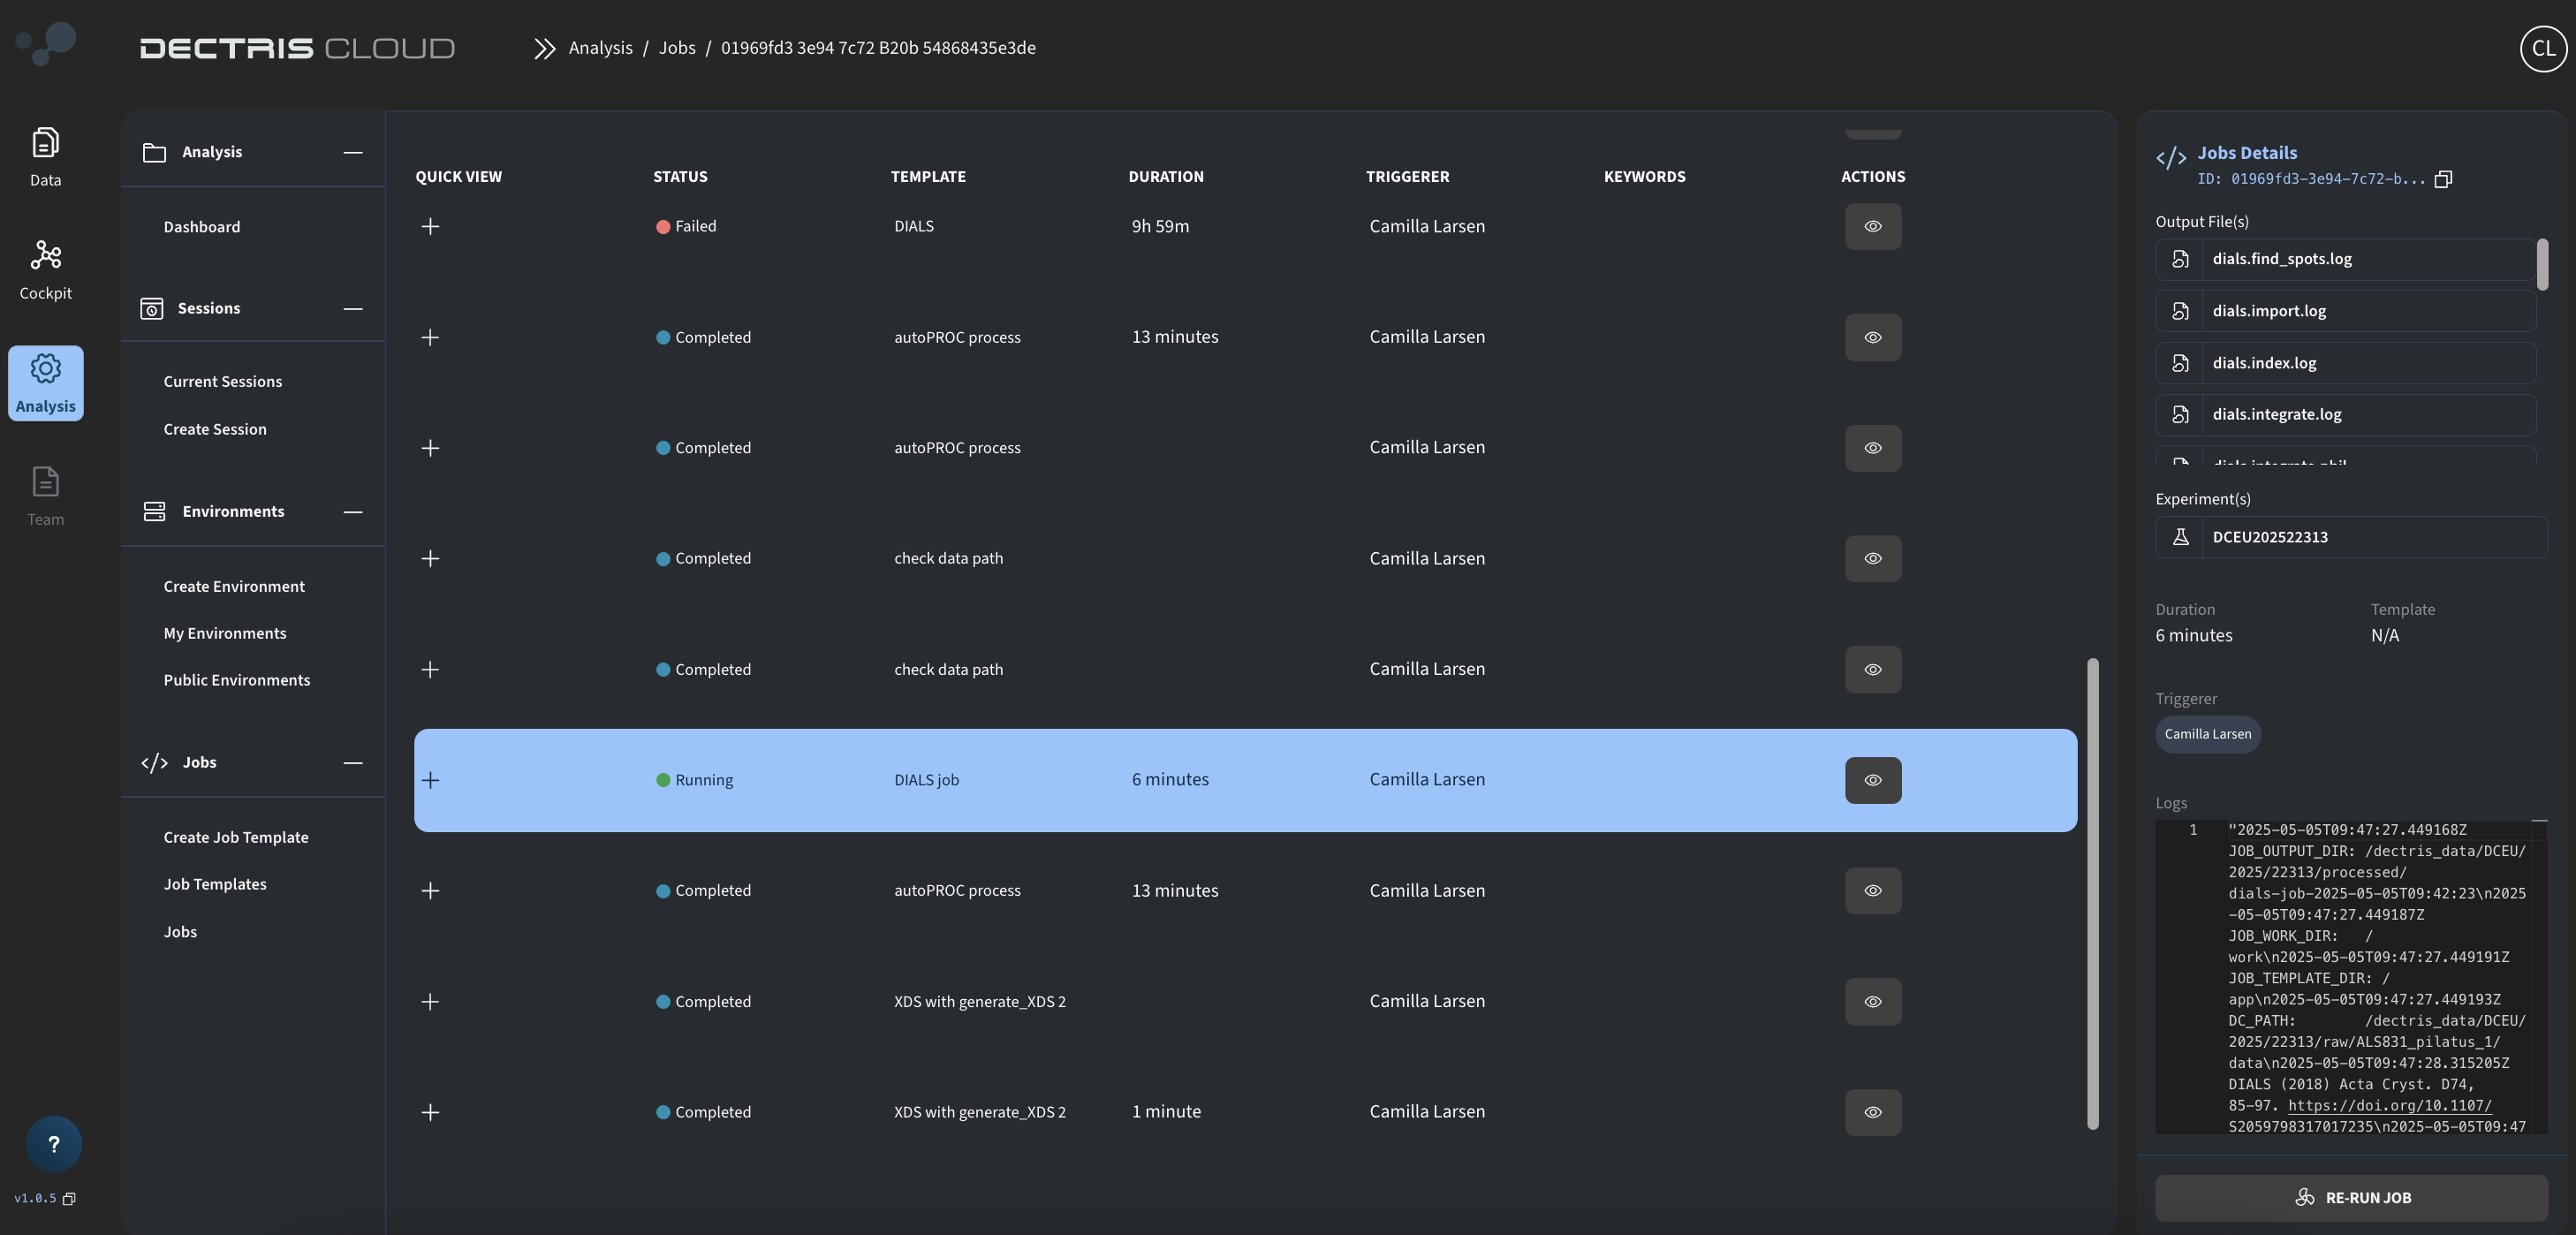
Pressing the + symbol gives an overview of the generated output files. As the job is running and goes through the different DIALS commands, more and more output files will gradually by added to the overview.

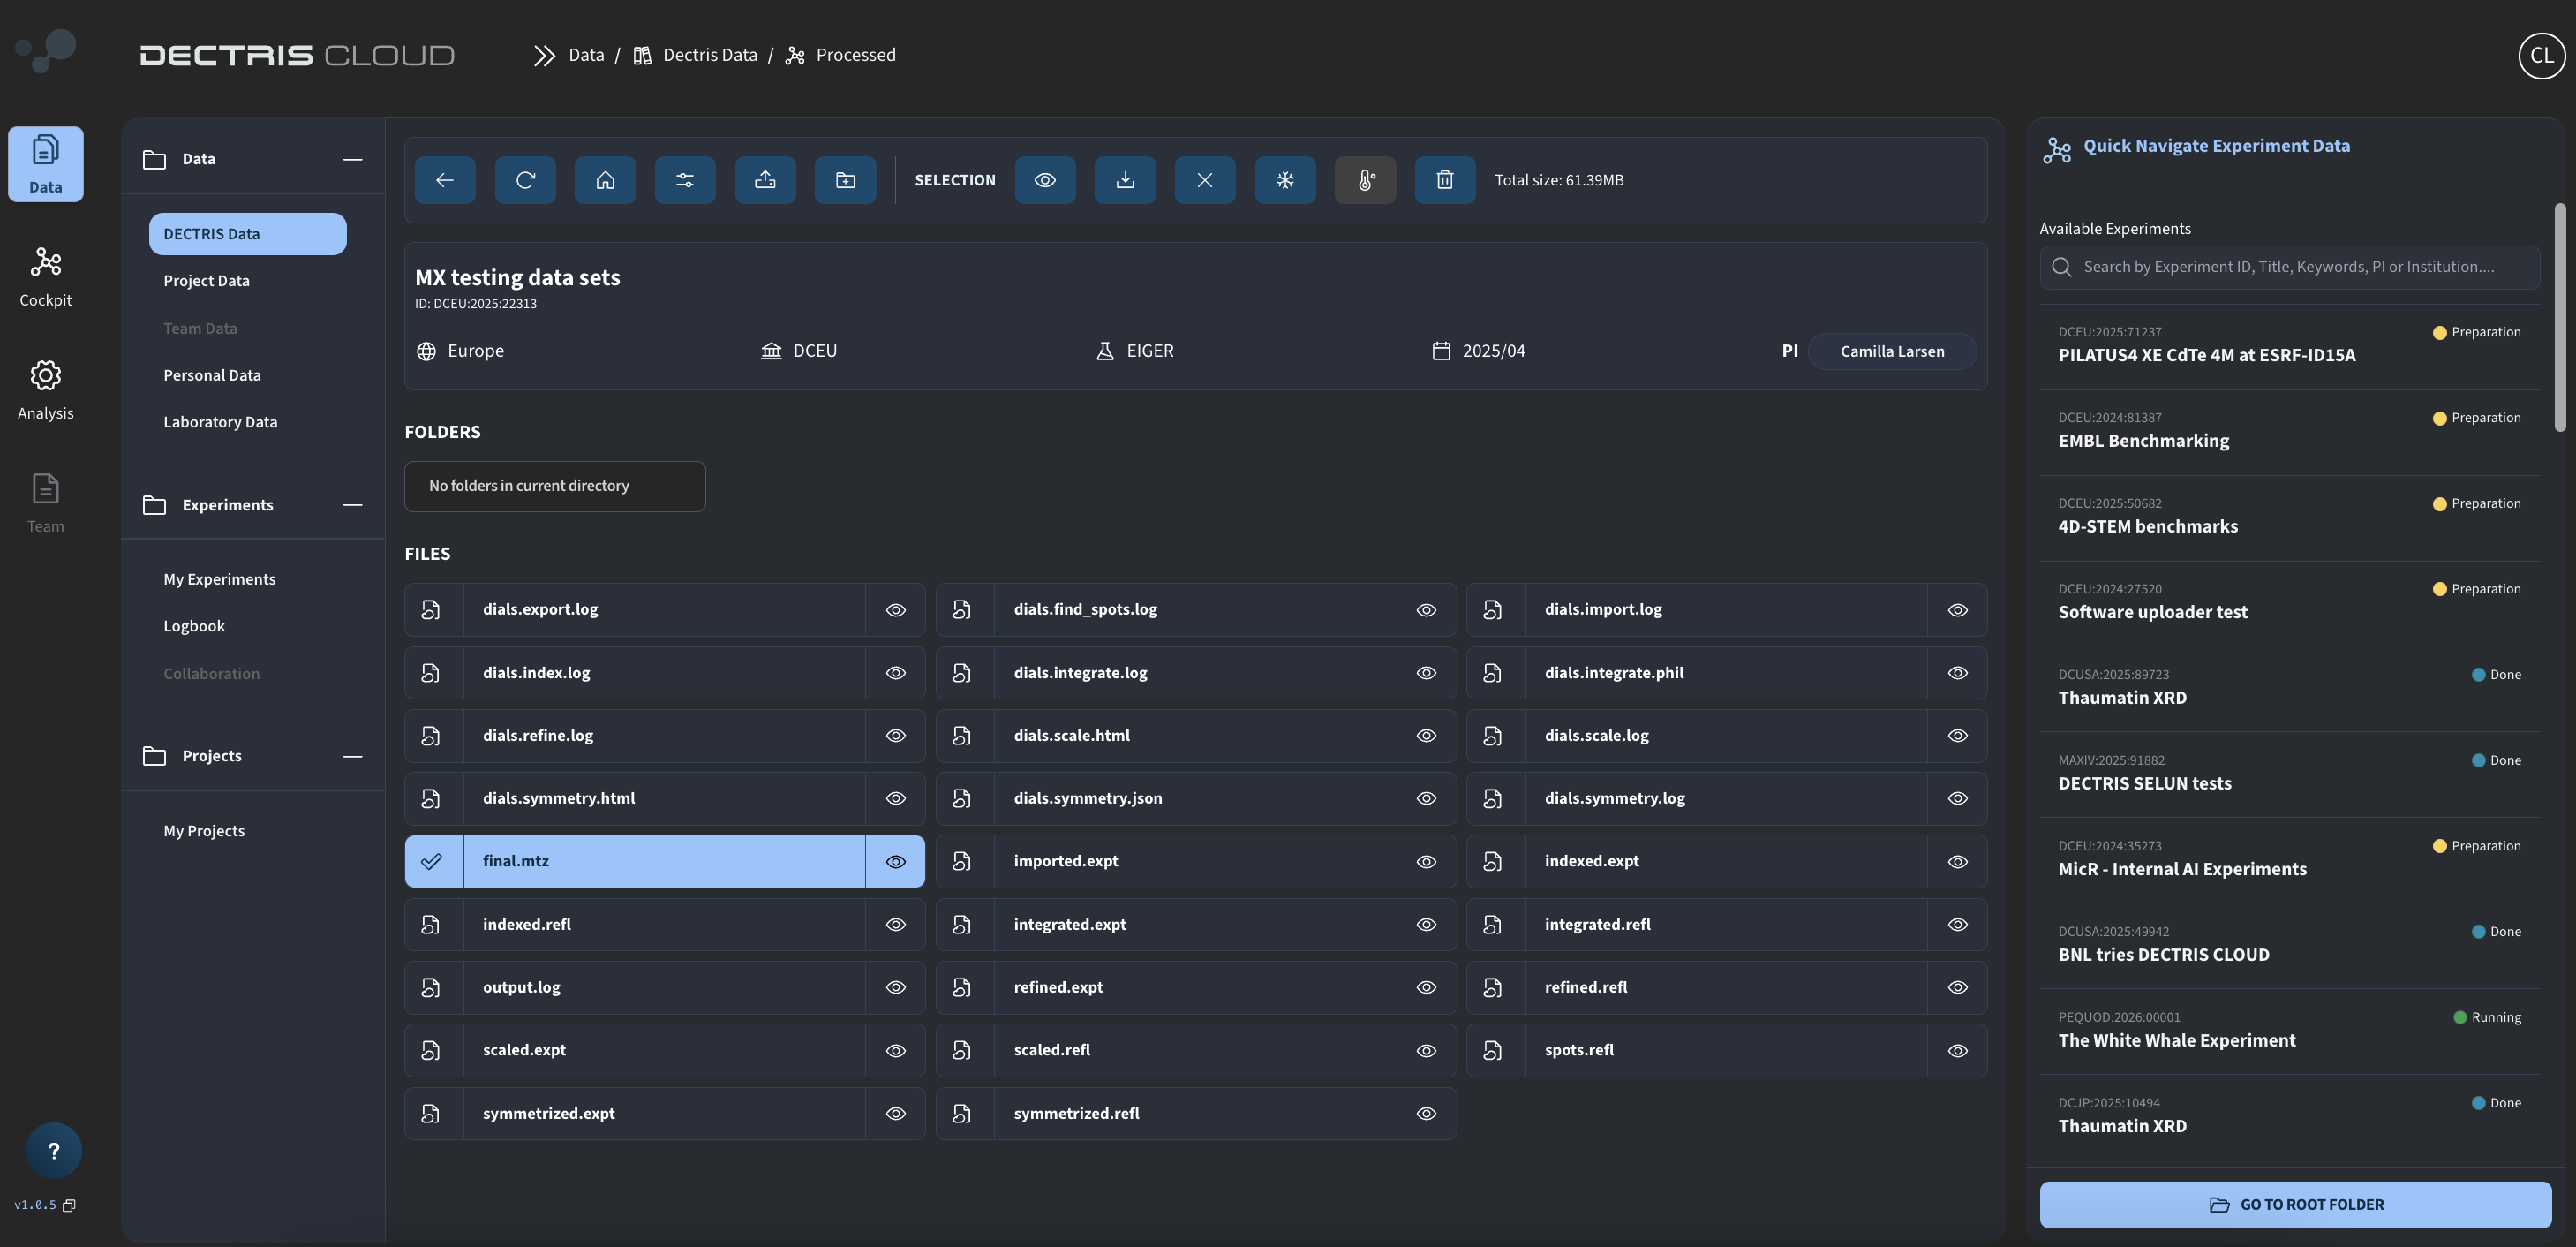
Step 2: Viewing the output in the processed folder
In addition, in the "processed" folder of the experiment, a subfolder can be found with all generated output files as well: