
Jobs
Jobs are processing tasks that you can execute directly through the Web app without starting an interactive Session. They are particularly useful for reproducible workflows that do not require manual interaction via a graphical user interface (GUI), and they can furthermore run uninterrupted for longer (up to 72 h) than a Session.
Job Templates
Each job is defined by a Job Template, which consists of a bash script containing the necessary processing commands and an associated Environment that includes all the required software tools. You can conveniently configure environment variables as input parameters, allowing the same job script to run with different settings and inputs.
Creating a Job Template
Start creating a Job Template by navigating to Analysis → Jobs → Create Job Template:

Choose whether you want to script the job template in Bash or Python and then click NEXT STEP:

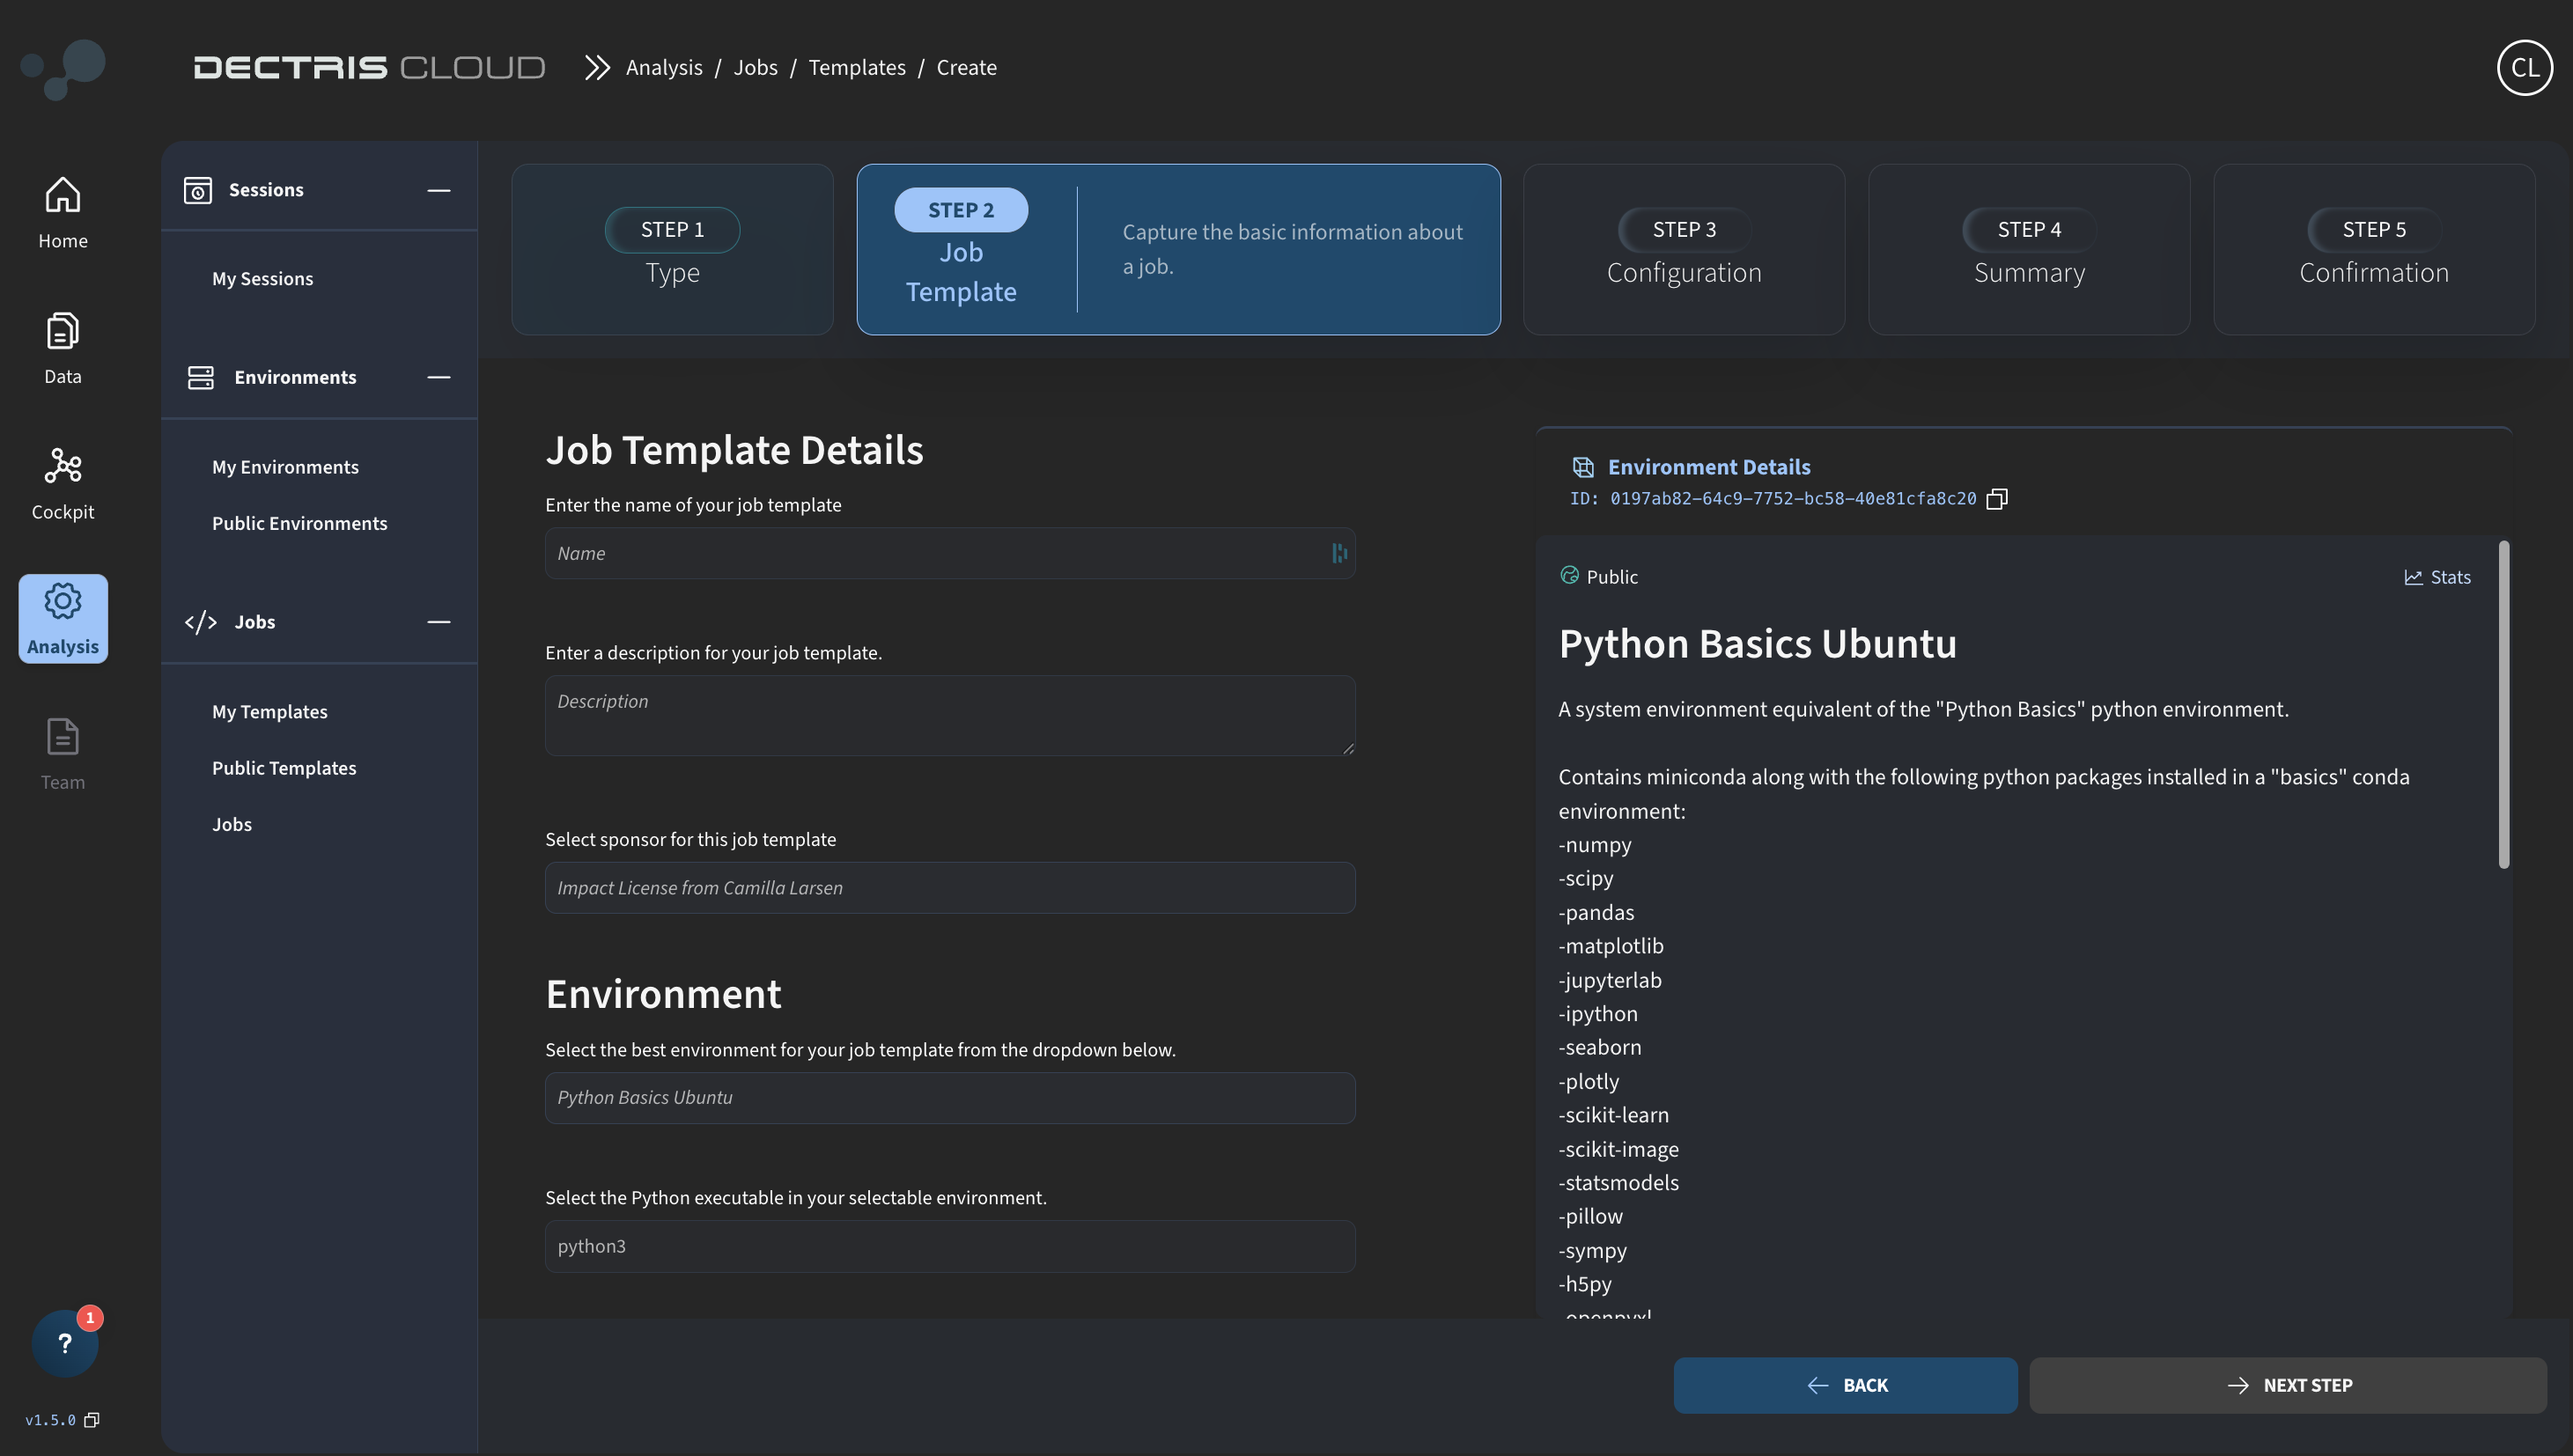
Here you can specify the initial details of the Job Template, such as its name, a description and the environment which it should run with. Note that if your environment has several versions, you can click on the Previous tab (marked with orange box) to choose the environment version you want to use.
Note that if you chose Python as your scripting language, you will additionally have to specify the path to the Python executable within your chosen environment. This could, for example, be python3 or /opt/conda/envs/basics/bin/python dependent on how Python has been configured within your chosen environment.
Clicking on NEXT STEP, brings you to the next stage of the creation process, where you can define the analysis script:
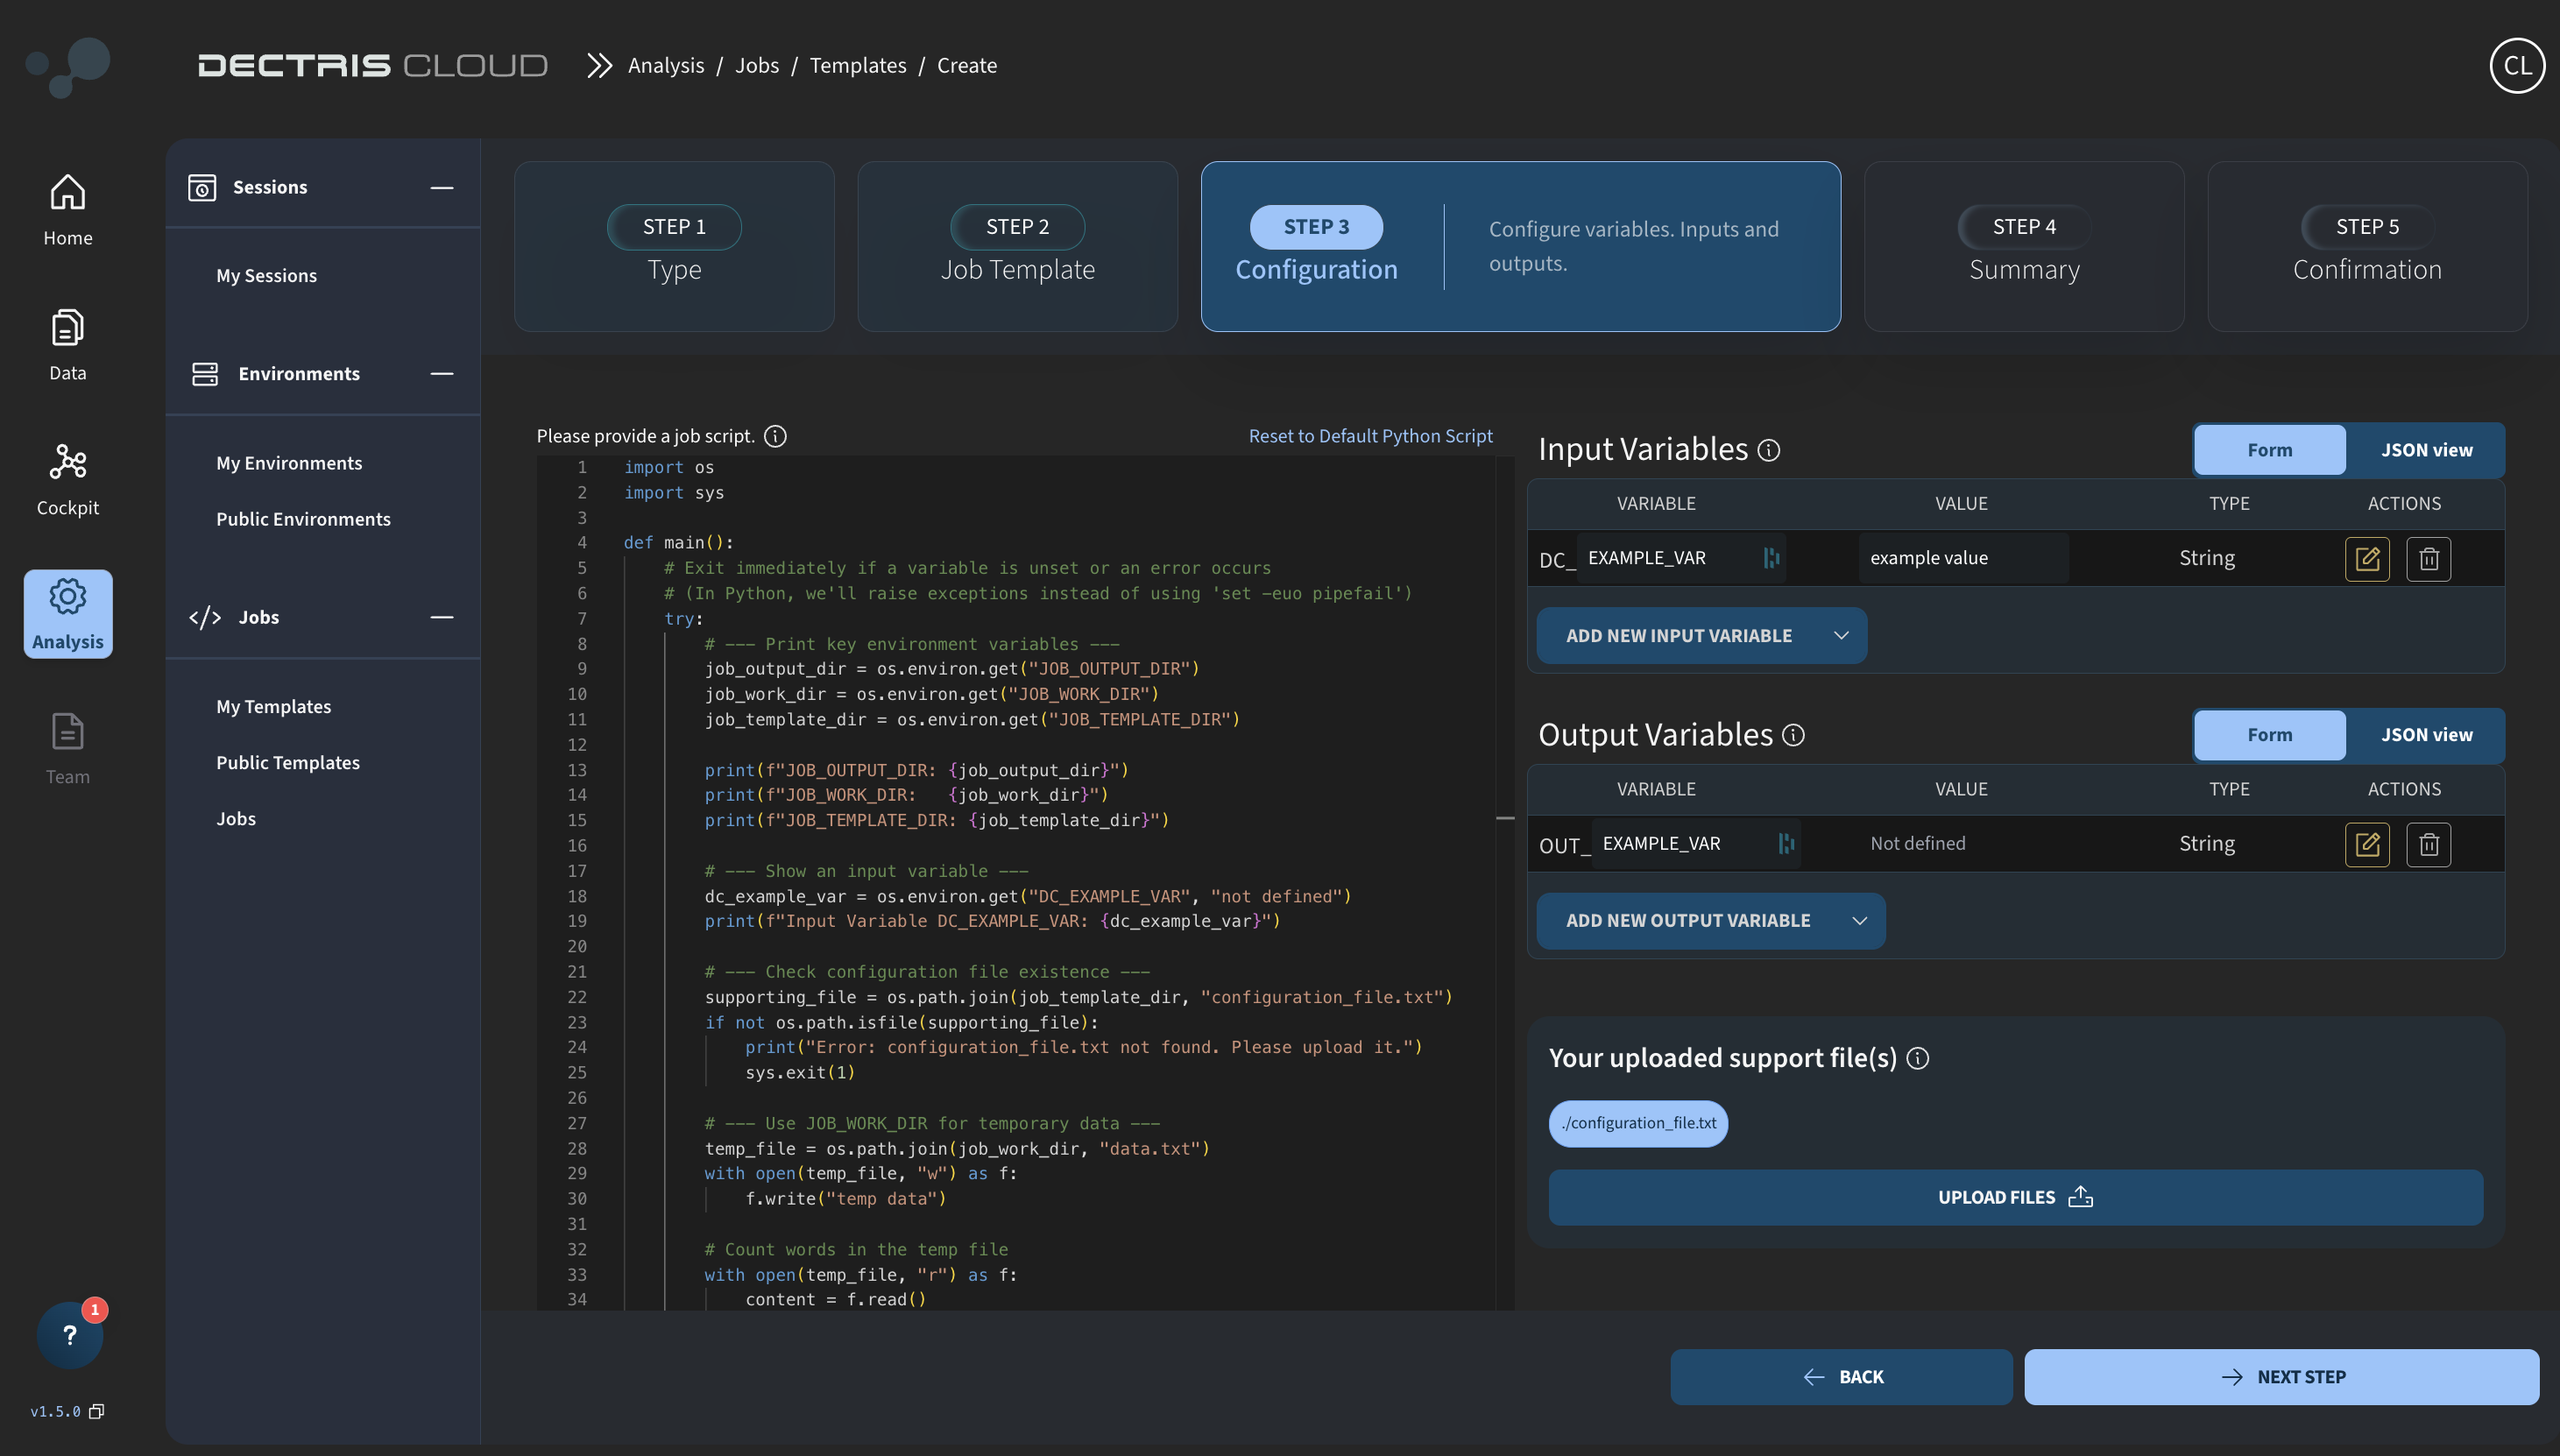
Within the script, you can specify the exact commands to run the Job. Make note of the following predefined environment variables:
- JOB_WORK_DIR :: Contains the path to the default /work directory for the job.
- JOB_OUTPUT_DIR :: Contains the path to the output directory. Files copied to the output directory will appear in the output overview in the Jobs Overview Table and will in addition also be accessible in the 'Processed' folder of the experiment
- JOB_TEMPLATE_DIR :: Contains the path to the directory in which the support files are uploaded. Files in this directory are not writeable, but can be copied to the working directory.
In addition, you can define your own environment variables as configurable Input Variables. Each Input Variable has a hardcoded DC_ prefix, which must be included when referring to the variable in the bash script. The value given for each Input Variable is a default value, which can be overwritten when running the job.
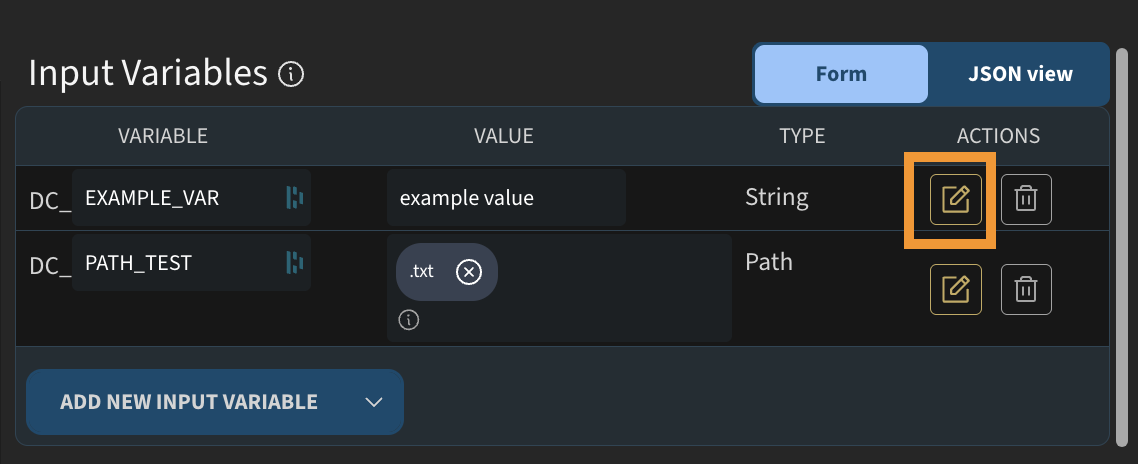
Note also that Input Variables with the type "Path" (as defined above) are special, because they can can point to a data destination within an experiment or project.
Output variables can also be defined as part of the job script. These are environment variables with an OUT_ prefix that capture values at the end of a job run and store them as part of the job metadata. They are easily viewable in the job details page after a run.
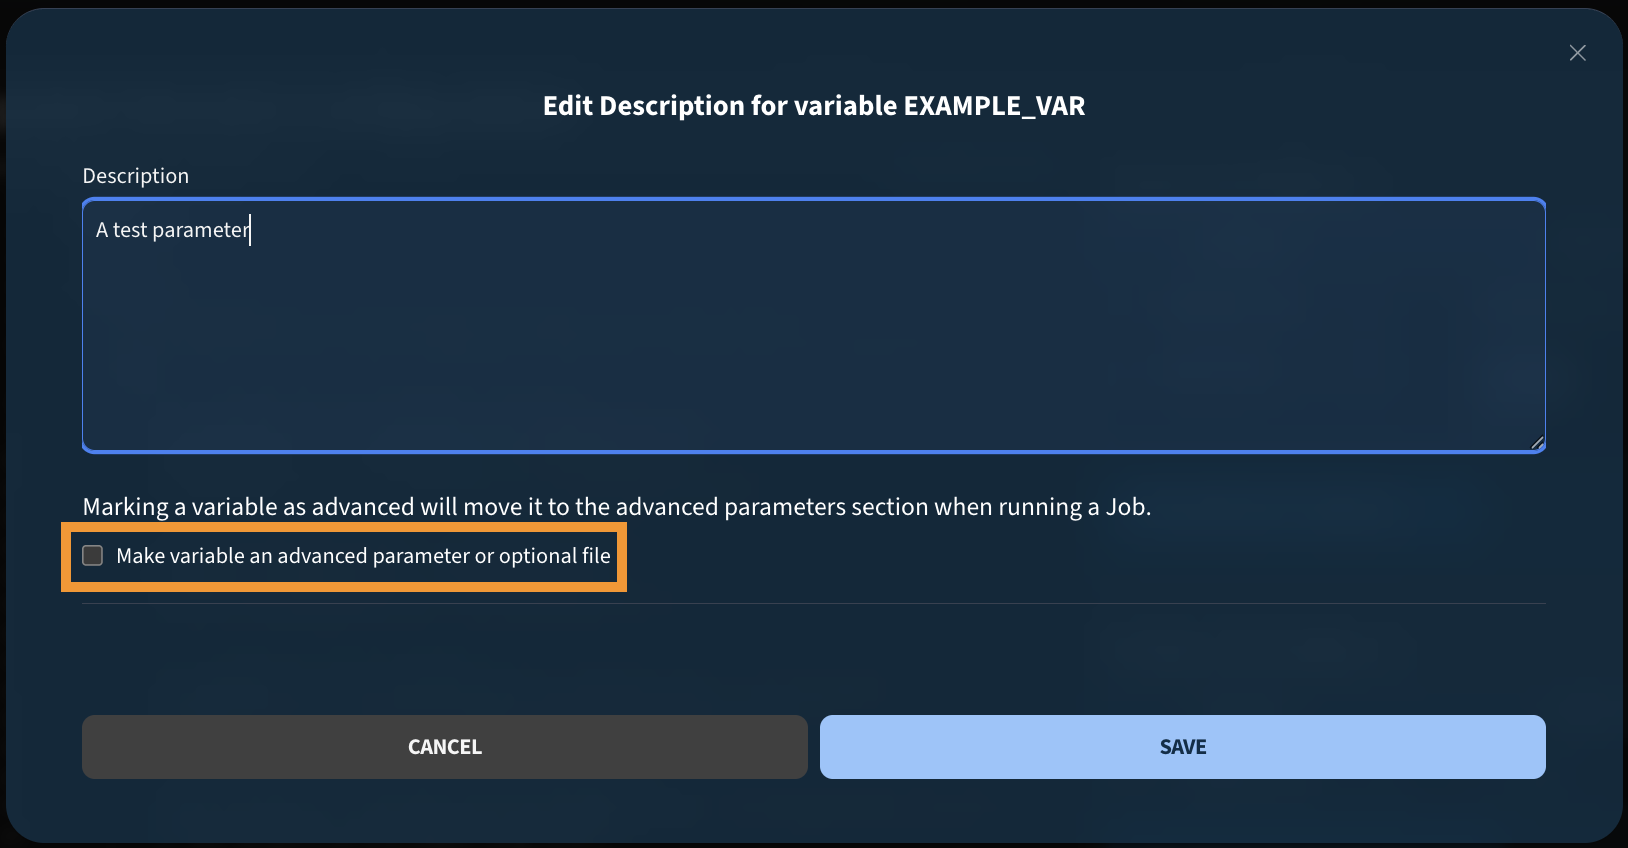
Both input and output variables can be given a description to provide context for other users. Click the edit button next to any parameter to open the settings dialogue, where you can:
- Add a description to explain what the parameter does or what values are expected.
- Mark the parameter as advanced, which hides it from the default job run view. Advanced parameters are only shown when the user explicitly requests them, keeping the job run page clean in cases where a template has many optional parameters that only expert users would typically modify.
Finally support files such as .py files can be uploaded and accessed via the JOB_TEMPLATE_DIR directory.
Managing Job Scripts
Saved Job Templates can be viewed in the table at Analysis → Jobs → My Job Templates:
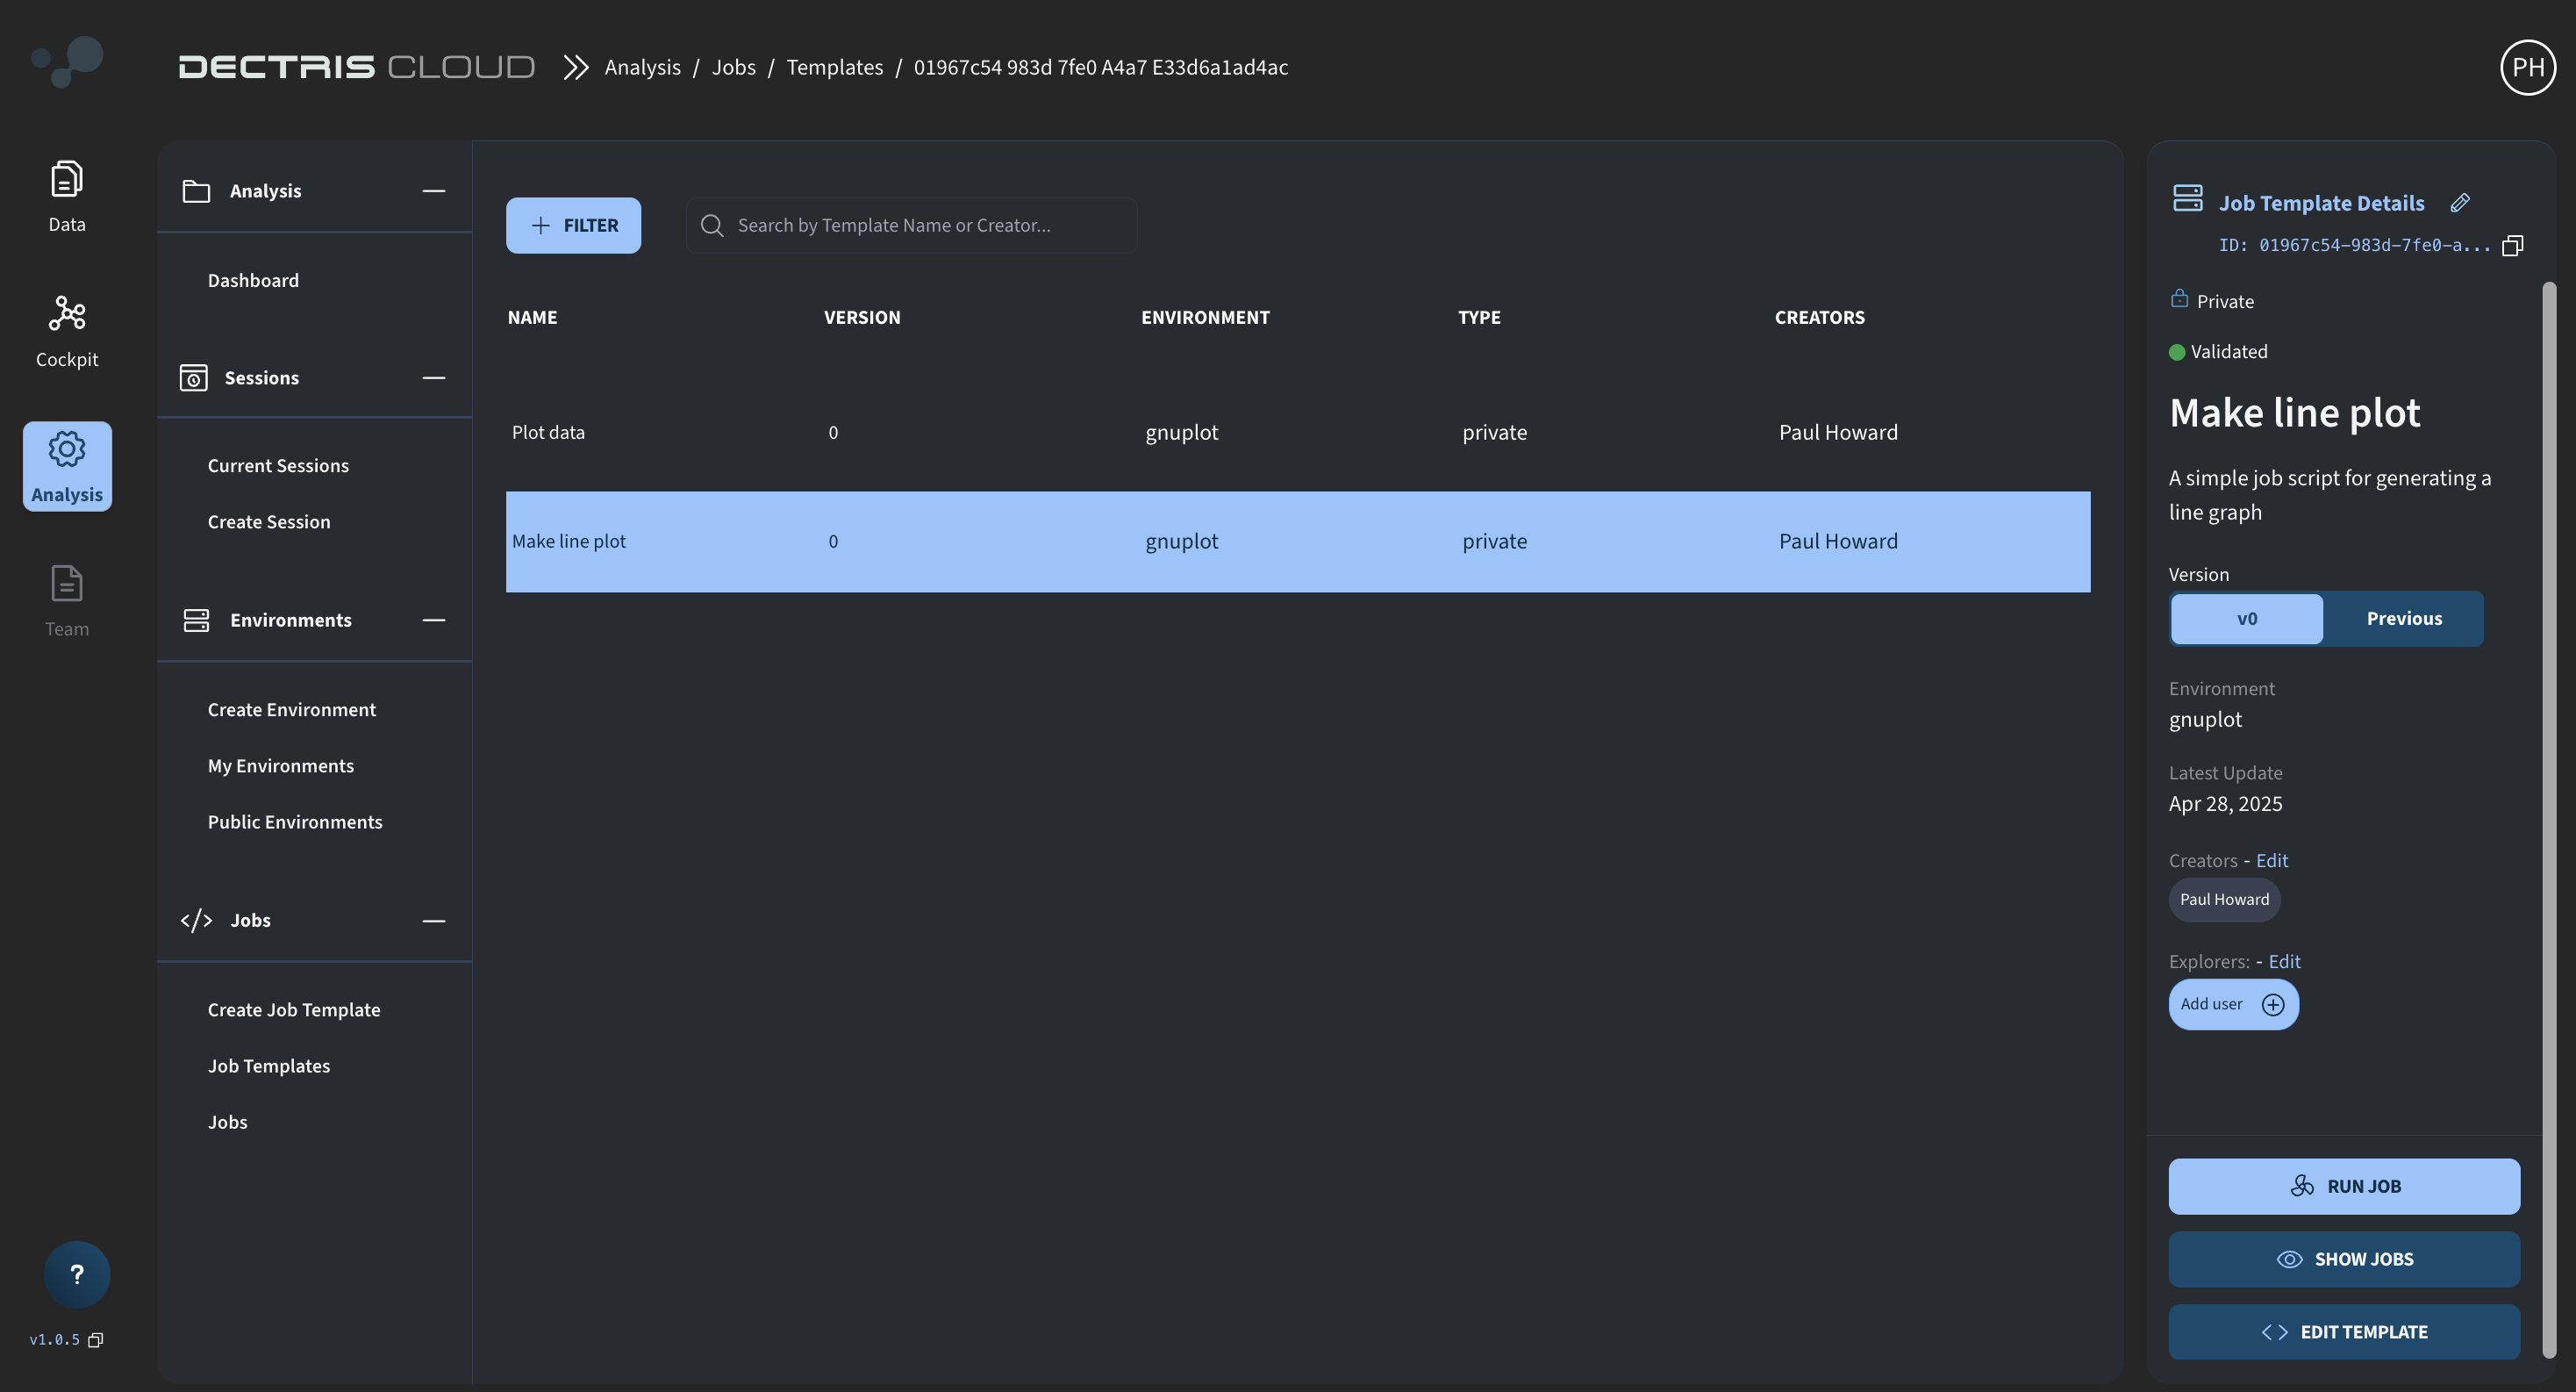
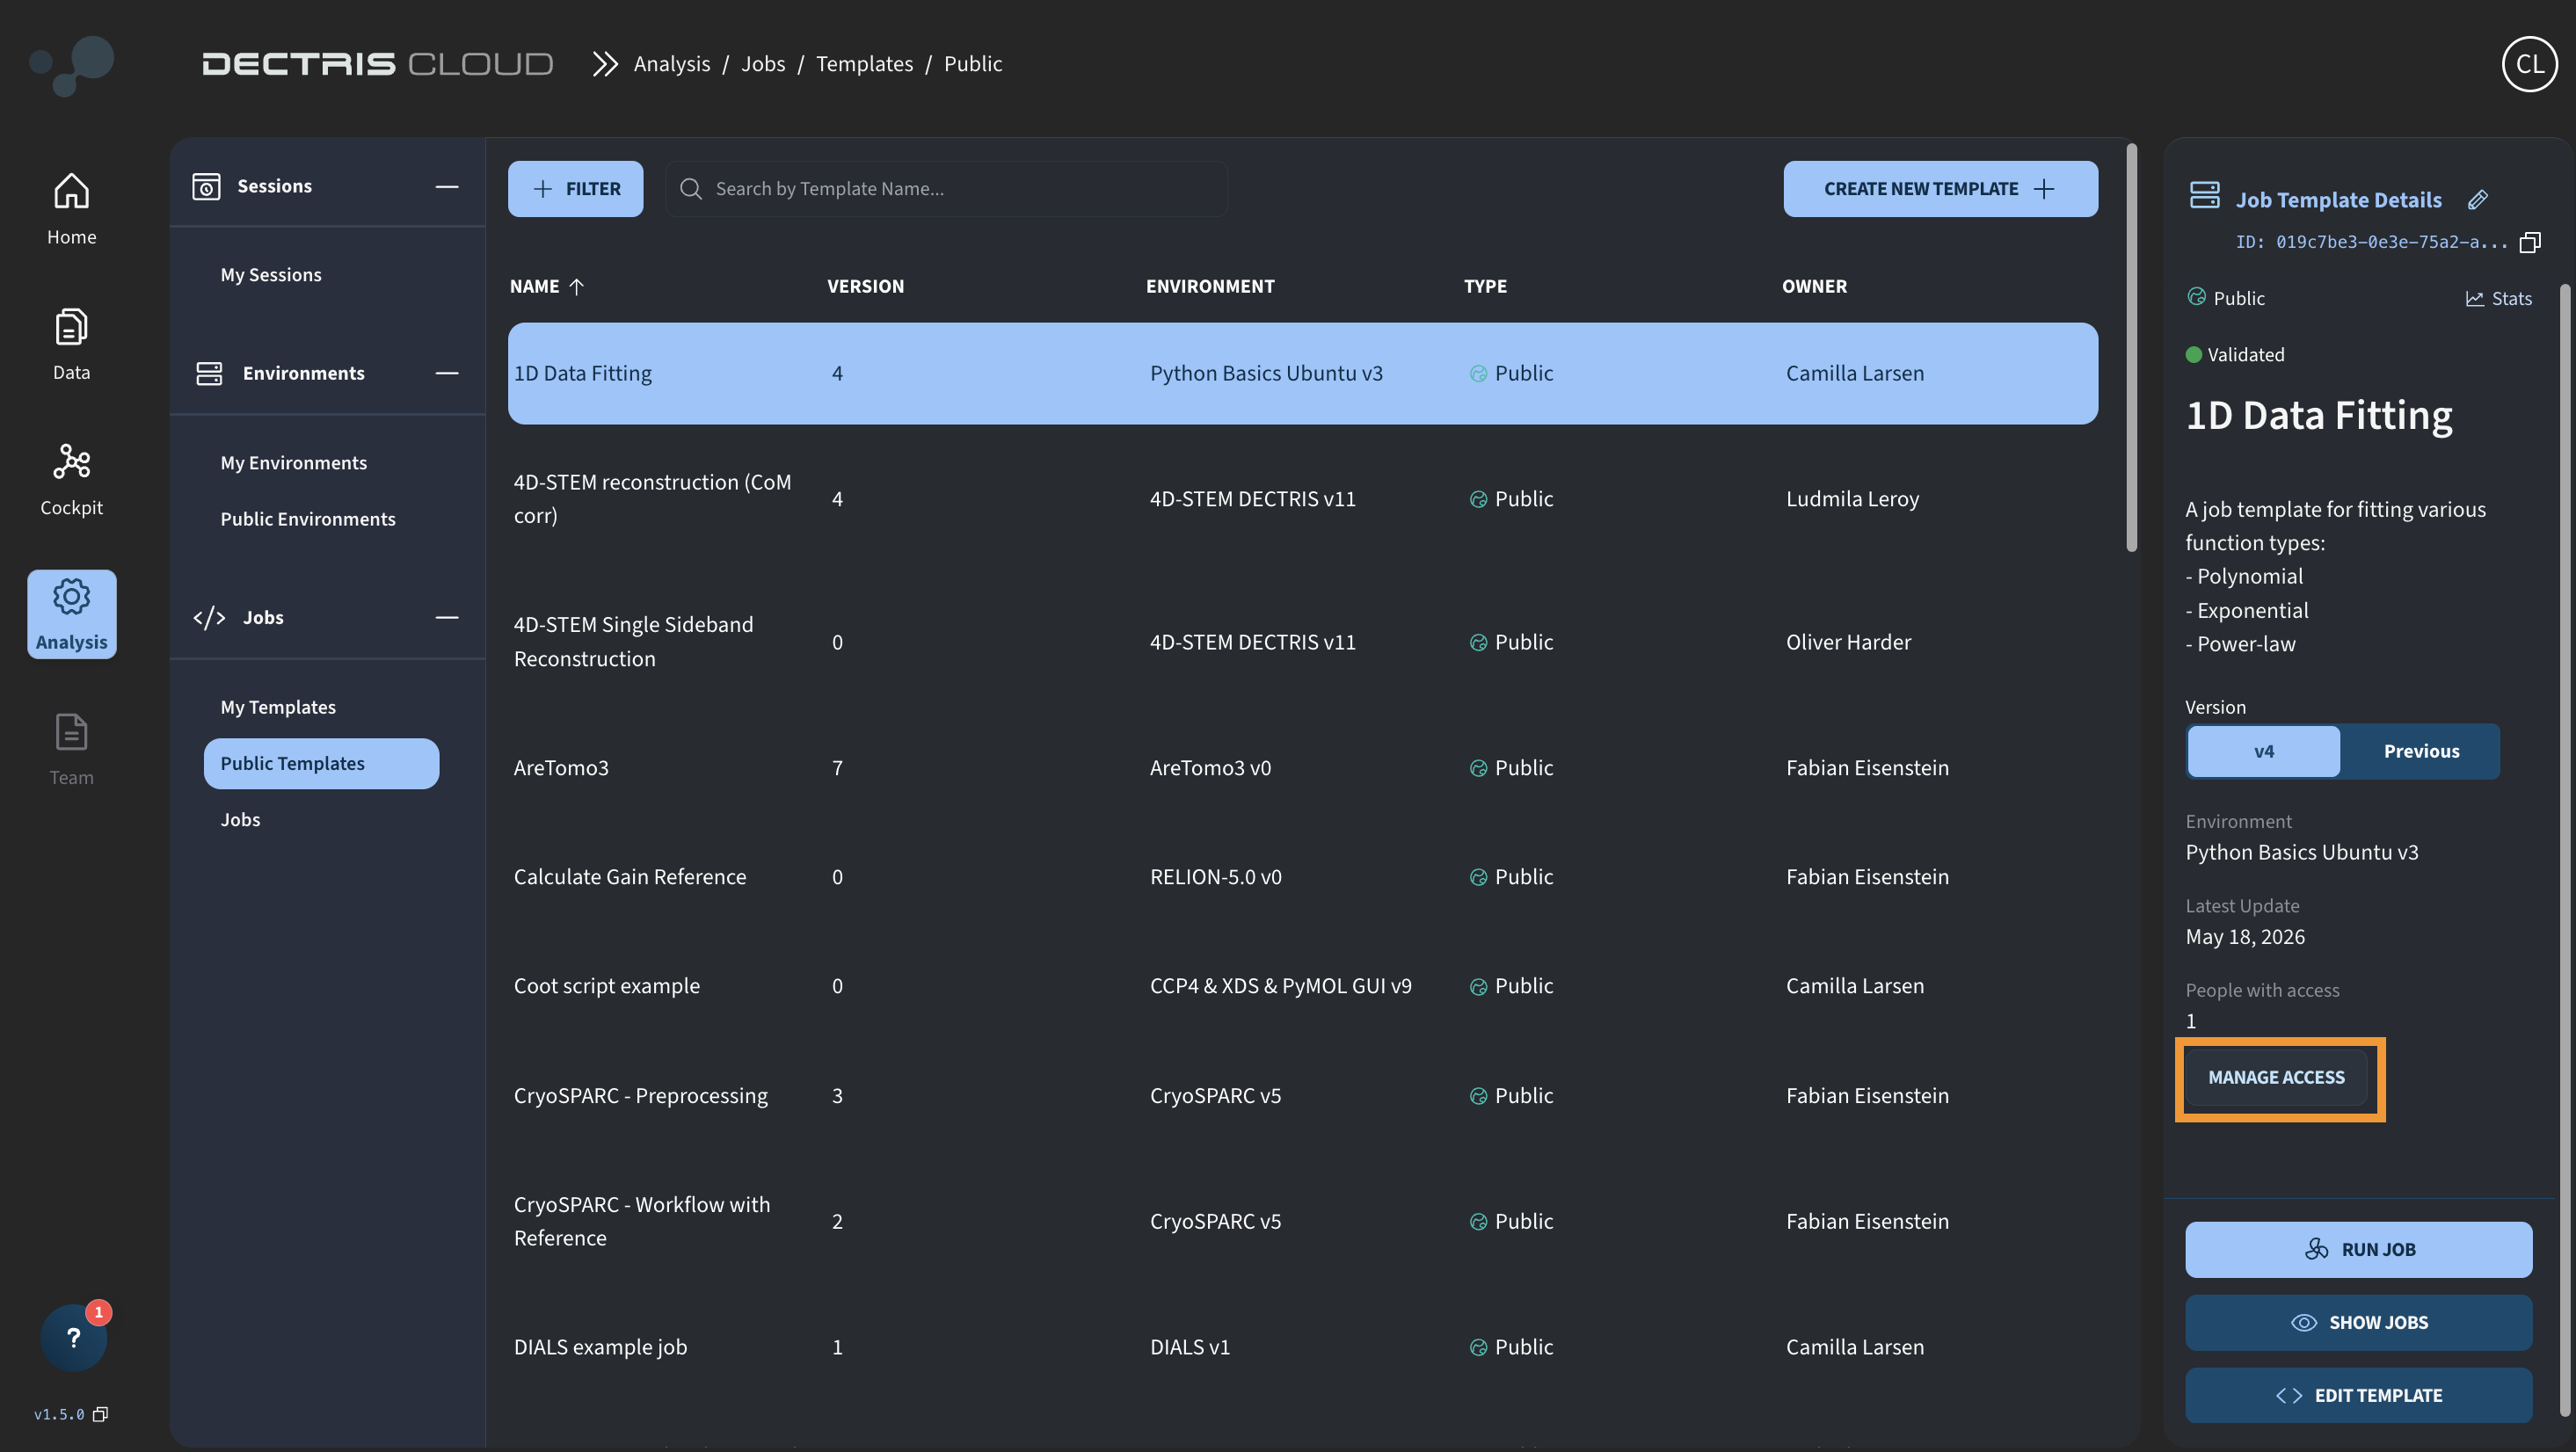
By clicking on your Job Template in this table, you can access the Job Template Card. Similar to Environments, you can share the Job Template by clicking Manage Access:
Job Templates use the same four roles as Projects and Experiments — Owner, Managers, Members, and Viewers — each with different levels of access:
- Owner and Managers can edit the template and run jobs.
- Members can run jobs but cannot edit the template.
- Viewers can view the template configuration if it is open source, but cannot run jobs or edit it.
If the environment the job template was built with is public, you can also make the job template public, making it accessible for all users of the platform.
Each newly created Job Template initially has an "unvalidated" status, which updates to "validated" after the first successful Job run.
The EDIT TEMPLATE button allows you to create new versions of the template, while the RUN JOB button initiates the execution of the Job.
Running a Job
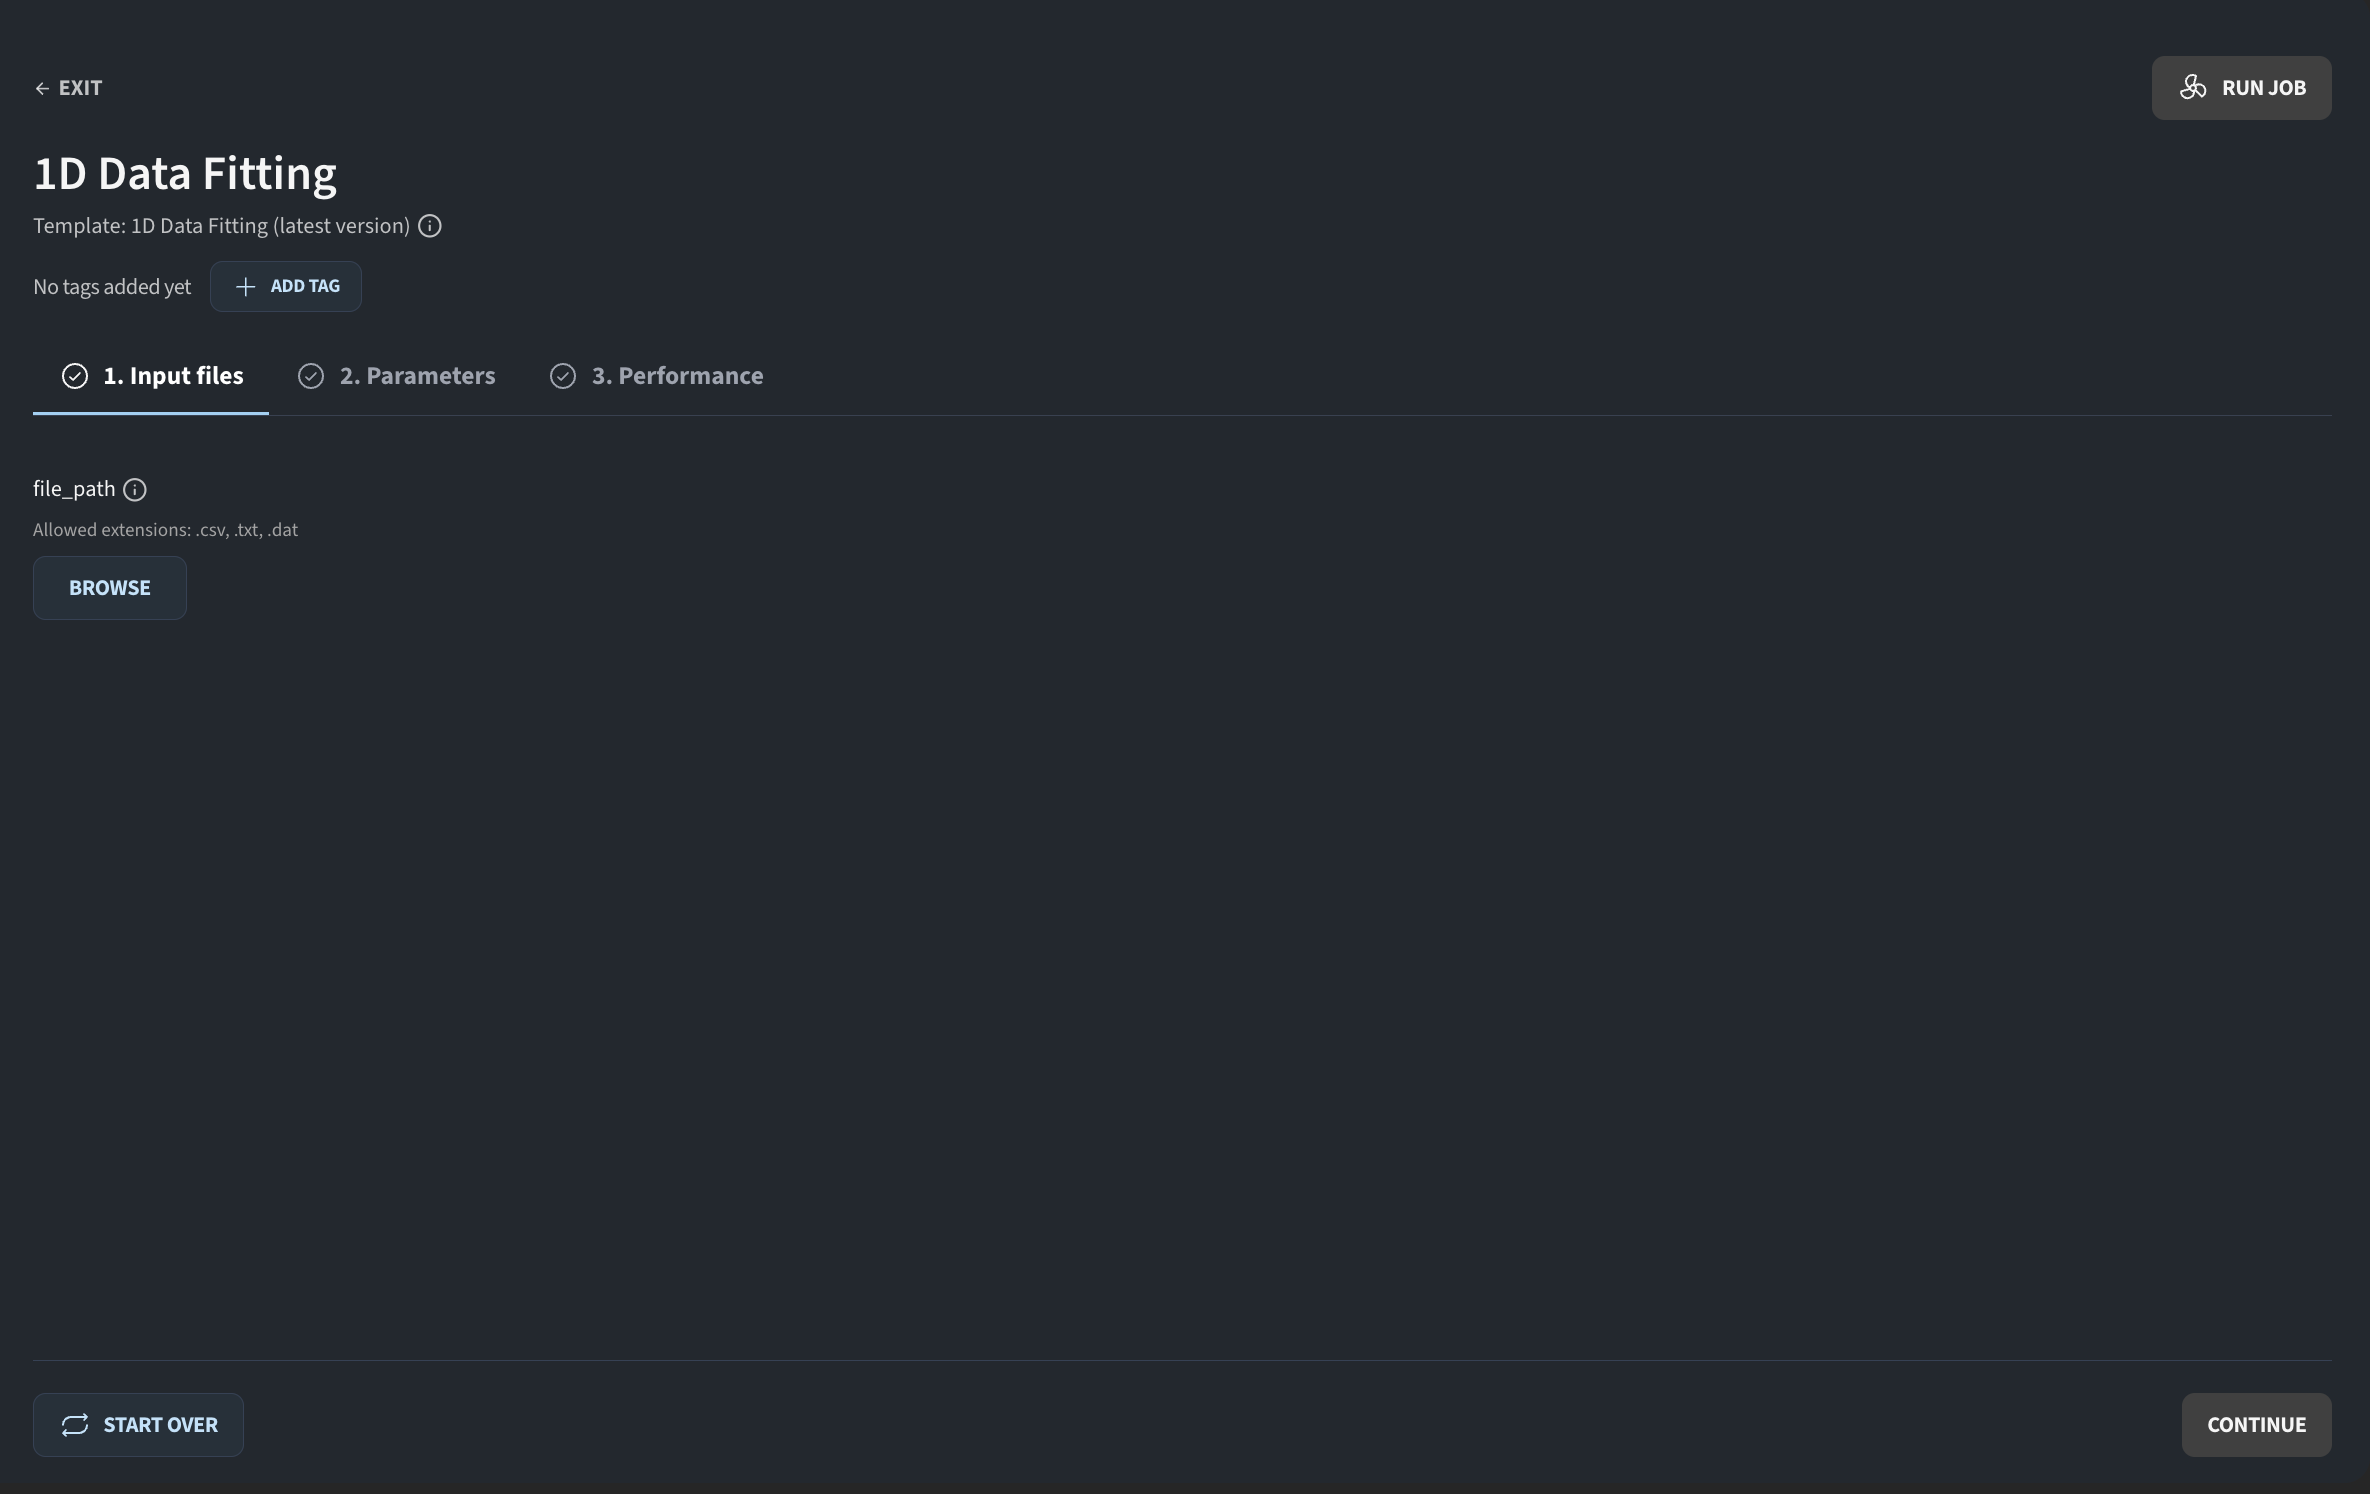
When you click RUN JOB, a job configuration window opens, allowing you to set and customize the input parameters before submitting the job for execution. On the first page you can click BROWSE to enter the file browser and choose the data path. This data path is automatically assigned to the PATH Input Variable defined during the Job Template creation process:
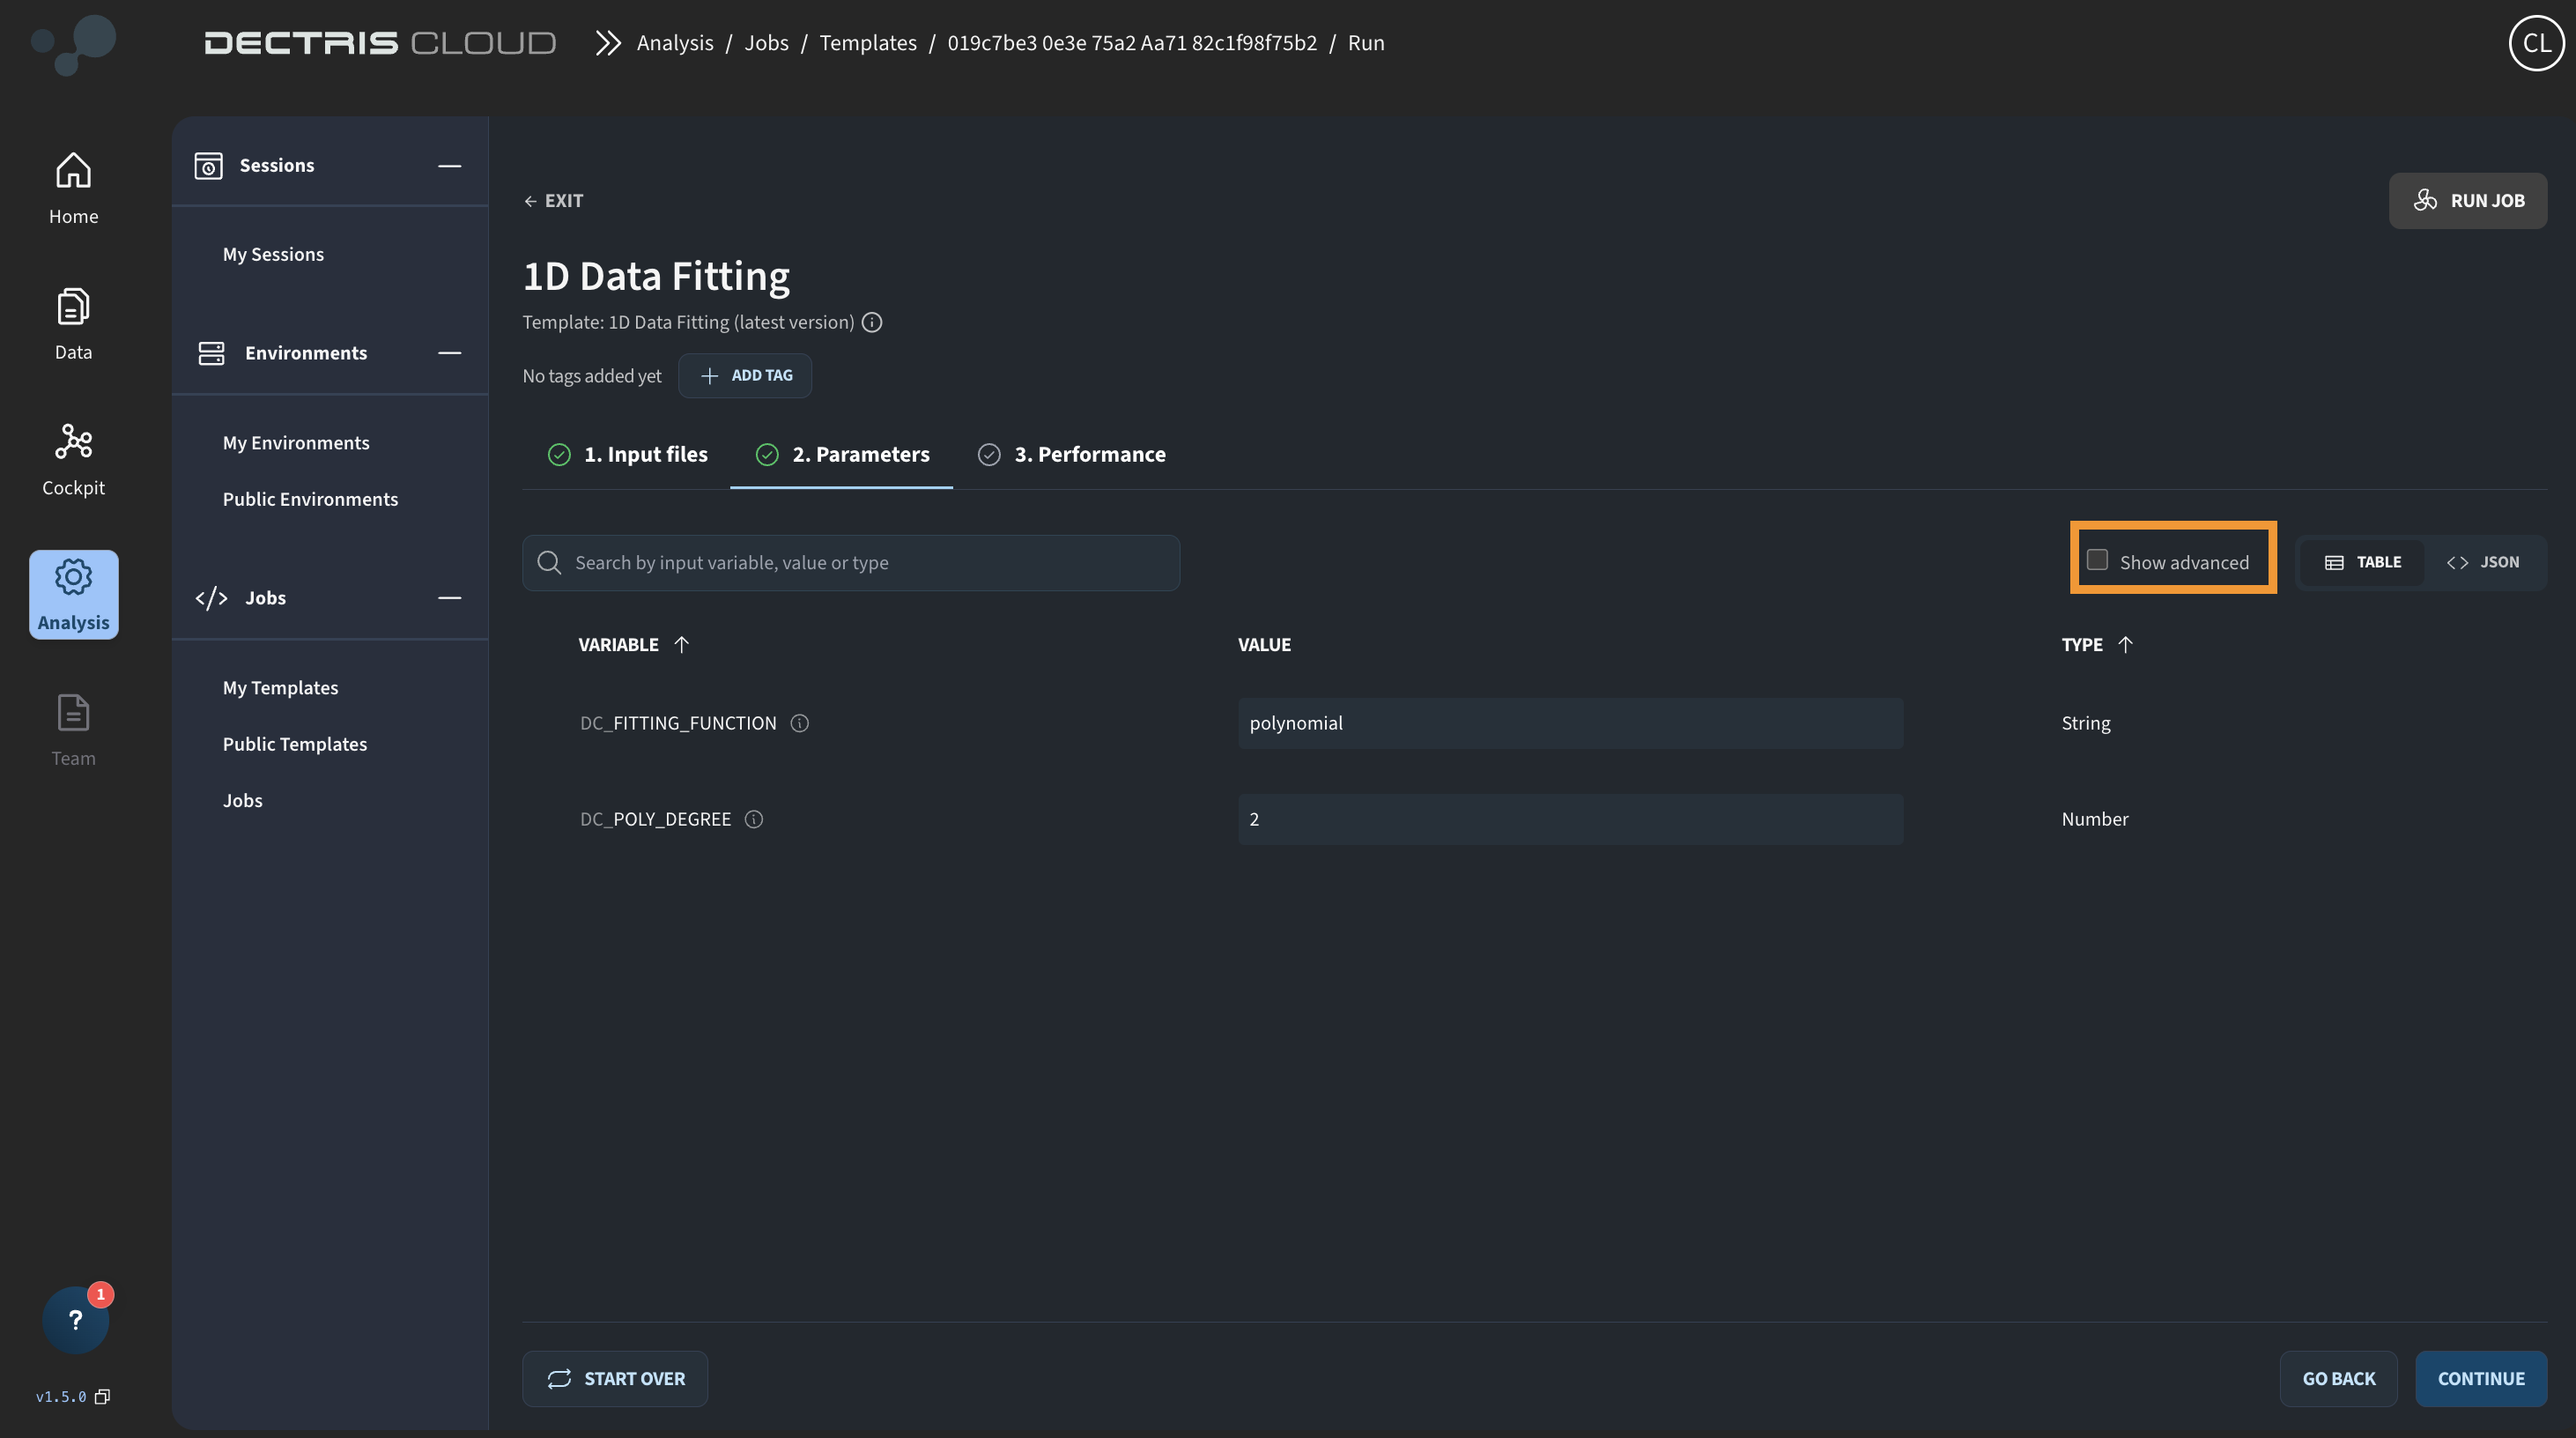
Clicking CONTINUE takes you to the next page of the run job workflow, where you can choose the configurable input parameters. Toggle the show advanced box to see additional input parameters:
On the final page, you can configure the job settings:
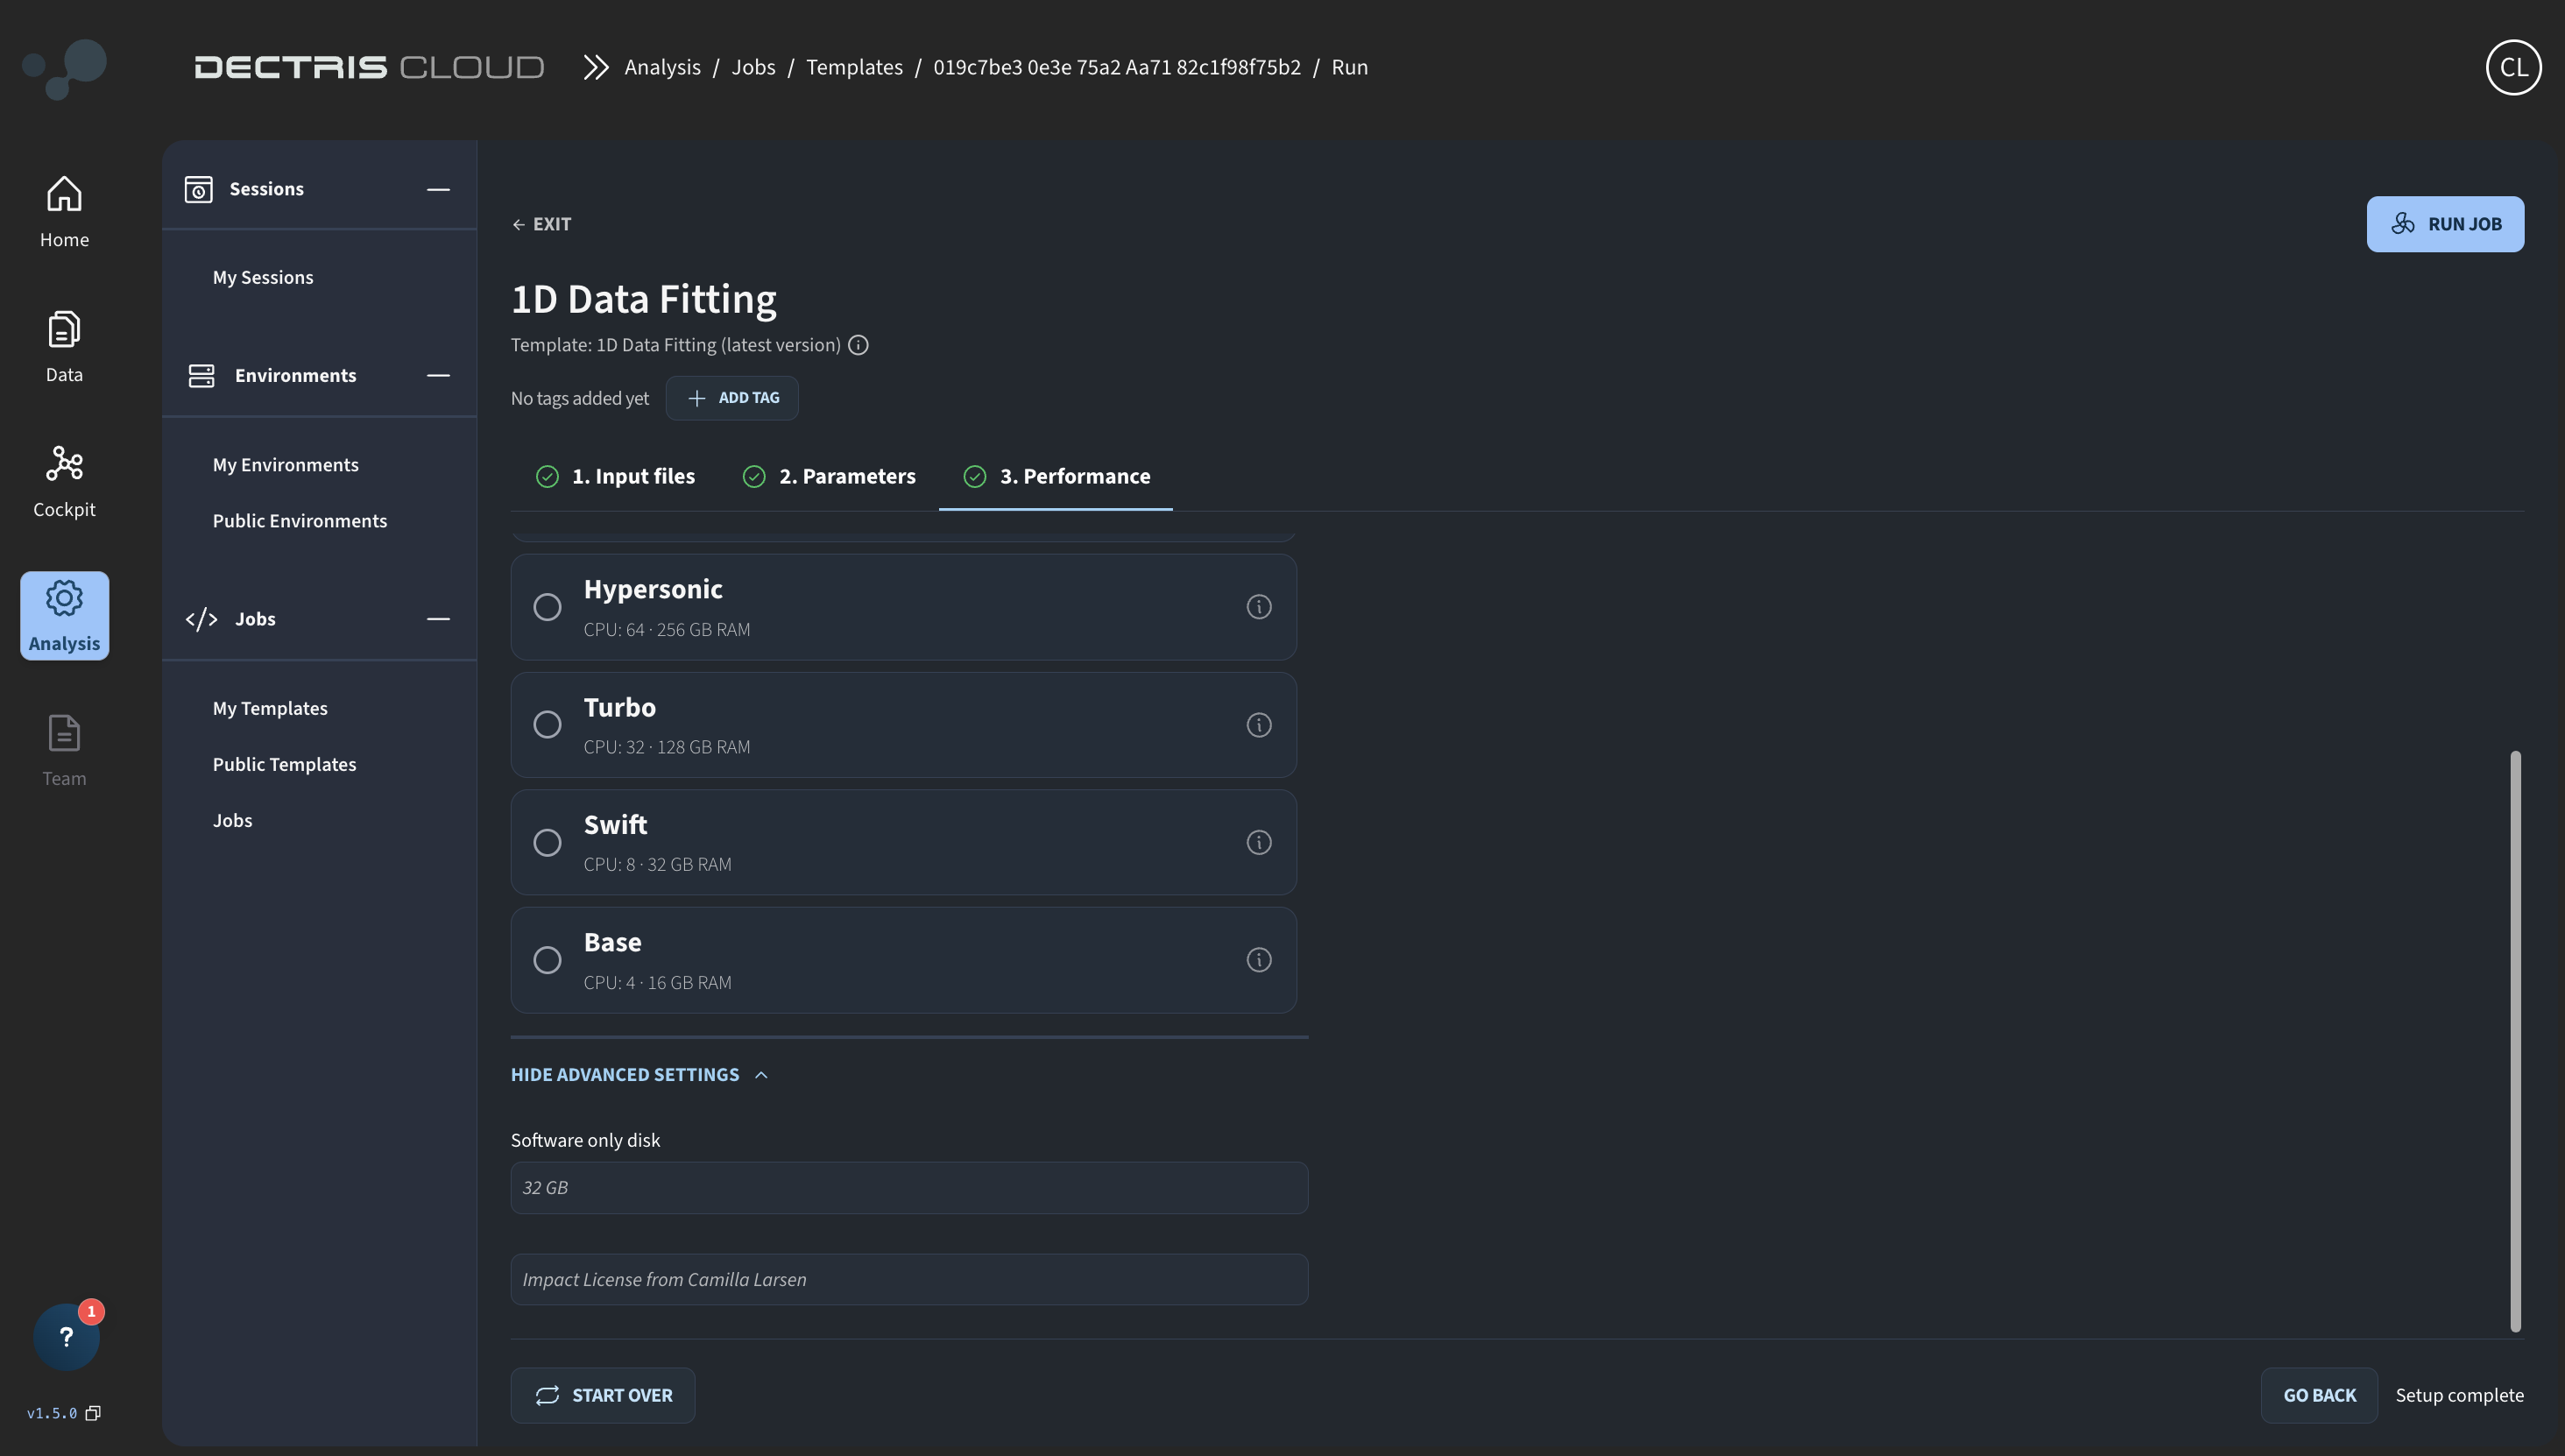
As with Sessions, a Job has a number of additional different configuration options:
- Machine Type :: The amount of CPUs, amount of RAM, and GPU type (if applicable) which should be used by the Job.
- Local Software Disk :: The disk size allocated for the local work directory while the Job is running (NOT data storage space or Environment storage space). Should be chosen to accommodate the temporary and output files generated during the job run.
- License :: Choose the license the consumed resources should be credited to
Once a Job has been started, it can be viewed in the Jobs Overview Table, accessed through Analysis → Jobs → Jobs:
Job status
Jobs in the Jobs Table can have the following status:
- Pending :: The compute node requested for the job is currently being allocated and is spinning up. Consumption (CPUhs and GPUhs) is not tracked for the user or sponsor in this state.
- Running :: The job is being executed. Consumed CPUhs and CPUhs are tracked and credited to the sponsor.
- Completed :: The job has finished and the results should be viewable in the Jobs Table as well as in the Processing folder of the experiment.
- Failed :: An error occurred that prevented the job from finishing normally.
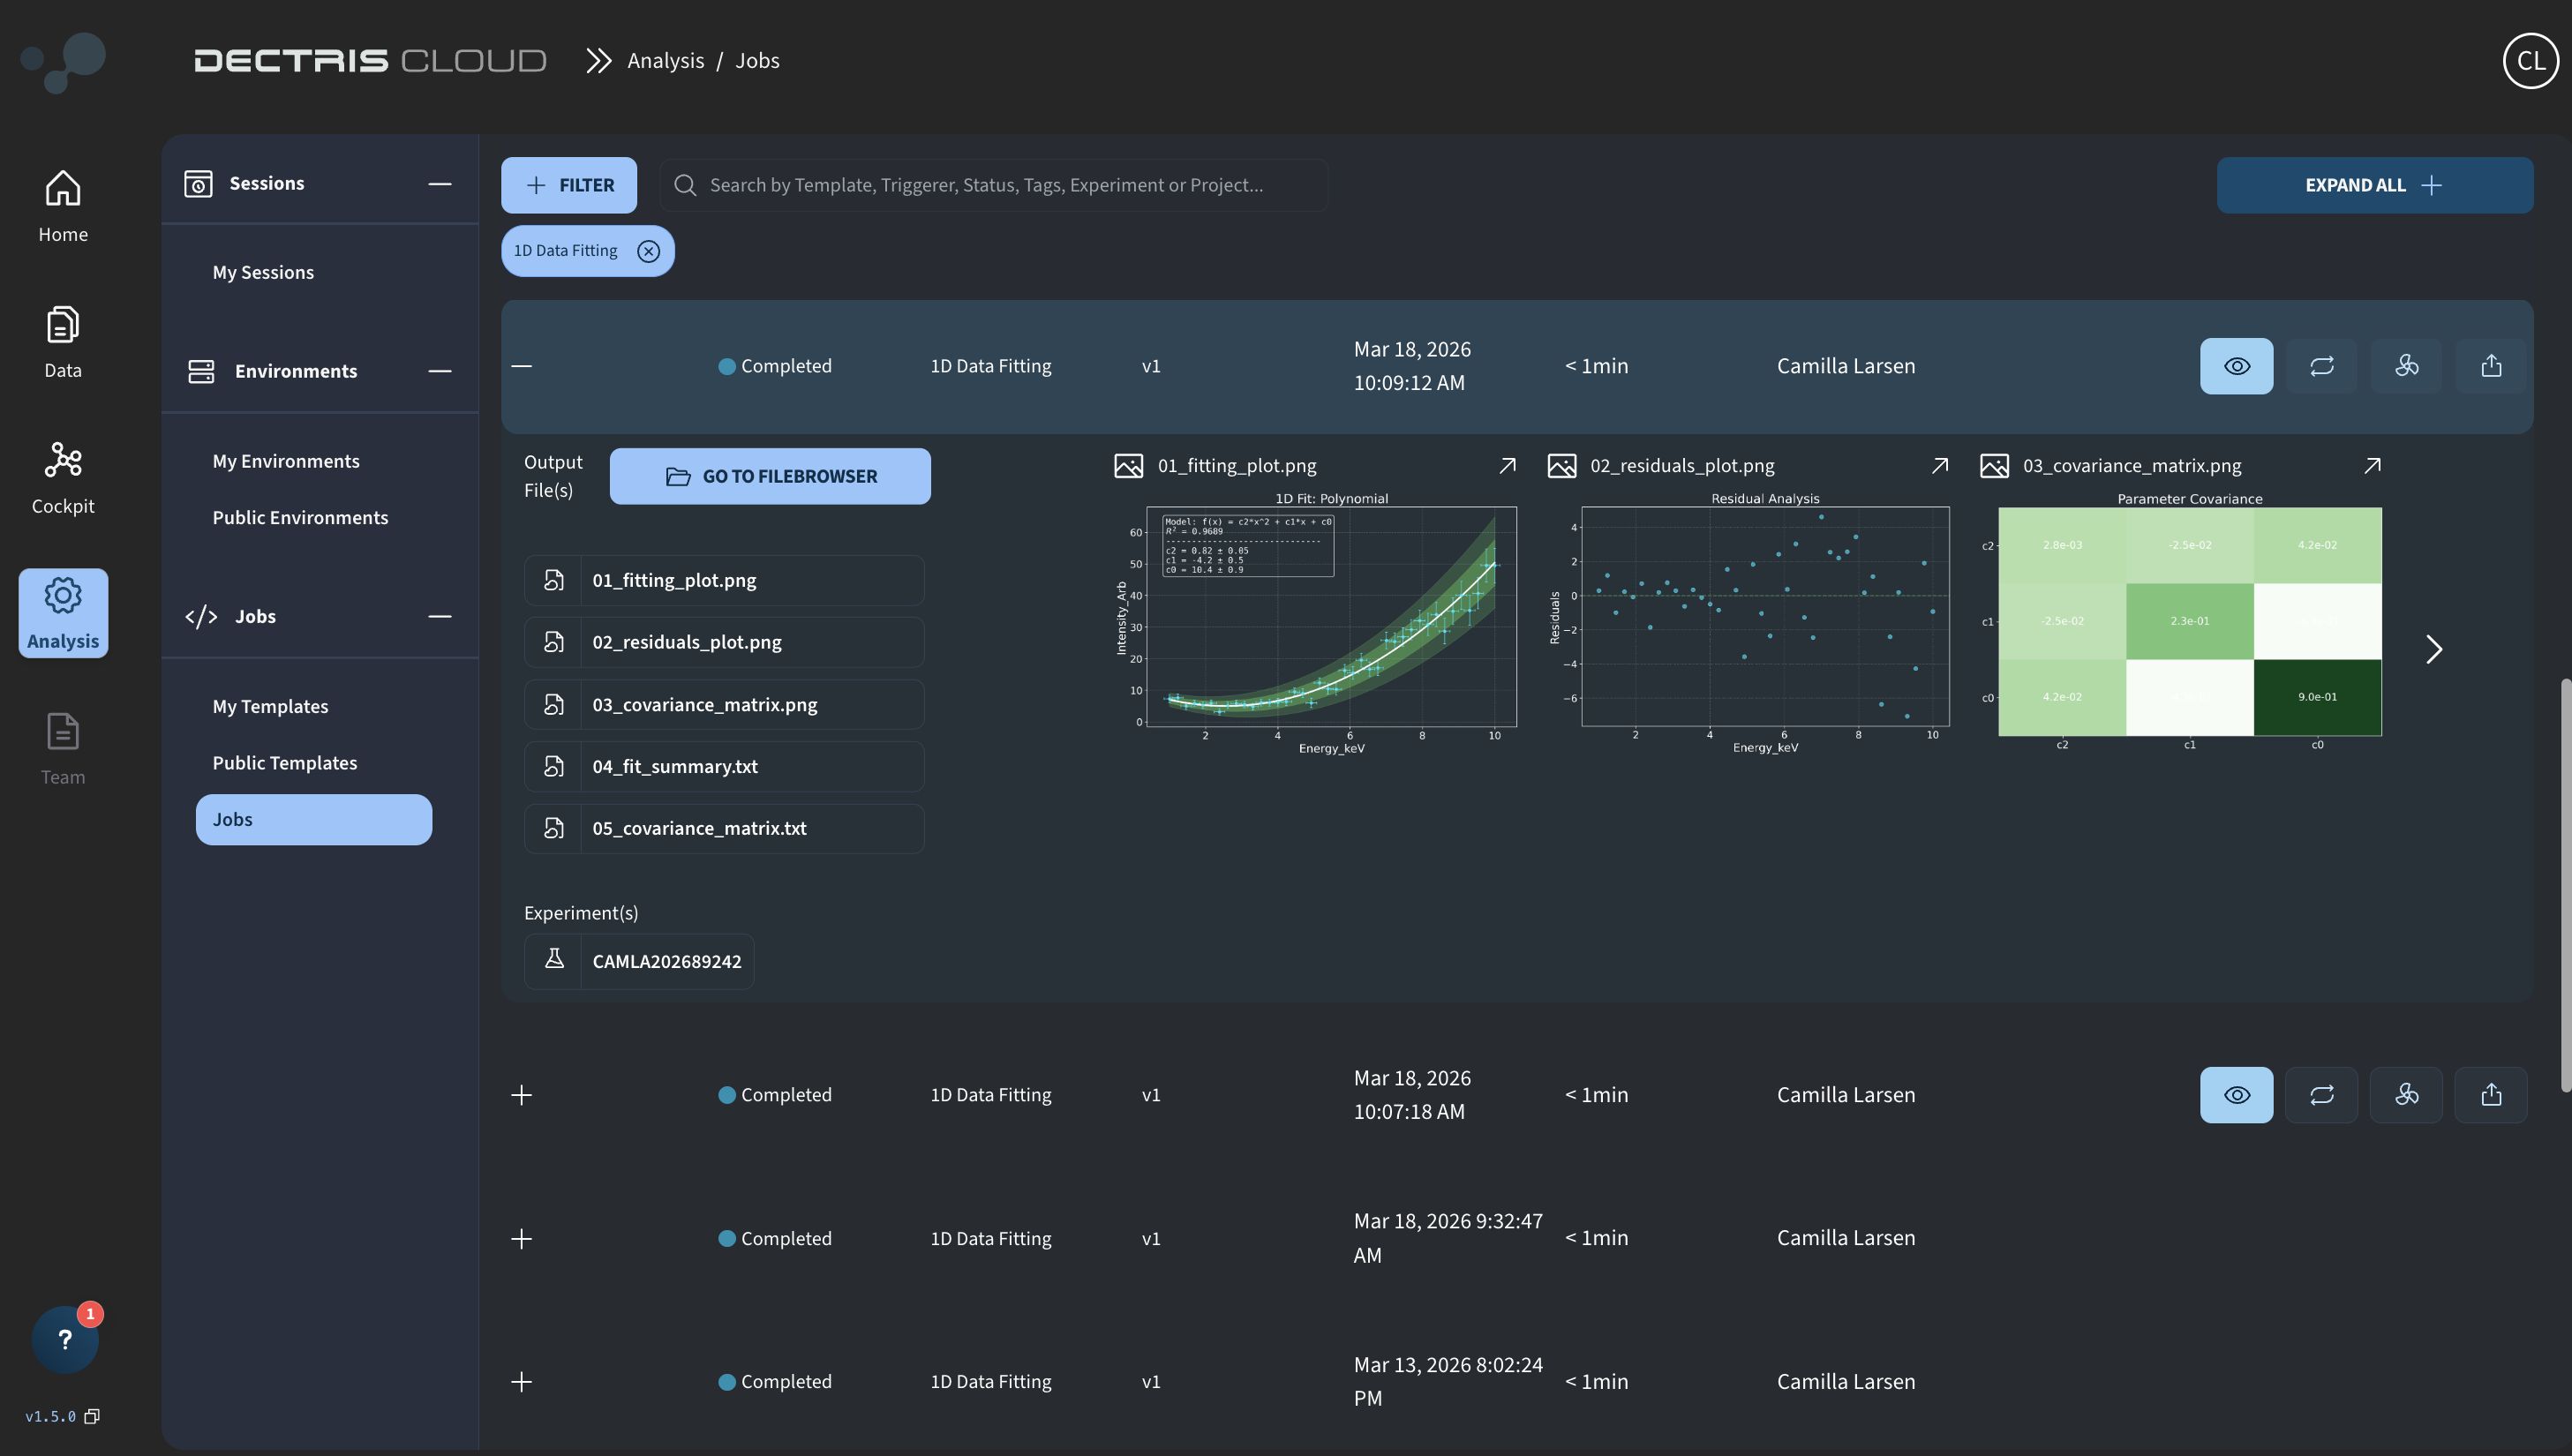
Job output
Once a Job has completed, the resulting output can be viewed in the Jobs Table by clicking on the "+" symbol to expand the view:
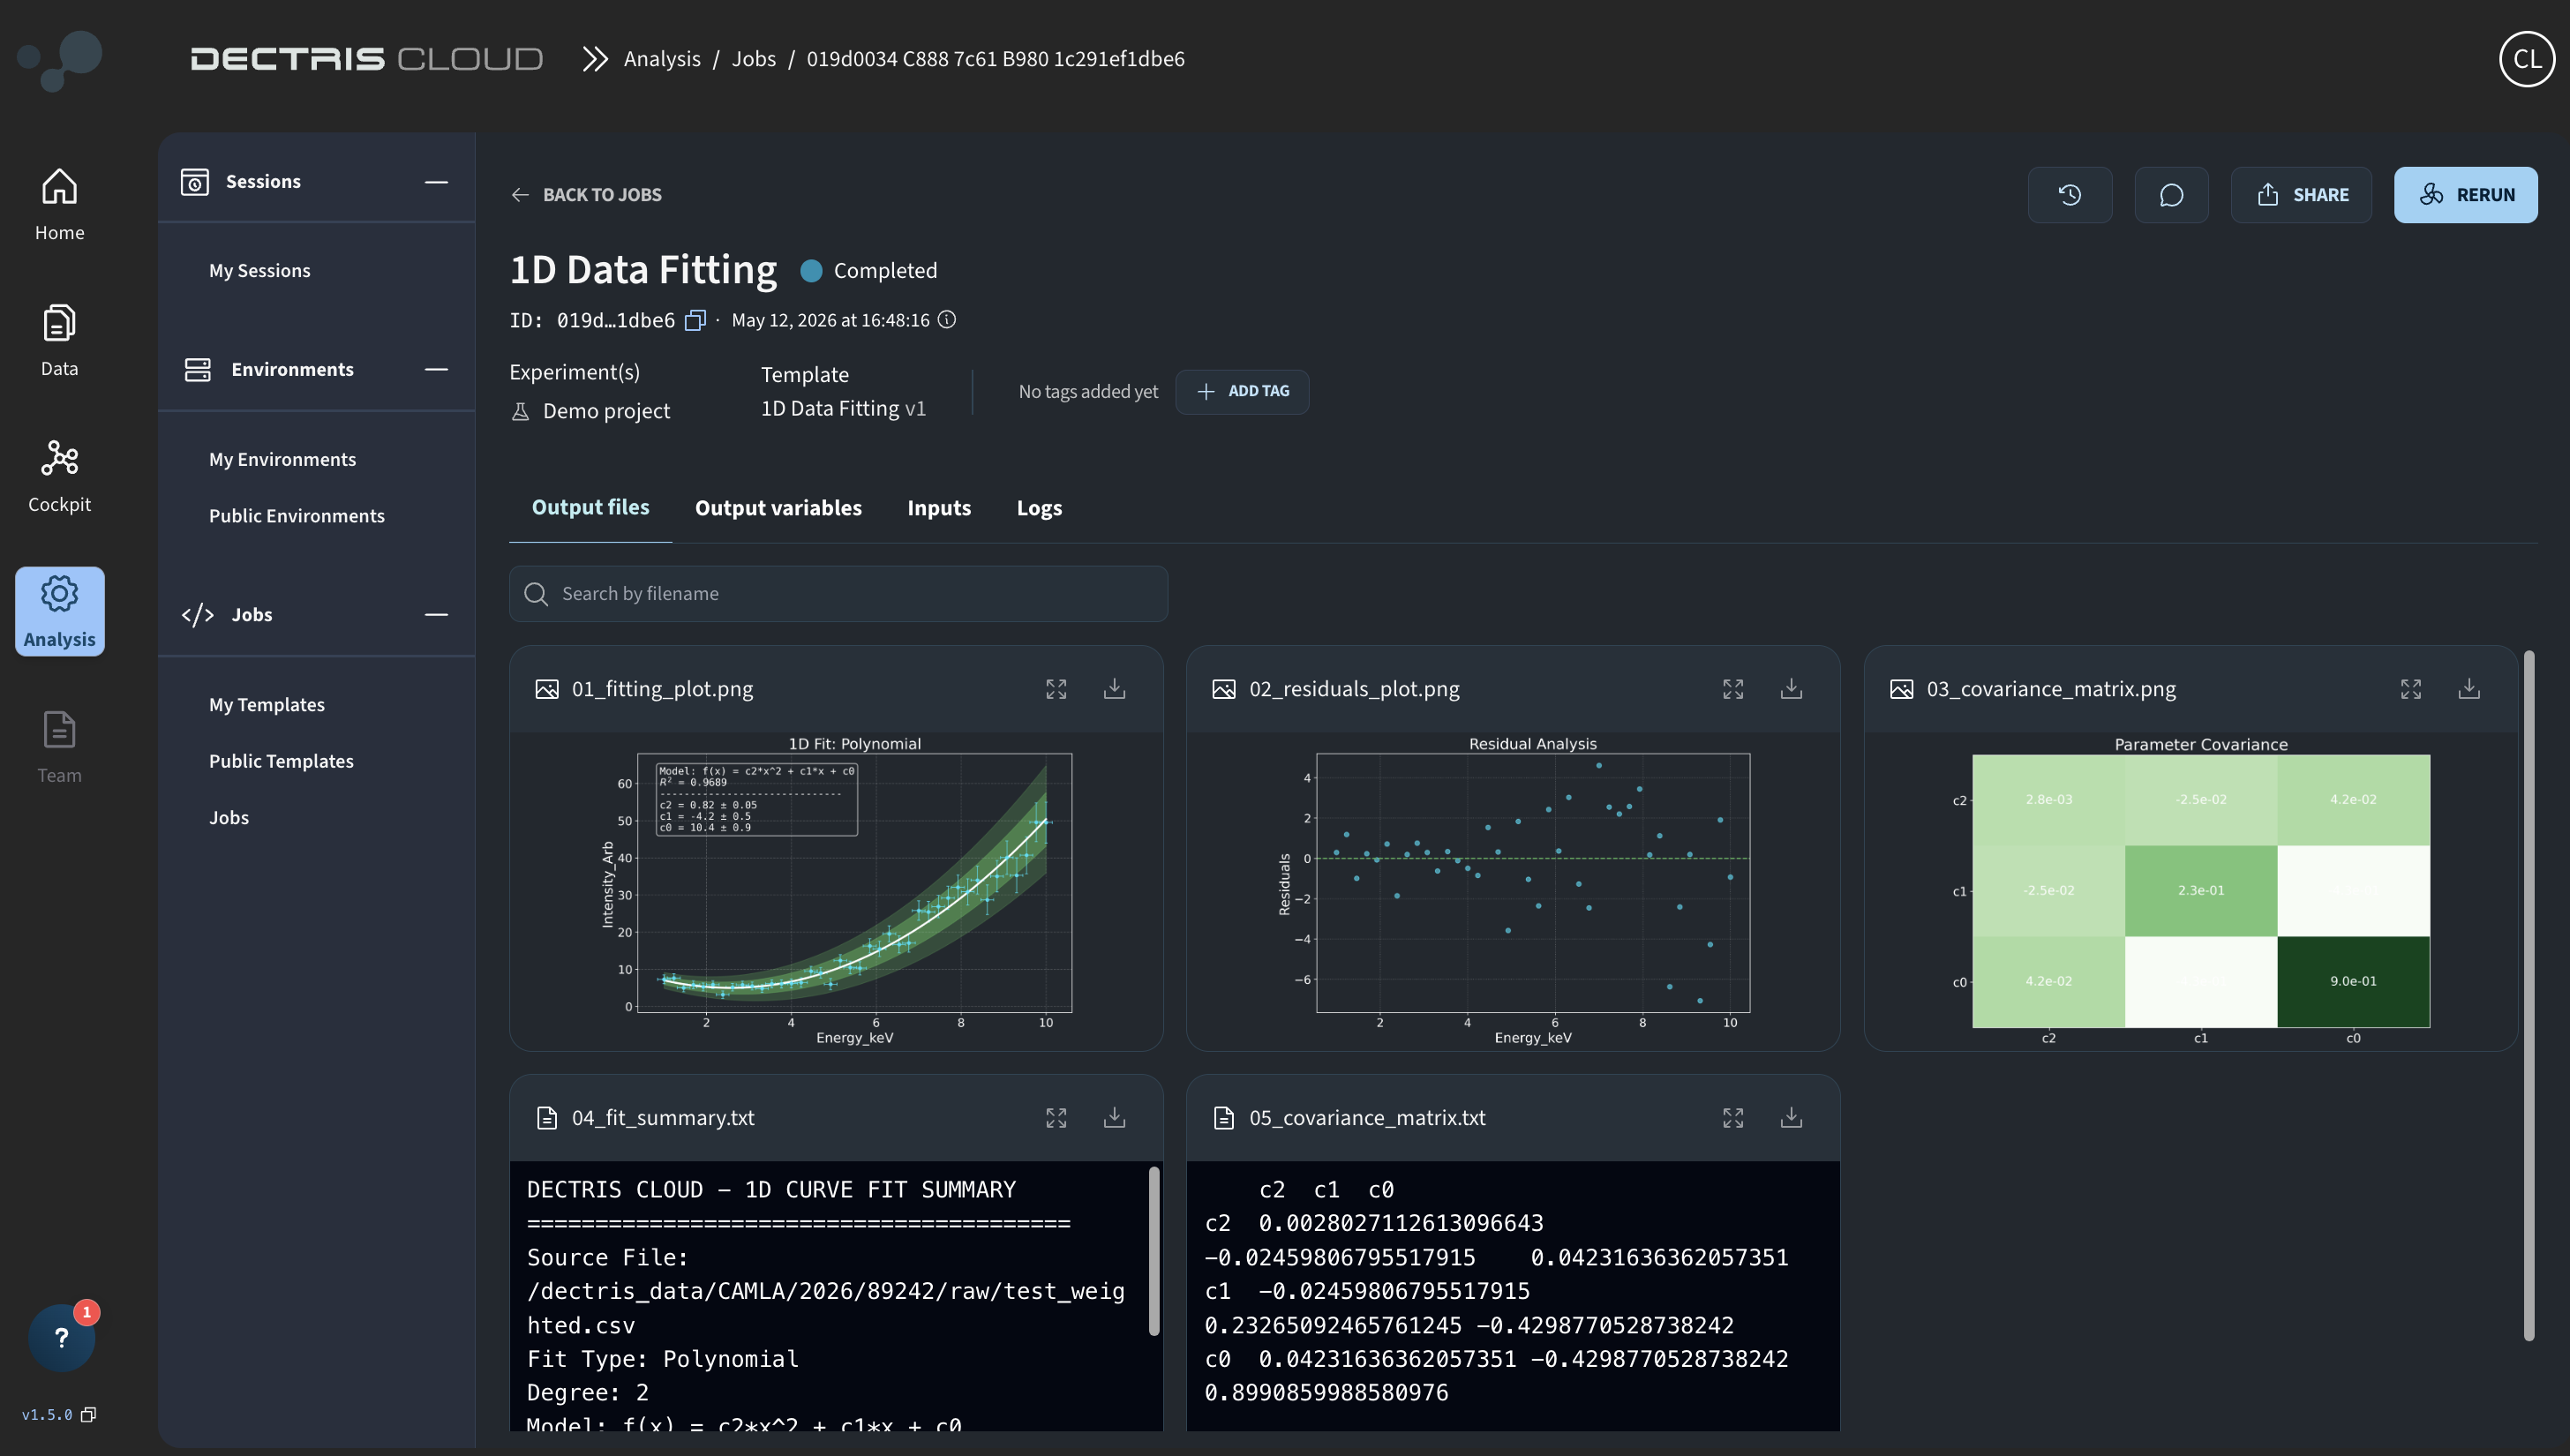
By clicking the eye symbol, you can enter the Job Details Page, where you in different tabs can view all output files, the assigned output variables, the configured inputs as well as the job log:
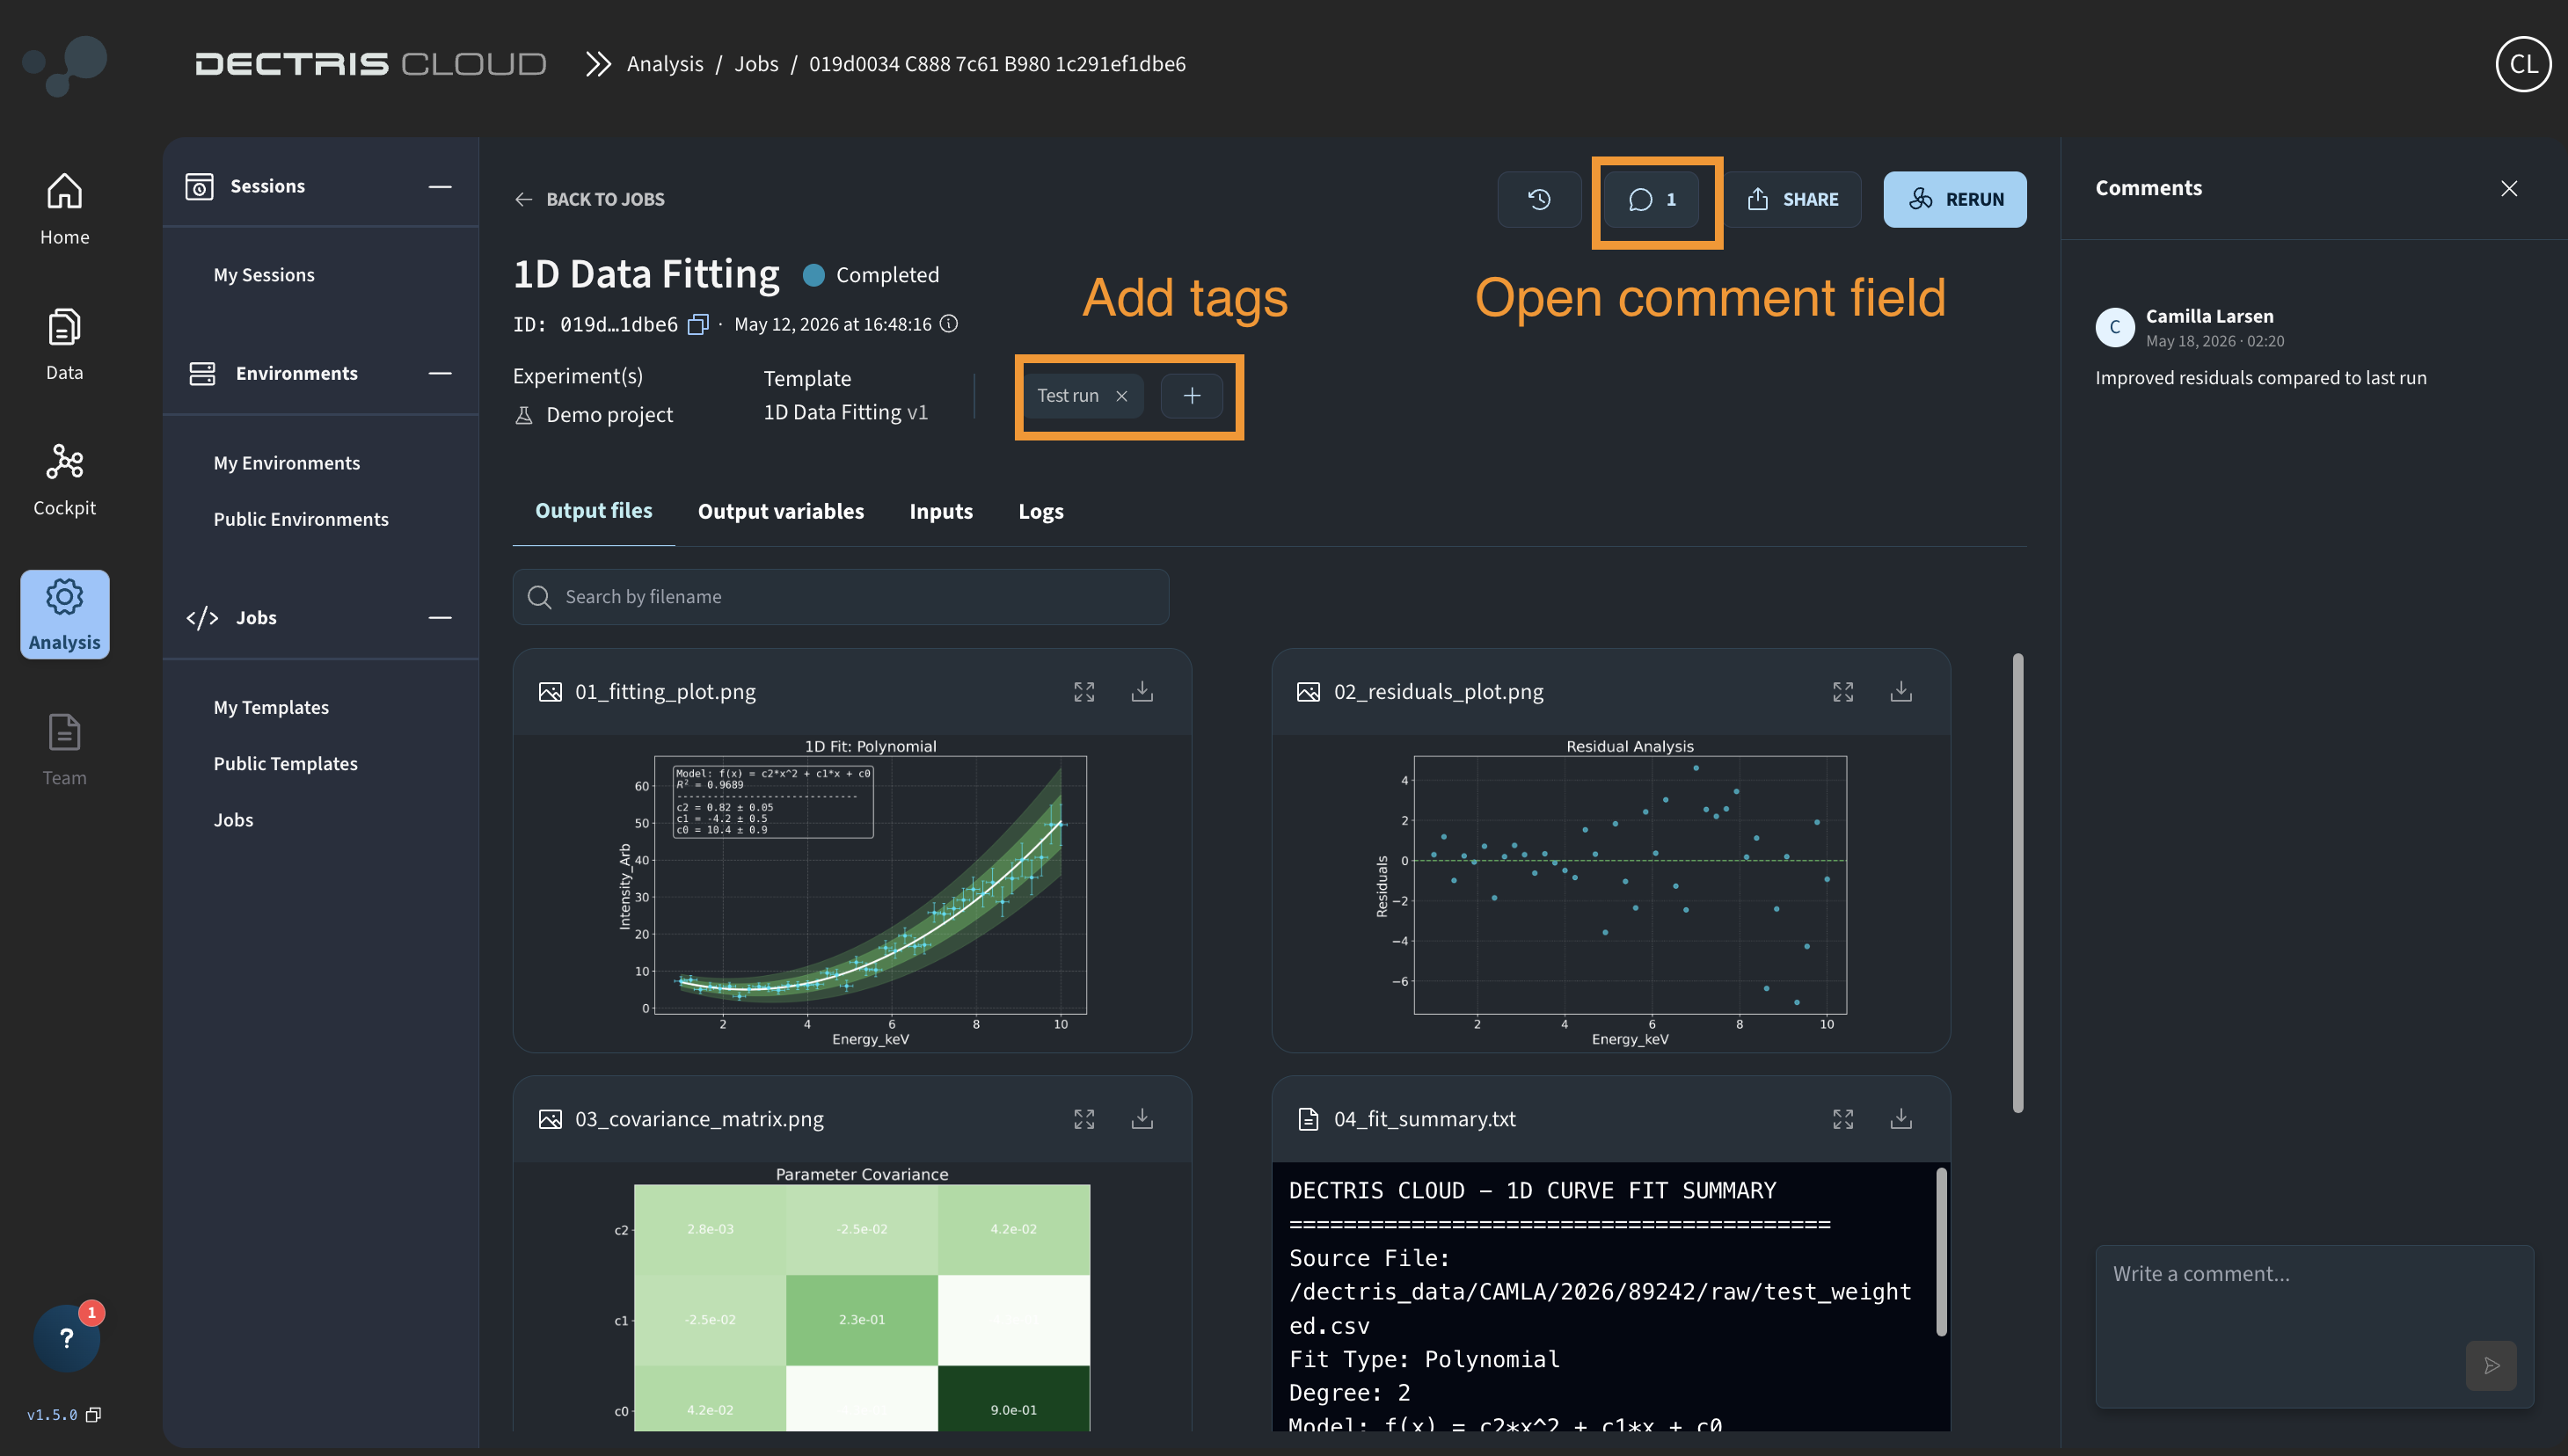
Adding context to jobs
Once a job has run, Members and above can add context in two ways:
Tags can be added to a job to help categorize and filter runs — for example marking a job as a reference run, or flagging it for follow-up. Tags can be added, edited, and deleted by Members and above after a job has run. Viewers can see tags but cannot modify them.
Note that tags can also be set before a job is triggered, but only by the person running the job.
Comments allow you to leave notes directly on a job — useful for capturing decisions, flagging issues, or explaining parameter choices to teammates. Comments can be added and viewed by Members and above. Viewers cannot view or add comments. Each person can only edit or delete their own comments, regardless of role.
Share job results
Any Member, Manager, or Owner of a project or experiment can see all jobs run on data within that project or experiment, including jobs run by other team members.
Job results can also be shared more broadly via a public view-only link. Anyone with the link can view the job output without needing a DECTRIS CLOUD account. This can be generated by Members and above from the job details page.